My 15 Trader Joe's Must-Haves

I freaking love Trader Joe’s. I unfortunately do not live close enough to one to shop on a regular basis there. There are three stores that are about an hour away from me and if I’m ever nearby one of them I always stop by and grab some goodies. I asked on Instagram (Click here to follow me) if you wanted to see the items I always stock up on when I’m near a Trader Joe’s and 100% of you said yes so here we are. I always get other items too depending on what I’m planning on making that week or if something looks really interesting to try. These are simply the items I always make sure to get!

My first tip for Trader Joe’s or just shopping at a grocery store that’s a little farther away from you, is to buy a reusable thermal bag to keep in your car so that you can safely take chilled items home without them spoiling. I bought mine at Trader Joe’s for under $9 and I love it because it zips and holds so much!

IMG_6816.jpg

1. Red Lentil Pasta ($2.99):

I am gluten-free now so I love this red lentil pasta and always grab at least two bags. As an Italian I love my pasta al dente and my number one complaint about other gluten-free pastas is that they are too squishy and always fall apart. I think this pasta is the closest texture I’ve seen to regular gluten pasta and I love it. Plus it has more protein and fiber than normal pasta so that’s amazing.

2.Everything But the Bagel’ seasoning ($1.99):

If you haven’t heard of this one you have to have been living under a rock because it has to be one of the most popular products Trader Joe’s sells. I use mine mostly for topping avocado toast and eggs, but it can be used in so many other ways! I am convinced there is nothing this isn’t good on.

3. Nutritional Yeast ($2.99):

I don’t always buy this one every time I am stocking up, because you actually get a lot of nutritional yeast for the $3. If you don’t already know, nutritional yeast is a common cheese replacement. I use it in place of parmesan or pecorino cheeses when I’m cutting back on dairy and have even used it to make a dairy-free ‘cacio e pepe’ that was delish!

4. Coconut Sugar ($3.99):

I LOVE this coconut sugar. The price is great and I use coconut sugar so much. I try to use it in place of brown sugar whenever I can, and even use it on my oatmeal every morning. I purposefully look for baking recipes that call for it instead of granulated or brown sugar because I love it so much and it’s so much better for you. Click here to visit a post I did about swapping it for brown or granulated sugar in your kitchen and why it’s beneficial.

5. Gluten Free Rolled Oats ($3.99):

I go back and forth between buying this bag of oats and the Bob’s Red Mill Quick Steel Cut Oats from Costco, but I love that these are gluten free and you get a HUGE bag for $4. It’s nuts! If you don’t follow me on IG you can go there and see my love affair with oatmeal that has been continuously blossoming for years.

6. Fruit Bars ($0.99 each):

I always keep bars in my backpack purse in case I am with a client, doing a wedding, or just out and needing a snack. My biggest thing with bars is making sure they are clean and not loaded with fillers. These have just two ingredients; the two kinds of fruit! Nothing else. They are super yummy and I don’t care that they have 20 g of sugar because it’s coming straight from fruit.

7. Green Tea ($2.49):

I always keep massive amounts of Green Tea on hand because I drink at least one cup a day, and sometimes more in the winter. You can’t beat this price for a tasty & classic big box of green tea bags.

8. Salsa Verde ($1.99):

My sister convinced me I needed this one time when I was shopping with her and I am so grateful she got me addicted to it. I love it for regular chips and salsa, but it’s especially great for pouring over a chicken breast in the slow cooker. When it’s dinner time, you shred the chicken and you have easy chicken tacos with lots of great flavor.

9. San Marzano Tomatoes ($3.99):

San Marzano tomatoes are simply the best. They make the most flavorful tomato sauce so I always make sure to have a can or two on hand for when I need to make a sauce for a special night.

10. Green Chiles ($0.89):

This is another can I keep on hand, but it’s for whenever I want to whip together a quick chili. I pretty much always have the ingredients on hand, which is extremely helpful for easy dinners in the winters and fall.

11. Proscuitto ($4.99):

This is the second time in a row I’ve not paid attention to the proscuitto and accidentally bought the German smoked version which I don’t like as much as regular proscuitto. I like to keep it on hand because I’m Italian and I really have no better reason than that. I’m addicted and it’s genetic.

12. Gluten-Free All Purpose Flour ($3.99):

You can pretty much use more GF All Purpose Flours interchangeably with a few recipe exceptions so I like to always have it on hand. The price of this one is pretty good compared to some of the ones out there.

13. Ginger Paste (~$2):

I already had a bunch of these tubes on hand so I didn’t actually see how much this one costs in the store. I always have this on hand because I LOVE cooking with fresh ginger. I absolutely hate buying a knob of it at the store however, and not using it up in time. I hate wasting food, so I love that it’s already in paste form and keeps well in my fridge. I flavor so many things with ginger.

14. Polenta Roll ($1.99):

I adore polenta and while it’s really cheap to keep the dry polenta flakes on hand, sometimes it’s really convenient to keep a log of polenta in your pantry so you can fry it up really quickly and serve it as your carb with chicken, mushrooms, veggies, etc.

15. Marinated Artichokes ($2.69):

I love having a jar of these in my pantry to quickly jazz up pastas, pizzas, salads, and more! The price is also really great compared to my usual grocery store. Extra tip: I like to use the marinated oil that the artichokes are packaged in, in place of regular olive or avocado oil for extra flavor.

There you have it! Those are my top 15 must haves from Trader Joe’s. Do you shop at TJ’s? Comment below with your favorite items to stock up on and let me know if any of these are your staples too!

Have a great start to your week,

Andrea
Tips for Hosting an Easy Dinner Party

It is no secret that I love to cook. Feeding people is my love language and my house will always be open to transform empty bellies into full and happy ones. I hosted a dinner party the other night and when I shared a few snippets of it on Instagram, a few of you reached out and asked me to share my tips on how to make hosting a dinner party easier. I am proud to say that it was amazing and I was able to create a dinner party magic in less than 2 hours. You read that right. I started cooking/setting up around 4:45 and my guests walked through the front door at 6:30. So how did I do it? I will show you how.

Planning:

In order to whip something like this up so quickly, you have to plan. I did a few major things that made this night super easy for me:

  1. I planned my menu out at least a week in advance and checked with all of my guests that they were fans of foods that not everyone loves, i.e., mushrooms in this case. I chose dishes that were not super detailed and needy, so that I could be cooking multiple things at once (I’ll get more into this in a little bit).

  2. I grocery shopped the night before and left everything out on my counter that wasn’t perishable, and put everything together in the fridge that I’d need. This allows you to pull everything out and not go searching through your cupboards/fridge trying to find each ingredient. You’d be surprised how much time you can save when you don’t have to keep walking to the pantry.

  3. I made a rough timeline of what I wanted to cook when. For example, my appetizer was something that needed to sit and stew a little, so I started this first. This allowed me to not have to think about what I needed to do next because it was all written down for me. I just check things off my list.

Decor:

When it comes to decor, I love to have things like books, place mats, candles and such all around. Instead of getting extra decor out to decorate my table, I just used what was already sitting out around me. I walked around my living room and grabbed things like pumpkins and candle sticks, and brought them to my table. I have a little storage cupboard by my front door, who’s top houses my keys and such, but inside I actually hide away all of my entertaining dishes, so that when it’s time to bring them out, they are all in one spot.

Personally, I find a rustic and cozy atmosphere to be the most appealing at a dinner party, so don’t get to stressed about things matching. In case you didn’t notice in the pictures above, I only had four of the gray and white tassel place mats, so I just grabbed a gray and white striped tea towel from my kitchen and added it for my 5th place setting. I’m not big on patterns matching perfectly but I generally always buy my entertaining dishes in neutral colors so that they always go together well enough.

Also, don’t be afraid to get out of the box and get creative with items that might not normally be used on the table. I like playing with height, so I stacked some big and really old coffee table books about Italian food right in the center of the table and placed my bowls for olives on them.

Cooking:

Now for the main portion of the planning and why this dinner party was so easy, did I mention everything was Gluten and Dairy Free? Here are the things I did to make my life easy:

  1. I chose recipes that didn’t need to be babysat, but would still wow my guests.

  2. I baked my pumpkin spice cake the morning of the dinner party at 6:30 am and did yoga while it was in the oven. BAM Kill two birds with one stone people. Also, you will automatically fill your house with the aroma of dessert all day which is a great way to start off prepping for a dinner party!

  3. My appetizer was a slow cooked tomato and garlic spread for crackers (recipe to come in a special announcement). I also set out two kinds of olives and would normally do cheese as well if the crowd wasn’t dairy-free.

  4. I also made a super easy and light mushroom soup because once the onions and mushrooms are sauteed and seasoned, it literally sits on the corner burner and stews for a little while, which means you can do other stuff! (Recipe also coming in that super exciting announcement…haha)!

  5. My entree was a homemade vodka sauce (I swear by this recipe from Rachael Ray) over brown rice and red lentil pastas. Can you guess why I picked it? You’re right, it’s super quick and easy and only stews on the stove for like 20 minutes! But you’re actually making a homemade sauce so it tastes like heaven.

If there is one piece of advice I can give you for hosting a dinner party it’s this….CLEAN YOUR DISHES AS YOU GO! There is nothing worse than having the world’s best dinner party full of laughter and happy tummies and then everyone walks out the door and you have a WHOLE kitchen to clean and you get depressed and want to ignore it and walk straight to your bedroom to sleep instead. So I always do this… While I’m cooking I wash every dish I can at every chance I get. I’ll even start placing food in their serving plates so that I can wash the pots they were cooked in. I even go as far as to wipe up my counters and stove before anyone arrives. This way the only things left to clean afterwards are the dishes you eat on and the serving plates. You can quickly rinse all the food off so they are mostly clean, load them in the dishwasher or leave them in the sink for the next morning and get to sleep instead.

I love dinner parties because of how relaxed and enjoyable they are. If you plan ahead and do certain tricks, you can make it enjoyable to host as well. If you have any tips or recipes you love for hosting dinner parties, be sure to comment below! I hope you enjoyed this post and remember; the details aren’t necessarily the most important part of the dinner. The food is a vehicle and excuse to experience the laughs, the stories, and the love among your amazing guests.

Happy hosting!

Andrea

How I Whiten My Teeth At Home

Today I’m back with a post that I’m really excited to be sharing. There’s even something exciting for my readers at the end so make sure to read through! 

As many of you know, I quit drinking coffee on a regular basis a few months ago. I have always loved my smile, but in the last few years I had noticed how my coffee habit was affecting the color of my teeth. I figured that since I’ve kicked the caffeine habit, now was the time to look into whitening my smile, as it would be easier to maintain without the daily coffee consumption.  

It’s funny how life works, but after spending a little time researching at home teeth whitening, I opened my email inbox to a message from Smile Brilliant wanting to do a collaboration! If that wasn’t a sign, I don’t know what is. 

I was excited to work with Smile Brilliant because they wanted to send me a teeth whitening system and share my honest feelings with you guys about the process. Now this is not a sponsored post but I did receive the teeth whitening system for free. However, my opinions on it are completely my own and I hope you already know that I would never recommend a product I didn’t like! 

image2.jpeg

I know that a lot of you reading this are getting ready to celebrate either your own special events, like your wedding, or have many close friends and family members celebrating special events and you want to look your best for them all. If your schedule looks anything like mine these days, there are photo ops every month.  

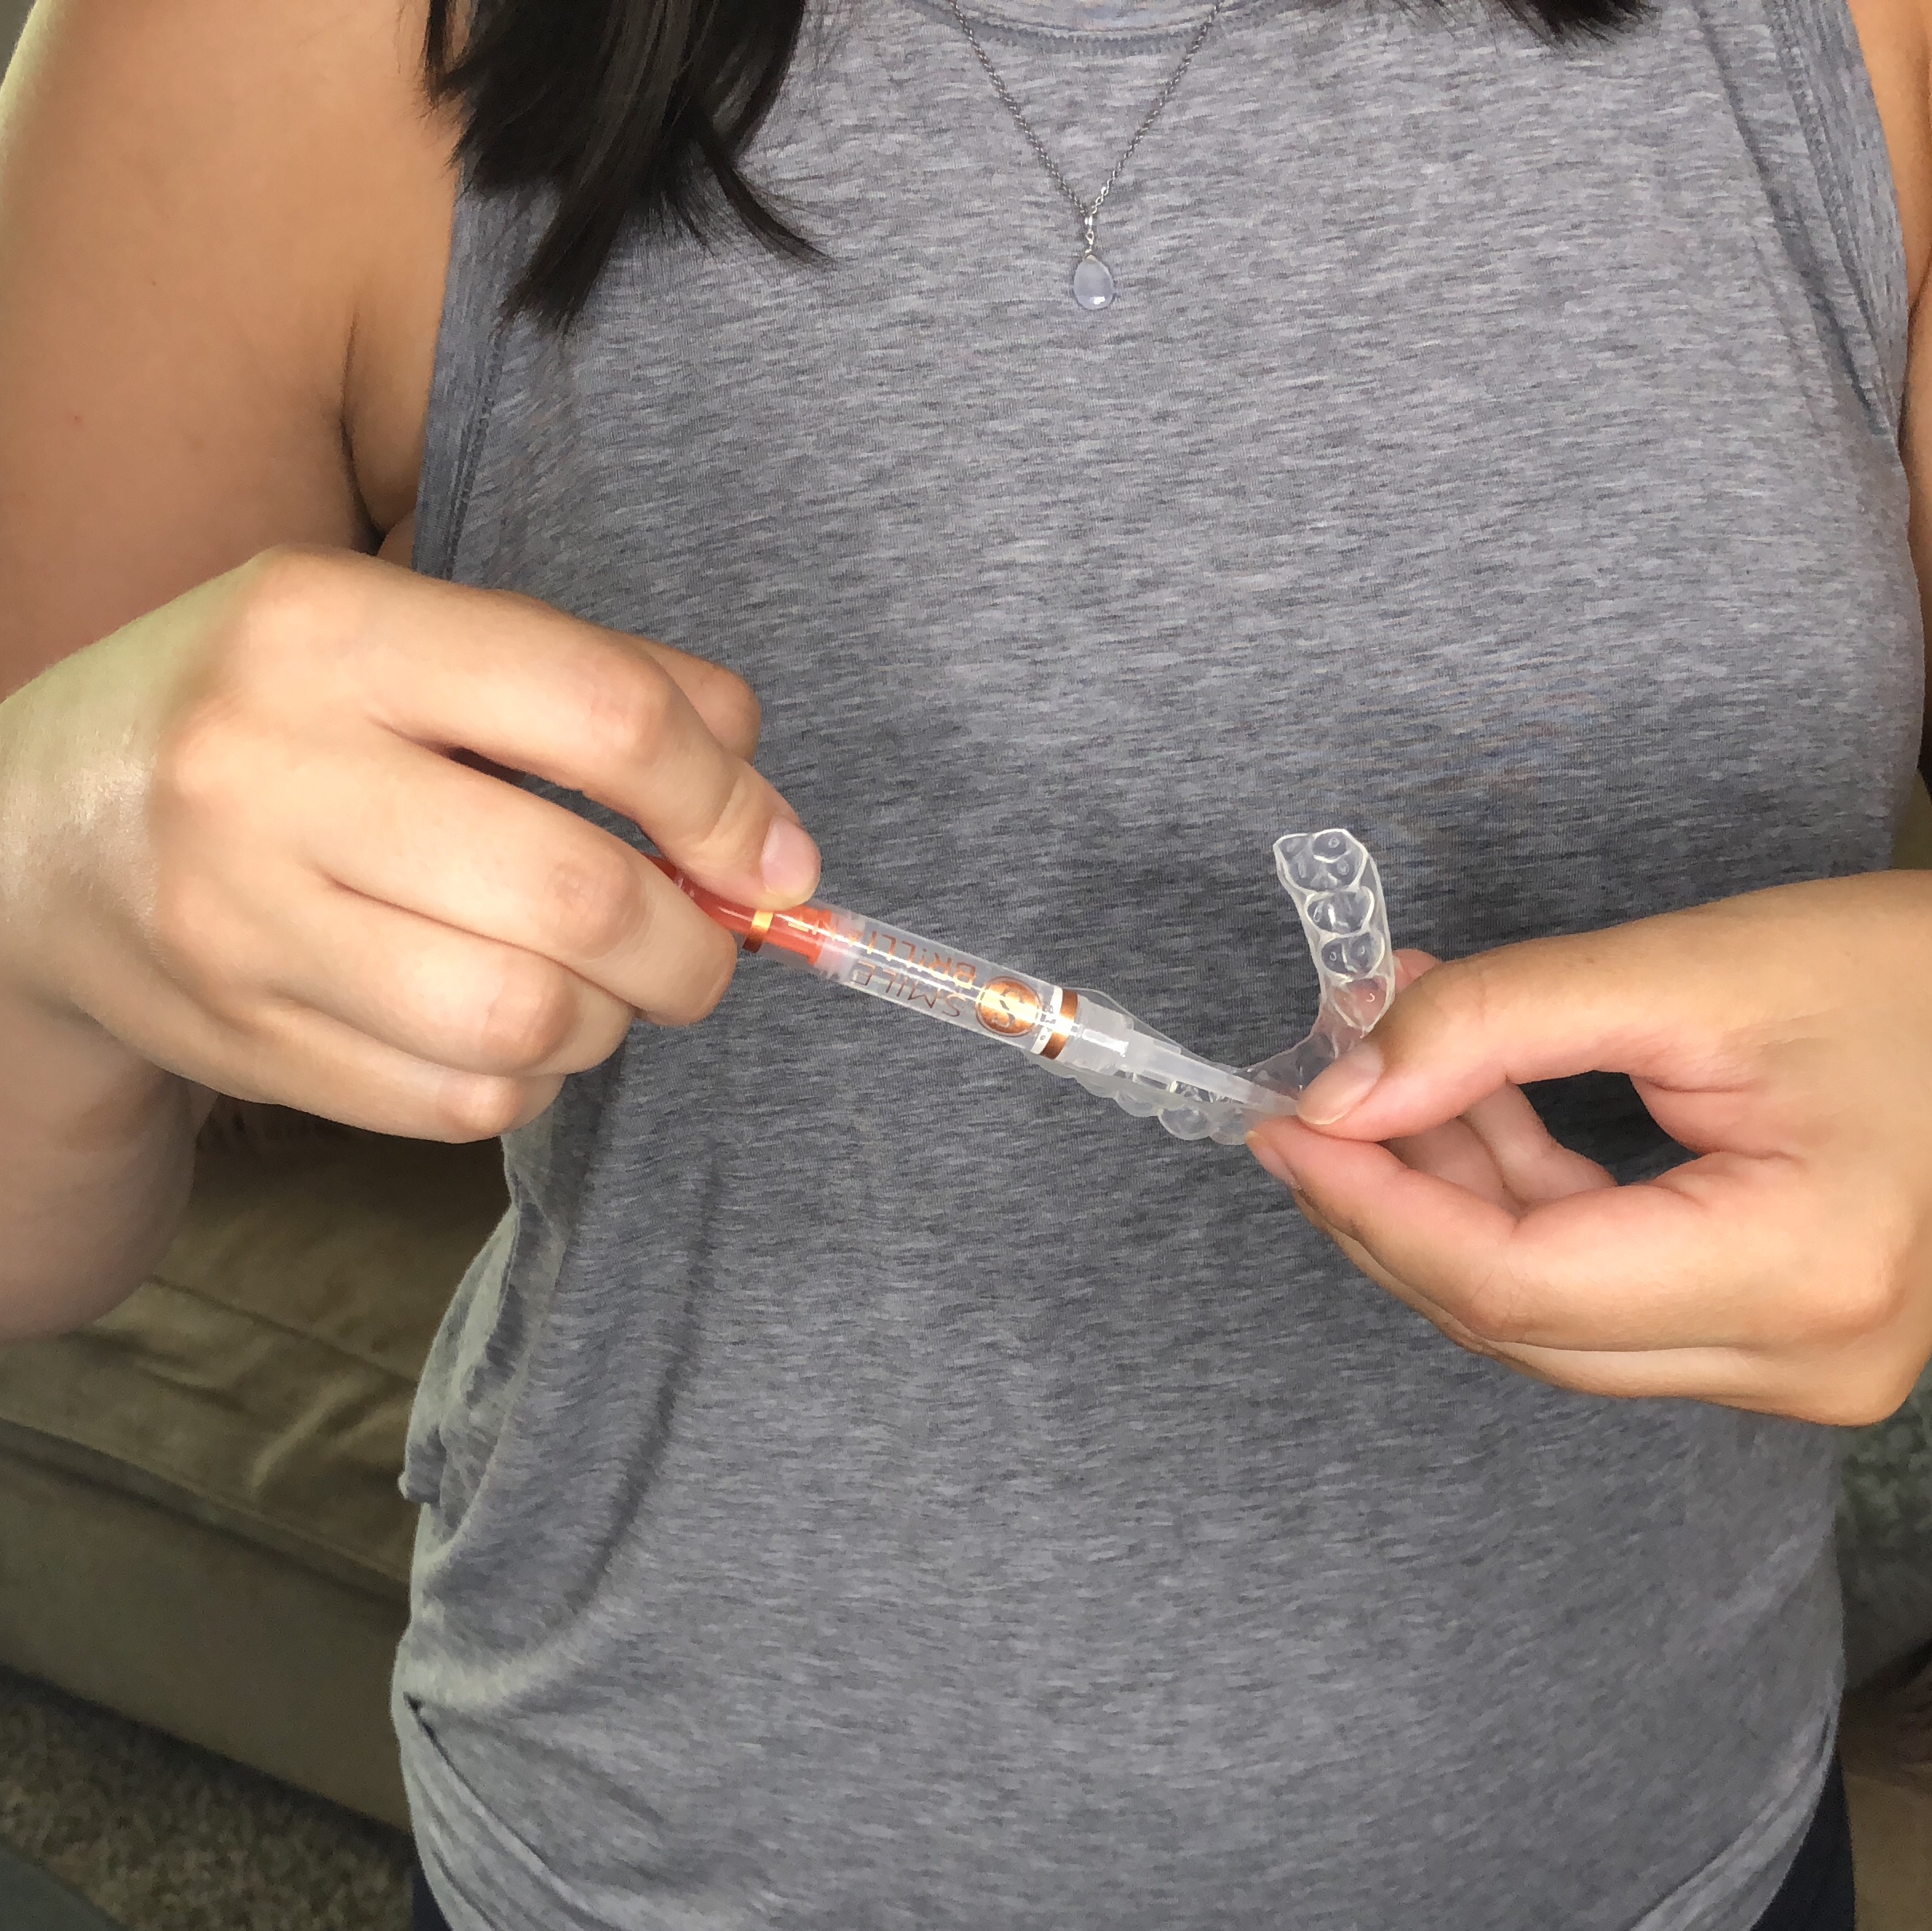
I was excited to try out Smile Brilliant because it’s a professional whitening system that you do at home, yet is still really customized and effective. Not only that, it’s REALLY easy to use. No awkward lights to put in your mouth; just custom trays that fit perfectly and you can go about your activities while whitening. I had only ever used Crest Whitestrips in the past, which were easy but took a lot longer to see results; plus I always experienced sensitivity. Smile Brilliant has a few different system options, and I chose sensitive which has really helped me not feel any side effects in my day to day life while whitening. One thing that is really great about Smile Brilliant is that if you are not happy with your results they will give you a full refund! Click here to visit their website and get even MORE info on the whitening systems! 

When you get your kit in the mail, the first step is to make your impressions so that your trays fit perfectly. The kit comes with very detailed instructions for the whole process. Once you make your impressions, you pop them in a pre-paid envelope and send them back to Smile Brilliant so they can make your trays. This whole process was pretty quick too, which I liked because I was excited to get started! 


image1.jpeg

Once you start the whitening process, it’s simple. 

  1. Brush your teeth with water. 

  2. Fill your trays with the whitening gel and leave in your mouth for 45 minutes up to 3 hours.  

  3. Brush your teeth like normal (including brushing out your trays). 

  4. If you’re doing the sensitive version, you add the desensitizing gel to the trays, leave on for 15-20 minutes and then don’t drink any liquids for at least an hour. 

image1 - Copy.jpeg

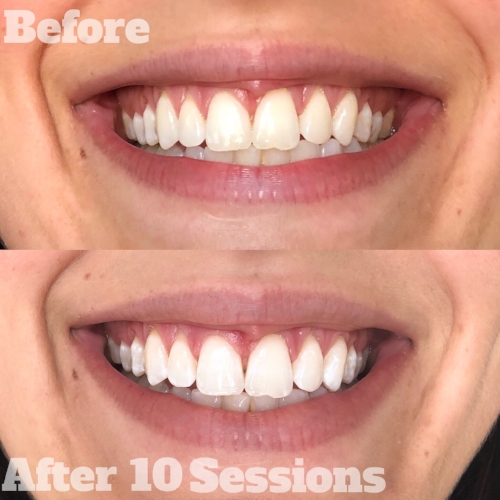
It takes anywhere from 7-14 sessions to get your teeth where you want them, and they send plenty of product! Now I’m sure you’re really curious about my thoughts. Below are some photos of my before and after and then we’ll get into the pros and cons of using Smile Brilliant. 

Let’s talk about the cons first. The thing I found most challenging about using the whitening trays was that I had to plan out my life accordingly. I preferred to whiten at night after dinner, but then I couldn’t drink water before bed which was kind of annoying. Sometimes I simply get home too later and need to sleep and don’t have time to whiten so I would have to skip a day or two before I could get back on schedule.  

The only other big con was that I did notice some sensitivity with my gums. Now most of this is probably due to the fact that my labial frenum (google it) on the top of my mouth was supposed to be clipped when I was younger and they never ended up doing it. So this means that it is attached lower than it is supposed to be and the trays really felt too tall for my mouth and scratched up against this. Again, this is more so my fault, not Smile Brilliant’s, but I have to say that I received lots of tips and help from Sierra over at Smile Brilliant, with how to increase my comfort level. I ended up coating my gums in coconut oil before hand and trying not to talk or move my mouth much while whitening. I also decided to whiten every other day, which helped cut back on irritation and I don’t think it skewed my results. If you end up trying this system out, I highly recommend the coconut oil on your gums for decreasing sensitivity! Works great! 

Now let’s talk about the PROS! I cannot believe how quickly this system worked. I noticed my teeth being whiter after one use, but ended up doing 10 sessions. Plus I still have whitening gel that I’m going to keep for touch ups before my sister’s wedding this fall! I loved that the trays were customized and molded to my teeth because having a tray in your mouth for over an hour that is big and doesn’t fit would be super annoying. One big thing I loved too was that even if I accidently got some gel in my mouth, it didn’t taste TERRIBLE. I had a bad experience once....can you tell? Haha  

I’m really excited to enter the fall season of weddings and events that I have being more confident in my smile. I think we can all agree that a whiter smile makes us feel more confident as we go about our daily business. As a makeup artist I am always taking pictures of my own face to share makeup looks, meeting new clients, and even taking photos with my brides. I am happy now that my smile is free of the coffee stains and would highly recommend you give Smile Brilliant a look if you are looking for teeth whitening.  

Here’s what my teeth looked like before and after 10 uses of the Smile Brilliant Sensitive Whitening System.  

These photos have not been filtered and have had absolutely no retouching. These ARE MY TEETH!

These photos have not been filtered and have had absolutely no retouching. These ARE MY TEETH!

Now for the exciting part! I am doing to be doing a giveaway with Smile Brilliant that will allow one of my amazing readers to win a whitening system of their own! Click the link below to enter the giveaway that is being hosted on their website for all of you! Good luck!! 

CLICK HERE TO ENTER GIVEAWAY! (Giveaway close one week from today - September 3rd

You can also use the code andreafontanabeauty15 to recieve 15% off store wide at Smile Brilliant!

Please be sure to message me or leave me comment below if you have questions about the Smile Brilliant at home whitening system. Also let me know if you try it out for yourself and what you think about it! I’m excited to have been able to share something like this with you guys.  

Have a beautiful weekend, 

Andrea

Tips for Practicing REAL Self Care

I realized recently that I haven't shared a topic on here that I talk about a lot in my non-blog life. I am just going to come out and say that I hate the phrase 'Self Care'. It's not so much the term that I hate but the trend that it has become in today's world. Stay with me. I think that taking time to yourself is crucial, but let me explain why I feel this way.

I find that the phrase 'self care' has become a trendy word for procrastination and a gold mine for the marketing of products to us. 'Practice self care and buy this bath bomb...you deserve it.' I know you've seen these campaigns and messages and frankly it frustrates the crap out of me. Taking a bubble bath is really great but if you have several things that you need to get done that night, a bubble bath can wait until tomorrow. However, if labeled as a 'self care' moment, it's fine to push off your priorities. 

If we are so stressed that we need to take a break and pause for a minute to take a bubble bath, I believe true self care is figuring out what is causing these moments of burning out and readjusting your life so it doesn't keep happening. It's crazy to keep doing the same things and expecting life to get easier if we don't self reflect and make some changes. There are no products that are going to fix the unbalanced life we are living, so today I'm offering you some tips to truly practice REAL self care and dig deeper into the stress of our lives. Use self care to really change your lifestyle so you can set yourself up for success and reduce stress and anxiety. 

Please be sure to comment below with your thoughts on the 'self care' trend and whether you agree or disagree with me.

6 questions to ask yourself to practice REAL self care:

1. What is one area of my house that I can tidy to relieve some anxiety? I am a huge believer in the idea that if your environment is messy, you will feel more anxious. Is there one space that you look at day in and day out, that could be tidier? Spend some time tackling it and I guarantee it will make your home more pleasant. 

2. What is the one thing on my To-Do list that would relieve some stress if I just did it? We all have those things on our lists that are either tedious tasks or simply no fun, but need to get done. Recognize this task as being annoying and just do it. Think about how relieved you will feel when it's done and carry that thought with you through the process to motivate you to complete it.

3. What is one thing that I don't want to think about right now but need to? This could be in many different categories of life. Sometimes we push things off or put them on the back burner because we don't want to think about them, but acknowledging them can take a huge weight off our chests. Debt is a great example of this. If you have no idea how much you owe in student loans, car loans, etc....ADD IT UP! The scariest part is looking at that total number, but once you do it, you can create a plan to get rid of it. 

4. How would I feel if I didn't let these anxious thoughts affect me? Sometimes we need to practice self care because we can't get out of our own heads. Trust me, I'm right there with you. But if we take a moment to think about how we would feel if we didn't let the stress and anxiety affect us, we give the anxiety less power and it's easier to think through it. Really try to think about the actual emotions you could be feeling instead.

5. Who can I call to just listen to me work through this stress and anxiety? Something that is really helpful for me to do is to talk to a close friend about whatever is bothering me. Venting in a sense and getting it all out, can be all we really need to feeling better. Sometimes it's helpful to hear someone say yes this is stressful and it's okay to feel this way. For me however, I like doing this because often it's helpful to have my best friend say what's the worst that could happen. 

6. Do I have a habit that I don't like and what can I do to stop it? Sometimes we don't realize the habits that we have created unless we measure them. I recommend to friends all the time to track what they spend their time doing and what the pros & cons are for each activity. If you don't like the habits you see, work to get rid of them! If it's a pretty big habit, look for support in your community to break it! 

Overall these questions encourage self reflection which I am HUGE on! I talk about it all the time with people because I believe it is so important to make changes when it's necessary and redirect what we are doing on a daily basis. I hope these questions encourage you to practice REAL self care and change your lifestyle for the better instead of supressing it with another bath bomb.  

Have a beautiful day,

Andrea


Make Your Own Chemical-Free Body Scrub

IMG_2812.JPG

I have a really great body scrub currently in my bathroom that I love and while reading the ingredients I realized I could very easily make a similar type of body scrub with ingredients from my pantry. This got me to thinking that I might as well make it for you guys and share with you how I made it. 

The ingredients you'll need are few and you can edit this recipe as much as you want and create your own unique scrub.

You will need:
- Coffee grounds (I used organic french vanilla from TJ's because I love how they smell)
- Coconut oil (Again I used organic unrefined so it still has the coconut smell)
- Brown sugar (you could use granulated white sugar but I like how soft brown sugar is)
- Essential Oils (I used peppermint to make my scrub SMELL LIKE A THIN MINT!)
- Some sort of container (I used a mason jar with a screw top lid)

Now the exact amounts you use will be completely dependent on how big your container is and the consistency that you like. I personally like my scrubs to be wet but really crumbly so that I get a good exfoliation (REMEMBER use these scrubs on wet skin only and NEVER on your face). 

FullSizeRender.jpg

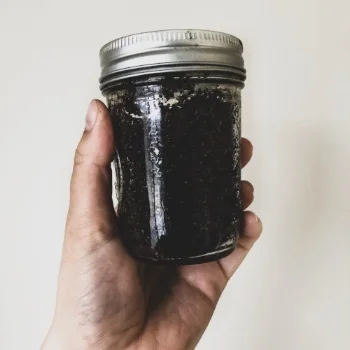
In my jar I mixed 5 tablespoons of coffee grounds with 5 tablespoons of brown sugar. I mashed them together to make sure that they were evenly mixed and then added 1 tablespoon of melted coconut oil. Next, I added about 10 drops of peppermint essential oil and when I smelled it I WAS IN HEAVEN. Thin mint in ajar. I cannot wait to smear this all over my body tomorrow when I shower.

If you are looking for a chemical free body scrub, this is a great way to make your own! The coffee is stimulating due to the caffeine and will help with circulation. The brown sugar will exfoliate all of your dead winter skin cells off, and the coconut oil is great for moisturizing your skin!

If you make a scrub and use different oils or measurements be sure to leave a comment below and let me know what concoctions you create!! I honestly don't think I'll ever buy body scrubs again!

FullSizeRender.jpg

Have a beautiful night,

Andrea

Skincare Tips for the Active Woman

As I was going about my shower routine the other day after hitting the gym, I realized that there are very specific things I do either before, during or after my workouts for the sake of keeping my skin clear and healthy. I figured I'd share them all with you as a quick reminder of how to keep things clean when you're an active woman. There are tips for for both face and body. Enjoy!

1. Wash your face immediately after your workout. If you sweat at all during a workout you should wash your face as soon as you are done, even if you don't have makeup on. I keep a pack of cleansing wipes in my gym bag (these are a great option) to wipe my face down quickly when I'm done because I personally never workout with makeup on. If you do wear makeup, I would definitely suggest cleansing your face with an actual cleanser afterwards. It's really important to not let the sweat sit on the surface of your skin for too long after you're done. 

2. Wash your body with a Charcoal body soap. I love to use a charcoal body soap to cleanse after the gym to lessen the likelihood of back or chest breakouts. Sometimes I can't take a shower right after the gym because I have other things to do, and doing this allows me to still get a deep clean and prevent any breakouts. This one by "Yes To" is a great option. 

3. Change your towel every day. If you shower at your gym after your workout, make sure you swap out for a clean towel every single day. More than likely, your towel gets put in a gym bag and doesn't get proper ventilation to dry quickly. If this is the case, it's really easy for bacteria to harbor and grow. I recommend tossing it in the hamper and getting a new one every time so that you avoid touching your face or body with it. I know that may seem excessive, but if you are prone to acne it's little changes like this that limit your exposure to acne causing bacteria which can lessen the likelihoods of breakouts. 

4. Stop touching your face. I know this seems obvious but think about how many things you touch that carry germs when you're at the gym. Touching your face only spreads the bacteria and it's always good to have another reminder not to touch your face. I do it without even realizing it sometimes so don't worry, I need this one too. Try bringing a fresh towel to the gym every time you go to wipe the sweat, instead of using your hands!

5. Use headbands. Headbands are a great way to keep sweaty hair off your face during a workout so definitely get some if you have bangs or baby hairs. I prefer to get ones that are able to be washed with my clothes so that I can clean them easily.

Let me know what your clean skin tips are for the gym but leaving a comment below!

Have a beautiful day,

Andrea 

How to make the only Kale Chips I'll ever eat.

Snapseed.jpg

It's no secret that kale is an extremely nutrient dense food that we should be consuming. Did you know that it can help tremendously with your skin? Full of Vitamin K, kale helps strengthen blood vessels, boost circulation and protect your liver. Since it's anti-inflammatory, it helps reduce puffiness and redness in the face and is great for conditions like rosacea. It's also rich in lutein and zeaxanthin (cartenoids that absorb UV light) which help protect us from free radical damage. Loaded with other vitamins and minerals, kale also has Omega-3 fatty acids and helps your skin stay nourished. Overall eating more kale will help with cell turnover, reducing dryness, and restore radiance to your skin. (Source: Eat Beautiful by Wendy Rowe, 2016)

If you want all of the above but don't know how to incorporate more kale into your diet, look no further! This is my sister's "recipe". The reason I say that in quotations is because I asked her how she made them and all I got was "250 until crisper". So let's just say I made it up from there. 

I have never liked kale chips. I have bought them from the store I don't even know how many times, and each time they taste like what I would imagine dirty leaves to taste like. They have no flavor and the texture is weird. Then last week my sister was talking about making kale chips and my nieces got so excited because they love when she makes them. I was shocked because I like healthy food and eating my greens but couldn't imagine trying kale chips one more time. 

After texting my sister and getting the 250 degrees response, I decided it was time to attempt making them. 

You will need:

A couple stalks of Kale
1 TB Coconut Oil
Salt & Pepper
Garlic Powder or whatever you want to season with

You will need to do the following:

1. Preheat the oven to 250.
2. Rip Kale leaves off of the stems and tear into smaller pieces. Wash in a salad spinner and dry really well; add to a big bowl.
3. Melt the coconut in the microwave for 30 seconds and pour over kale and massage into kale to make sure it's distributed evenly. 
4. Season with S&P to taste and garlic powder (or your choice of seasoning) and mix with hands to make sure it's incorporated well.
5. Spread out on 1 or 2 baking sheets to make sure most of kale isn't touching and has plenty of space. This allows it to properly dry out.
6. Bake 20-30 min until it's your preferred texture checking frequently to make sure you don't burn them. 
7. Try not to eat them all at once.

Note: I baked mine for 20 min and I found that this was absolutely perfect. I think the reason I've never liked kale chips before is because they are so dried out. 20 min was the perfect amount to dry the kale out so it was crunchy, but still have a little bite to them. If you prefer a super crispy and dried out kale chip, try 30 min instead.

If you make these let me know what you think and how you season yours!

Enjoy,

Andrea


March Must Haves

It's the time of the month where I share everything I've been obsessing over. I get so excited to write these posts for you because you guys seem to love them! As usual, if there is an Amazon link I trust I will share it and it will be an Amazon Affiliate link (feel free to scroll to the bottom to read my disclosure on that). If it's not an Amazon link then it is not an affiliate link. Now let's get to the good stuff! This month will be short, but sweet. 

Let's start with the best healthy cookie recipe you will ever make. I don't know if it's a good or bad thing that I can eat them all in 2 days, but let's be glass half full people and say it's a good thing. Laura in the Kitchen is my go to when I need a good recipe because she has so many and they never disappoint. I have shown these a few times on my Instastories and was waiting to share them with you in a favorites post. So go make them NOW. I would be shocked if someone could tell they were healthier without knowing before hand. 

Dr. Jart Cicapair CC TreatmentThis has become an everyday must have for me. I have seen Michele1218 RAVE about this product for about a year and finally bit the bullet and decided to try it. I am obsessed. It is a physical SPF, gives me moisture and has pigment to color correct your skin. It doesn't look like makeup at all but makes your skin look so much smoother, healthier, and even toned. It's my last step everyday when I'm not wearing makeup and need SPF. Don't let the green color scare you, it quickly color corrects the redness in your skin, while being completely undetectable. 

Herbivore Blue Tansy Resurfacing Clarity Mask: If you read my post about Curate + Co (I'll link it here in case you didn't) I was gifted this amazing mask by the wonderful owner Christina. This one has also found its way into a permanent position in my skincare routine because it's amazing. It's completely clean and effective for keeping my skin smooth and blemish free. I love how the Blue Tansy has Azulene which reduces inflammation, so if I have breakouts it calms them while getting rid of them at the same time.  If you can, please use the link in the title to purchase it and support Curate + Co, an amazing small business that I love! If you are only a die-hard Amazon shopper, here is the link for that as well.

Pacifica Rose Flower Hydro Mist : Yes, this one made it two months in a row. I debated not mentioning it but the reality is that I am still obsessed and I used it almost every day in March. It feels so good on the skin and I cannot get enough of it. I love how refreshed I feel every time I spray my face with it and it smells so good. If you're looking for a good refresher try this one out!

Lancome Matte Shaker in Beige Vintage (270): I have been loving this lip product, mainly because it is so light (literally feels like water on your lips) and gives the right flush of color. The staying power isn't great, but that doesn't really bother me. I'm excited to try more shades. 

As you guys know, I recently cleaned out my skincare products and the best part is that all of the skincare listed above is clean and passes my chemical-free test! My every day makeup clean out is still on the horizon so remember that when I recommend any makeup from now on. 

What were your favorites this month? Did you discover anything good? Leave me a comment below and let me know!

Have a beautiful day,

Andrea

Disclosure: Amazon links are Amazon Affiliate links meaning that I make a commission off the purchase of the product through my link. I would never recommend a product that I didn't love and all opinions are my own. I am thankful for you choosing to purchase through my links, as it helps me create more content for Andrea Fontana Beauty. 

Science of Skincare (S.O.S. #4): Cleaning Up Your Skincare Routine

I'm going to warn you in advance that this post is going to be longer than normal. I am cleaning out my skincare and getting rid of the chemicals. This has been something that I have been thinking about doing for a long time. In the last few months I have been thinking about health, fitness, my diet, and more in a different way and that is what prompted me to think about the products I was using on my skin on a daily basis. I have always considered health to be a vital part of my skincare so I felt like this was a natural progression for me. 

With any big changes like this, you have to start small because it's too expensive to do every product I use right now at once. I didn't want to empty my entire medicine cabinet and skincare shelf into the trash so in this post I am going to share my process with cleaning up my skincare routine and my thoughts behind my decisions. If the thought of this is something you have been toying with, I highly suggest you grab a drink and snack and read this post thoroughly. I personally am starting with skincare because I use it twice a day, every day. Next I will move to hair products, and then my every day makeup routine. I say every day because I am not as concerned about a lipstick I wear once a year. I am the most concerned about the products I am applying to my skin every day so I will be focusing there first! So let's dive right in.

Let me start by giving you a little background on the ingredients that are used in skincare products. If you know me, you know that I am a huge label reader and recommend products based on their ingredients, not their brand names or claims. The reason you see such a large margin between high end and low end products, is because most ingredients can be synthetically made. Some skincare companies pay the money to source ingredients naturally, which you see reflected in the price tag. I feel like there is this misconception that you need chemicals in order to see results with skincare but this is not the case. There are so many naturally occurring acids, enzymes, antioxidants, and more that can be used to create amazing products that will be healthier for you and still give you great results. 

When I decided to embark on this journey I first turned to my favorite app called Think Dirty. You can also visit the EWG's Skin Deep Cosmetic Database here, if you want to do it on your computer. I had had the Think Dirty app on my phone for a long time, but was terrified to see just how bad the products I was using were, so I hadn't done much with it. In a nutshell, the app allows you to search or scan the bar code of almost 1 million different products and they rate them on a scale of 0 to 10; 0-3 being healthy for your skin, 4-7 being moderately bad for your skin, and 8-10 being the worst for you skin. Not only does it rate them, it allows you to look at why they get the rating they do. Each ingredient in the product is also rated so if it has a high rating it will show you the ingredients that are causing it to rate so high. It will then tell you the purpose of the ingredient and if it's linked to being carcinogenic, causing developmental & reproductive toxicity, or causing allergies & immunotoxicities. 

If a product wasn't listed in the app, which seems to be the case for a lot of newer products and brands, I would first submit the product to the app (a feature I love) and then I would hop on my computer and search ingredient by ingredient on the Skin Deep Database I mentioned above. Now I want to list some of the ingredients I am trying to stay away from and how I decide if I'm ok with keeping a moderately bad product in my skincare routine. 

Ingredients to Avoid (All information on ingredients is either from my brain from years of skincare training or the EWG Skin Deep Cosmetic Database):

  • Mineral Oil: MIneral oil is a cheap oil made from petroleum that traps moisture in skin, but doesn't actually hydrate the skin. It simply doesn't do anything for us and can even trap bacteria in the skin and pores. There is belief that it could be a possible human immune system toxicant and since it doesn't actually do anything for the skin and comes from petroleum I say, DO WITHOUT IT!
  • Parabens: If you are familiar with skincare, you probably know that a lot of companies are straying away from the use of parabens as preservatives because of it's possible link to cancer and how it can mimic estrogen in the body. For this reason, it's going on my DIRTY list.
  • Phenoxyethanol: This is an ingredient that I think will be one of the hardest to stay away from, because it seems to be in everything!! haha Again this is a fragrance or preservative ingredient and is restricted in Japan in cosmetics in certain quantities. I've noticed it often in cleaners and toners, but can be in moisturizers as well.
  • Propylene Glycol: This one is a humectant and skin conditioning ingredient that has been associated with skin irritations and dermatitis. After reading about how it is a probably carcinogen, I've decided it's on my DIRTY list. 
  • Synthetic Colors (Yellow 5, Red 40, etc.): In my opinion, there is no reason that a skincare product needs to be colored a certain way. If there is naturally occurring pigment in the ingredients that is fine, but do not add synthetic colors that are made from petroleum just so the mask is orange. To me this is an easy one to get rid of so welcome to the DIRTY list!
  • Benzalkonium Chloride: A surfactant found is many household cleaning supplies, I have no use for it in my cleansers! It has been shown to be a skin, respiratory, and eye irritant. 
  • Triethanolamine: This is a relative of Nitrosamines, which are a very likely carcinogen, which means that it is a very possible health hazard. It is used as a buffering and emulsifying agent and will no longer be irritating my skin.
  • Polysorbate 20/PEG Sorbitan Laurate : These are similar in that they are derivatives of Lauric Acid, and they have an extremely high contamination of Ethylene Oxide and 1,4 Dioxane which are very highly likely to be carcinogens. Lauric Acid is the fatty acid found in coconut oil that is totally fine and healthy for your skin. However, these forms of it, are very much a toxicant and welcomed on the DIRTY list. 

Ok this list could probably go on and on, but I will stop now and encourage to use this website and app to go through your own collection. If I come across more research and more ingredients that I will be omitting for sure, I will made sure to write new posts updating those who want the info! For now I will be for sure eliminating those above.

Now let me describe some of my decisions regarding ingredients and how I read labels. First off, it's important for you to know that the order that ingredients are listed shows which are in higher quantities. The first listed ingredient makes up the most of that product, the second being the second most, and so on until the last ingredient has the least concentration within. This is important to note because it can help you decide if that product is good for you or not. My biggest concern is usually the first half of the ingredients. I do not want a single chemical in those. Ideally, there wouldn't be a chemical in the whole label, but if I have a product that I love and works well for my skin and the second to last ingredient is a chemical, I might consider using it occasionally because I know the concentration is lower. 

Next, I look for the purpose of the ingredient. Sometimes products will be rated higher because they contain an ingredient like Glycolic Acid which exfoliates the skin. That glycolic acid could be listed as a potential skin irritant for this, which is fine with me because that's the reason I'm using it. I want it to break down the skin and exfoliate the dead cells off. As long as that Glycolic Acid is coming from a more natural source like maybe sugar cane, I am fine with it and don't consider that product to be a hazard. 

Now if you are thinking about making this transition with me into cleaning up your skincare, your next question is probably about how to make that transition. My recommendation is to do it slowly and phase out products as you use them up and purchase only healthy alternatives. If you have brand new bottles or back ups on hand, try returning them or giving them away to friends that don't necessarily care about the chemicals in their skincare (to each their own!).

So what does this mean for Andrea Fontana Beauty? I am a firm believer in putting your money into the health of you skin first so from here on out, I will not be recommending skin care products that are not clean for your skin. I will include you on this journey and plan on doing a follow up post asap, as to what products I've had to get rid of and what I've replaced them with. When I move on to hair care and every day makeup products I will do the same. For makeup however, I will continue to recommend, try and use all brands of products because I do not use the same things every day and still need high performance products for wedding day and special event makeup. For me this isn't an all or nothing process. As long as I'm converting 75% of what is going on my face and body every day, I will consider that a win. 

Again, I'm not encouraging you to throw out everything you own, but rather look where you can make some healthier changes in your every day routines. As always send all questions my way and let me know how you feel about this topic in a comment below!

Have a beautiful week,

Andrea

February Favorites

Hello I'm back! 

In case you missed all of the sunsets, head over to my Instagram to see all of the fun I had on my Florida vacay!

I'm back with some favorites from February that I can't wait to share. Originally I was going to include some book favorites because I have been reading a lot, but I polled you guys on Instagram and you decided you wanted a Quarterly Book Post instead, so look for that at the end of March. I feel like I mention this in every post, but if you want to have a say on the content I create, follow me on Instagram and vote in those polls!!

If links below are Amazon links, they are affiliate links. If you choose to use them, I earn a commission off of your purchase. This in no way affects the price that you pay, but supports me as a blogger and I so appreciate you if you choose to use them! If the link in this post isn't for Amazon, then it is not an affiliated link. I just like to be upfront with you! Anyways, now onto the faves!

I have been driving a lot recently and love to listen to podcasts during this time. One of my all time favorite bloggers Sydney from The Daybook, recently started a podcast with her business partner and I knew I had to listen. No shocker, I am absolutely obsessed. It's called What The Eff Podcast and it's about going after your dreams and figuring it out as you go along. I cannot recommend it enough. Sometimes they have guests, sometimes they interview each other, but every episode is amazing. Check it out here!

I can't remember how I found out this Newsletter but I love it. It's called the Girl's Night In Newsletter and you get an email every Friday morning (as if Friday wasn't exciting enough) and it's full of recommendations; recipes to make, things to do, books to read, articles to read, etc. As I get older and spend less time out on a Friday night, I really like the ideas it gives. Click this link here to sign up for it!

Next, let's talk some products. First up we have the Pacifica Rose Flower Hydro Mist. I bought this in a rush at Target when I was picking up last minute things for my vacation and I became obsessed. It has that amazing rose scent, but I used it constantly whenever I wanted to refresh and cool off my face, especially at the beach. I loved it. It also has Kombucha and essential oils in it which I find pretty cool (Side note, I'm learning how to make Kombucha Tuesday night and could not be more excited!!) It's 100% vegan and cruelty free and also formulated without SLS, petroleum, parabens, and sulfates!

I always use a lip treatment with an SPF when I am on vacation or in the sun, so I went back to this amazing one for my Florida trip that I've loved for a long time. The Fresh Sugar Lip Treatment in Tulip has a berry pink tint to it, which I love to give my lips moisture, color, and protection in the easiest way! I can't recommend this line of lip products enough for warm days!

Let me be a broken record and say I LOVE SHEET MASKS! haha that probably comes at no surprised, especially if you read my last post on Travel Tips. I have been using them so much recently and again I think they are great to have on hand. Here's a great set to get you started if you want to try some out. 

I want to mention my SPF that I have been using for awhile and was my go to in Florida. The Algenist Ultra Lightweight UV Defense Fluid SPF 50 doesn't smell like traditional SPF, doesn't feel like traditional SPF and I love it. It protects so well and I can't recommend it enough. I am all about formula and finish when it comes to the SPF for my face and I love how this one doesn't feel greasy at all but still nourishing. 

Lastly, I want to share a drugstore foundation you've probably heard me talk about but I've been loving for awhile now. The L'Oreal Pro Glow Foundation is medium coverage and build-able and gives a really nice glowy finish. I'm normally a NARS foundation girl all the time, but I am happy to have found a great drugstore foundation to have as an affordable option.

So that's it for February! What were your favorites this month? If you've fallen in love with something be sure to leave it in a comment below!

I hope you have a great start to the new month! I'm starting my March off with a Launch Party tonight for a Beauty Bar I did makeup for! Then I'm headed for a weekend away visiting my best friend.

Enjoy your weekend loves,

Andrea

Skincare Tips for Travel

As I write this I am three sleeps away from being on a beach with a drink in my hand. I cannot tell you how much I am looking forward to this vacation. That being said, this past week has been filled with packing and getting things together for my trip which brings us to this post.

Your skin can change and become imbalanced when you go on vacation and change climates. Today I'm going to share with you my tips for avoiding common issues and keeping your skin feeling happy and glowing all vacation long! The more prepared you are the less likely you will be to have issues.

1. Prep your skin the week before you leave. I make sure that I am extra consistent when it comes to my skin before I travel so that it is the healthiest for my trip. Follow your routines and do some masks beforehand to really make sure your skin is happiest before your trip.

2. Prep your skin for your flight. I cannot recommend this one enough. If flying dries your skin out, wear a heavy moisturizer, overnight mask or sheet mask on the plane! I know this might seem crazy, but if you go on the plane nourished and hydrated, you won't be able to dry out as much from that gross airplane air. Then you'll get to your destination with glowing and happy skin!

3. Bring a SPF 50. You probably are not shocked that this is next. I wear a SPF everyday anyways, but I cannot stress how important this is especially if you are traveling somewhere with more sun. More sun means you will probably spend more time outdoors so DO NOT skip the SPF. 

4. Bring sheet masks. Sheet masks are a great way to bring many kinds of masks with you that won't take up much space in your luggage since they are one time use. Depending on your vacation and skin type you could need to combat all sorts of issues. If you'll be in the sun and sweating, make sure you have a good pore cleansing mask. At the same time, if you are getting sun, hydrating masks are vital. These sheet masks come in a gift set and give you many options for your next trip!

5. Bring an overnight mask for dehydration. Whether it's the plane or the sun you can almost guarantee that your skin will become dehydrated at some point. I think it's great to have a mask like this one from Laneige that will hydrate you while you are sleeping. It's light and helps draw moisture into your skin which is perfect after long beach days!

6. Bring a spot treatment. I tend to breakout when I am in more humid environments so I make sure to bring my spot treatment with me just in case I acquire some blemishes while traveling. I love this one by La Roche Posay and have been using it for years. I like to apply it in areas where I'm prone to breakouts as more of a preventative measure. 

7. Watch your diet. Especially if we are traveling for vacation, we are more likely to let loose and eat a little unhealthier than we would at home. If you know that certain types of food can affect your skin, stay away from them to lessen the likelihood of problems arising. I personally know that dairy makes me break out more. Knowing this, I'm less likely to get ice cream every night of vacation like I would normally want to. I'm not saying to not relax and enjoy food on vacation, just be aware of the consequences of what you are consuming.

8. Lighten up on makeup. Personally, I love to use traveling as a time to lighten up on my makeup routine and give my skin a break. I tend to rely on a bright lipstick as the star of the look and lighten up when it comes to the products I'm applying to my skin. 

9. Drink your water. You had to have known that this was coming, but the changes of traveling can change your body and create a little imbalance, so keeping up with your hydration is key, especially if you will be in the sun. I know I'll be enjoying a few extra glasses of wine than I normally do, so drinking extra water is key. I like to use this Origins Hydrating Mask at night when I've had a few drinks of been in the sun to combat the dehydration! 

10. Use up samples. While I'm not the biggest fan of Sephora's point system, I do like taking advantage of the small sizes of free product to take on vacation with me. Just be careful if you have sensitive skin. If this is the case, only take products that you've tried before so you don't have any sort of reaction while traveling. 

Let me know below if you're traveling soon and where you're headed! If you have any travel tips of your own let me know!

Happy travels,

Andrea


Be Your Own Valentine First

Happy LOVE Day. When I was planning out my posts for the month of February, my mind went initially to makeup but I knew very quickly that I wanted to write a post about self love on Valentine's Day. 2018 has really been an interesting year for me so far. While I feel like it has flown by in two seconds, I feel like a lot of self growth has already happened. A lot of this could be due to the fact that I started my own business and really dove into the unknown. The path isn't laid out for me, so I've had to do a lot of trial & error and observing along the way. Regardless, my mind has been constantly full of self reflection and I wanted to pass along some things that I've noticed. Warning: This post might be all over the place, so bear with me. 

First off, I want you to think about Valentine's Day differently this year. Instead of thinking about candy and roses, think about being your own Valentine first, regardless of whether or not you have a Valentine. Look at Valentine's Day as a way to evaluate whether you are really creating goals and working towards them. Are you creating the life that you want for yourself? If you're in a relationship, do you push each other to go after your dreams and support each other when needed? If you're not in a relationship, this is the perfect time to cultivate more self love for yourself if it's lacking. 

Let me tell you a little story. So far this year, I've accomplished some things that I'm really proud of. A few of them brought about so much anxiety and stress beforehand, that I found myself doubting my talents, wondering if I was crazy for saying yes to these things. Then I realized that the fear of the unknown was creeping in and making me feel unworthy, creating this voice in my head. I knew I was talented enough and that they were going to turn out well. I found myself sitting in my car one morning and I had this realization. I was getting down on myself for feeling nervous and feeling unworthy, but then I realized that I don't necessarily need to turn off these voices but look at them a little differently. That feeling of nerves was due to the fact that I was challenging myself and trying something new. I'm learning, growing and getting out of my comfort zone and that's what life is all about, right?

It's ok to do something that terrifies the shit out of you! In fact I encourage you to go try something that does. Life really is a roller coaster and in order to have those strong and happy feelings of accomplishment, I have to also accept that I might have to deal with nerves and be terrified at times. Be gentle and kind to yourself. Think about what you would tell your best friend if they were in the same situation. Would you be hard on them or would you be kind and gentle in the moment and enforce how capable they are? Now be that kind to yourself.

You cannot be in a healthy relationship with another person if you don't have a healthy relationship with yourself first. Don't for one second get down on yourself if you don't have a Valentine this year, because you never know what is around the corner. Check in with yourself today and really ask yourself how you are doing and if you like the direction you are headed. If not, make the adjustments that are necessary. If you don't know how to make those adjustments, recognize that a change is needed and that you are willing to figure it out because you love yourself. It is never too late to re-direct down a path that is better for you. Only you can know what your heart desires, so make sure you are taking the time to stop and figure it out. I've learned so far this year that this is a learned habit, and if you don't force yourself to do it, it's easy to get wrapped up in the busyness of life and never figure it out. 

If anything, I hope reading this post inspires you to take at least 15 minutes to yourself and evaluate your life. Anyone can make the changes necessary to create a happy and fulfilled life, but not everyone is willing to do the work to make it happen.

I hope you decide to love yourself first today and have a magical Valentine's Day!

Know you are so loved,

Andrea