Home Decor Thrift Flips

Fruit Basket (Macrame)

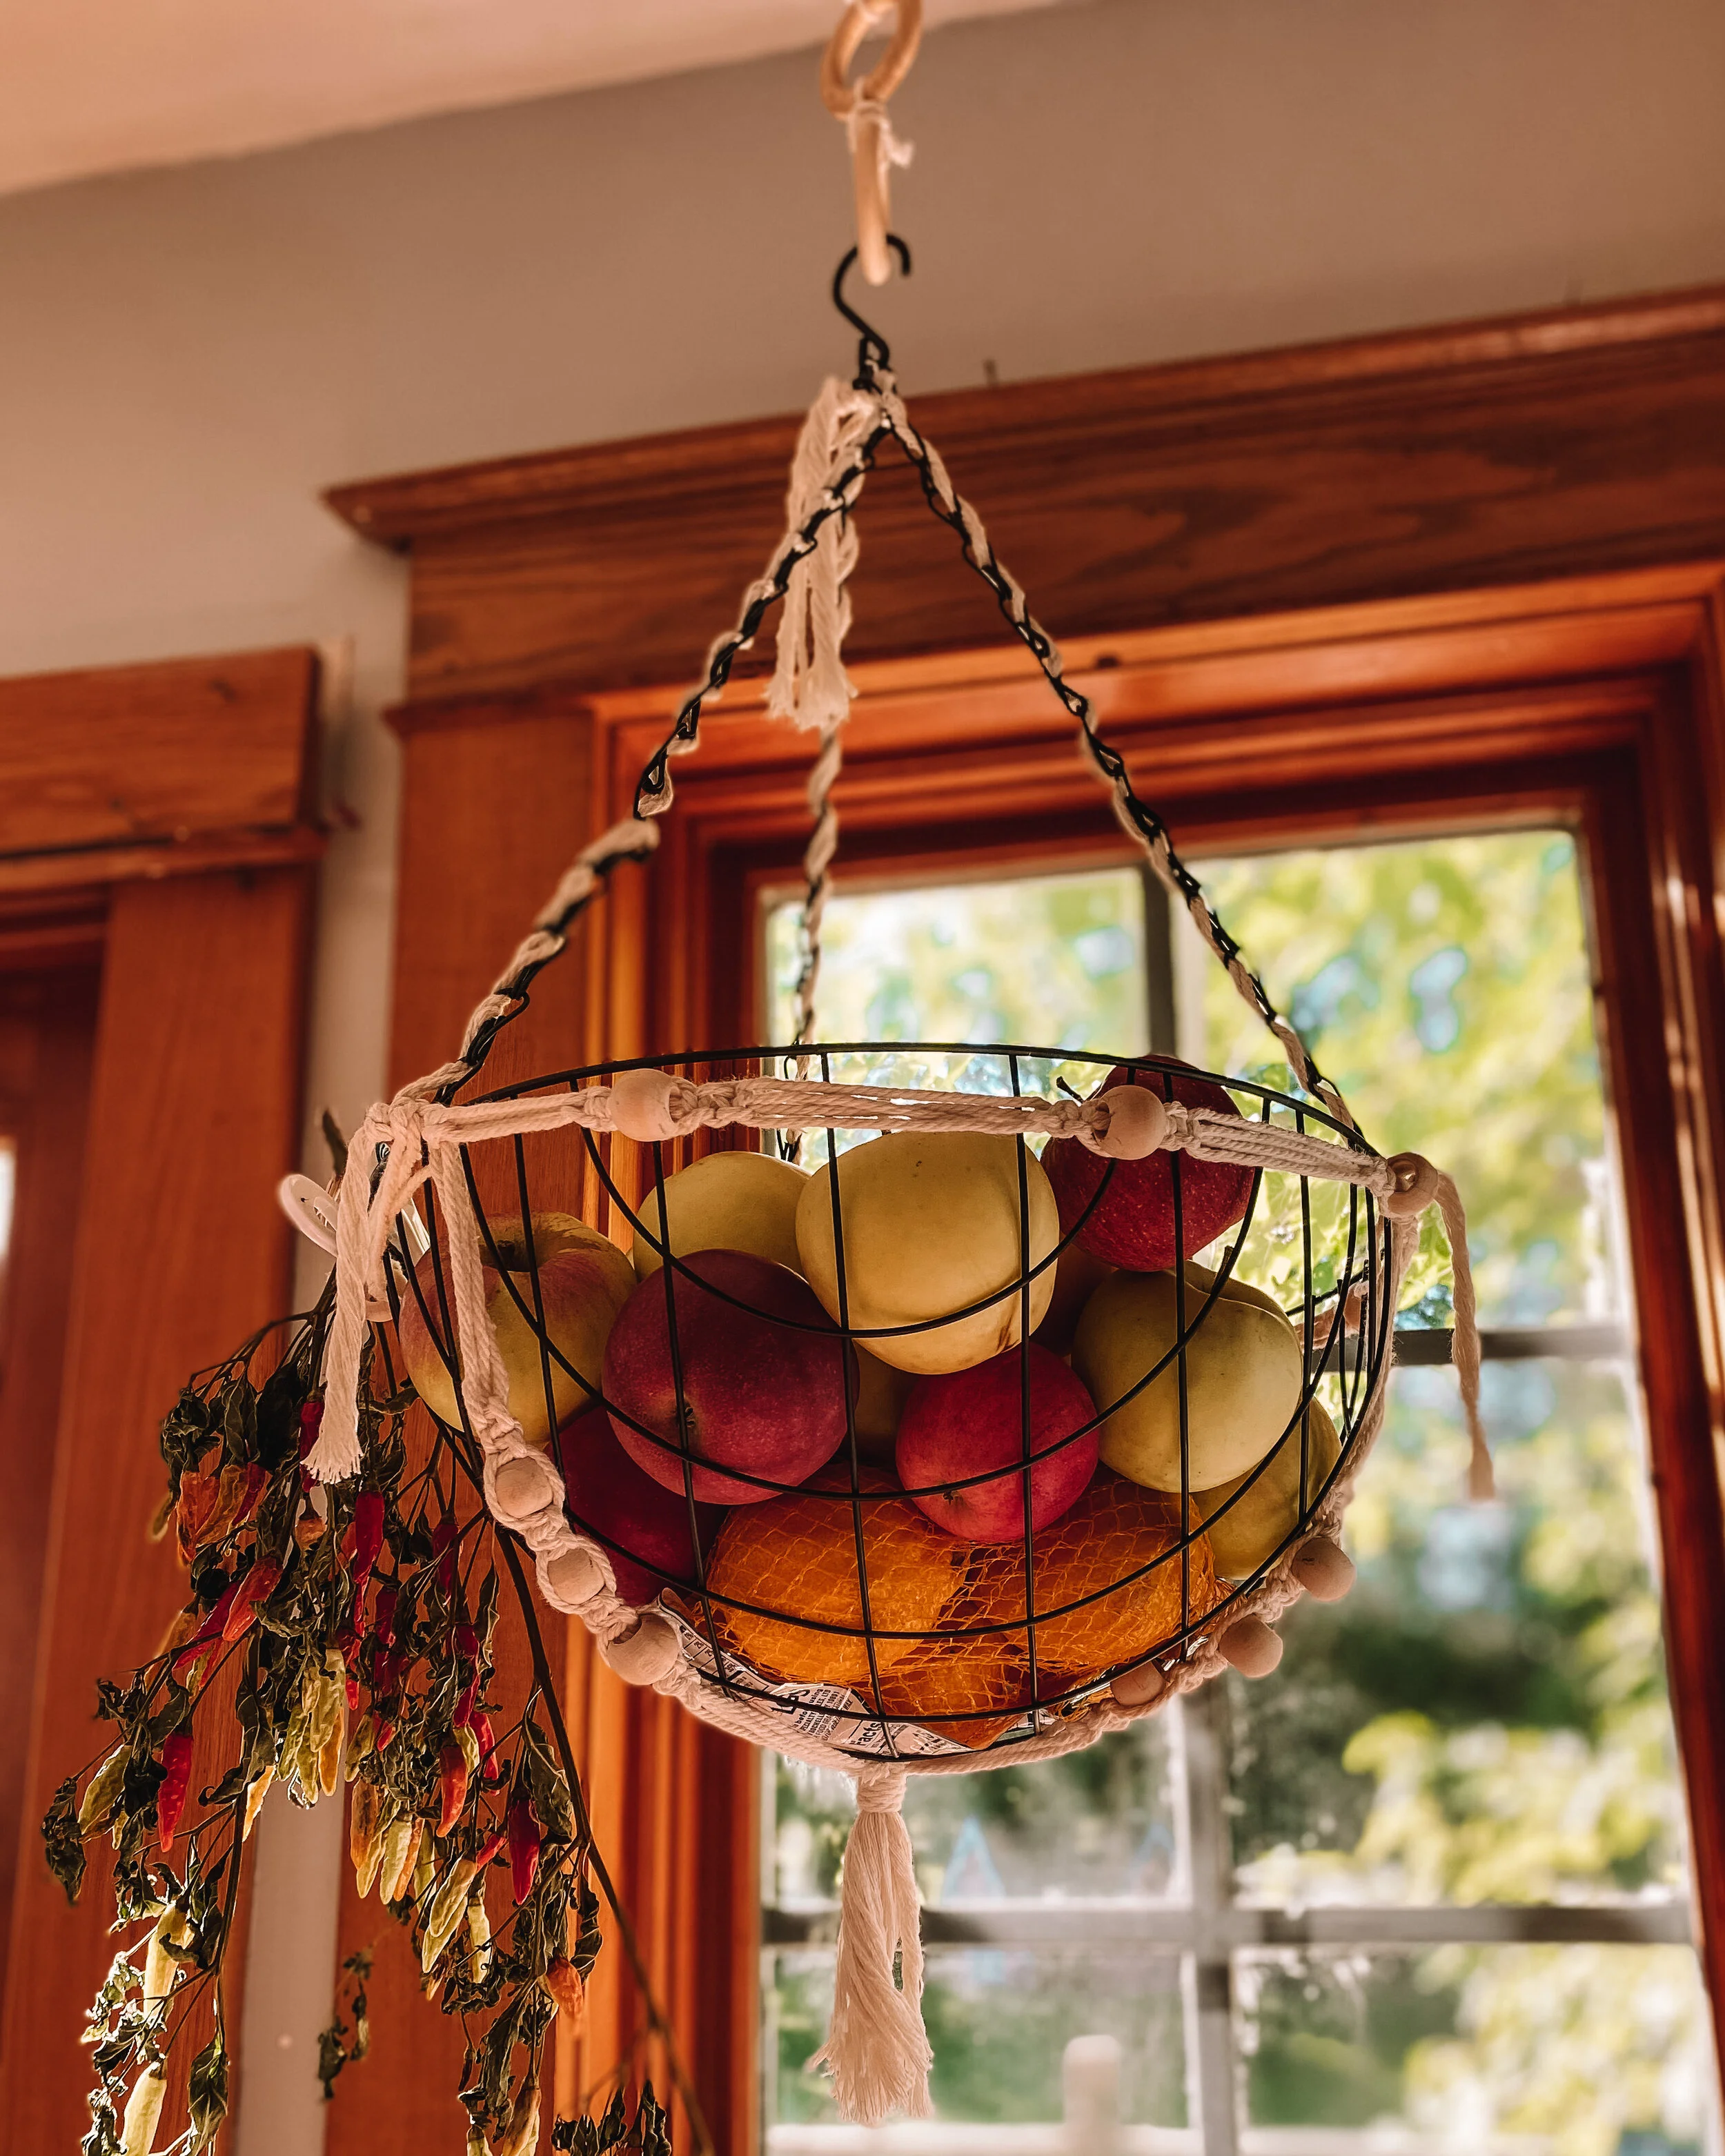
This project took a little while for the idea to come to fruition. I was thrifting one day and came across a simple, wire hanging plant basket that was green. It was a great price and something just told me I shouldn’t pass it up. It sat around for a little while in my studio until I was thinking about how I desperately needed a bigger fruit basket that wouldn’t take up a lot of counter space. I had just seen a video on macrame and decided why not give it a shot! I ordered this set of wooden beads and loops plus a roll of macrame cord from Amazon. While I waited for those to arrive in the mail, I used this flat black spray paint to cover the bright green color. Once it was dried, I cut 16 very long cords of macrame cord, searched how to make a square knot, and made up my own knotting pattern, periodically adding wooden beads. I attached the wooden loops together to make the basket longer and attached it to a hook I already had in my kitchen. The thing I love about this project is that there are a ton of ways you could make this!

diy macrame fruit basket thrift

Terra Cotta Candles (Spray Paint and candle making)

I always find short, wide, glass, circular vases at the thrift store for super cheap. One day I picked two up for $1 each and decided it was time to try making my own candles. Instead of trying to master candle making, I simply went to the clearance section of Homegoods and purchased 2 candles about the same size as my vases (so that it would fill nicely) that I liked the smell of. The design of the candle doesn’t matter since you will be ‘rehoming’ the wax. The day before repotting my candles, I used this AMAZING terra cotta spray paint and added about 3 thin layers of spray paint on each vase. It’s important to note that before you spray paint anything glossy or glass, it’s important to make sure you clean it off really well with soap or alcohol. If you do thick of a layer it will start clumping or dripping because it is a textured spray paint. You want to make sure everything is covered well. If you are going for a true terra cotta dupe you’ll want to make sure that you do a good amount of coats. As you can see below, I thought it was covered, but it was still a bit transparent when it was dry. I don’t mind this for a candle however because some of the light shines through. After I was done painting, I let them dry overnight.

The next day, I got a big soup pot and filled it about half way with water (making sure it was a couple inches below the top of my candles), let the water come to an almost boil, and put the candles in. I let them melt for about 45 minutes, checking on them every 10 minutes or so. While they were melting, I hot glued the new wicks I purchased onto the bottom of each vessel. Depending on the size of your new vessel, you might have to do multiple (as you can see I did three). Once they are melted you can take them out (I pulled the wicks out to make them easier to pour) and gently using potholders (the candles will be hot), I poured them into the newly wicked candle vases. Once the wax was in, I used some chopsticks to wrap the excess candle wicks around so they would stay standing up as the candle wax hardened.

terra cotta diy home decor candle

Coasters (spray paint)

These were easy and left me amazed as always, at how easily a coat of spray paint can change a thrifted item. Using the same flat black spray paint, I sprayed both sides of these wooden coasters and now I have beautiful matte black coasters that match my living room decor so well.
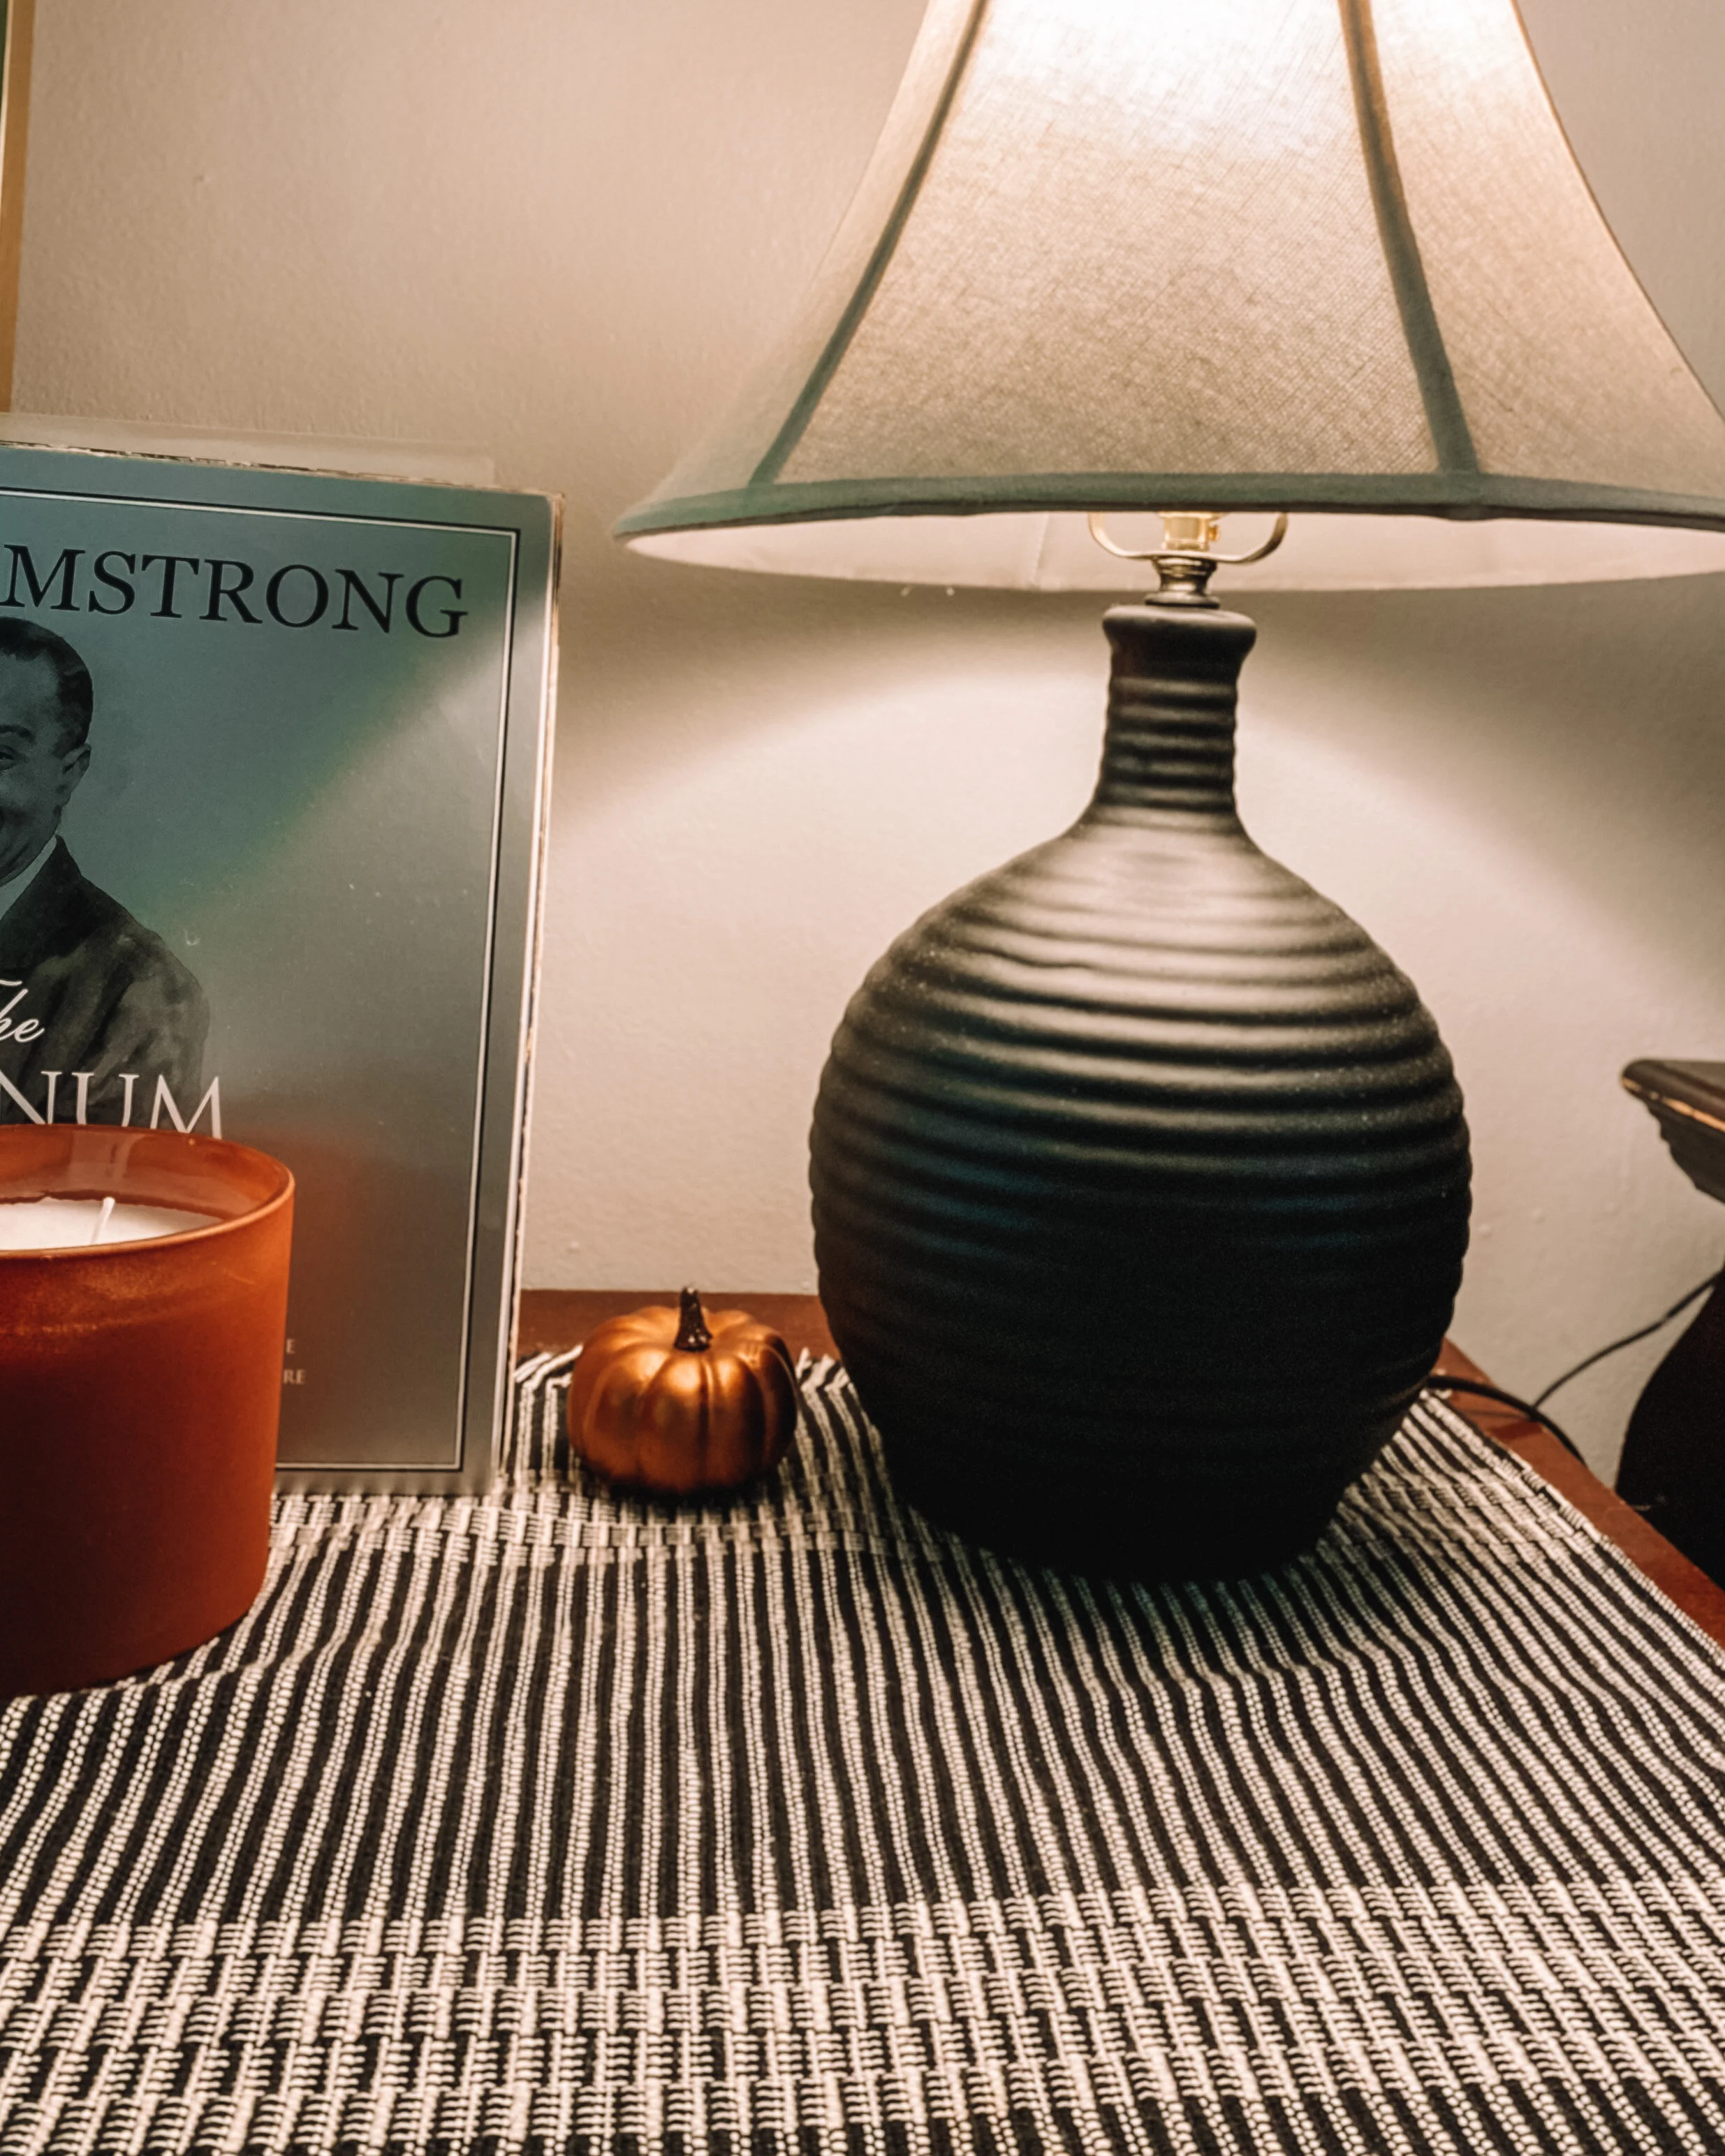
diy thrifted coasters home decor

Lamp (Painted base)

Another quick flat matte spray paint save, I found this lamp and actually hated the shade when the base was it’s original, glossy brick red color. I figured I’d spray paint it and get a new shade, but I found that once I sprayed it, I actually liked the shade with the base. When looking for items that are easy to spray paint, try your best to look at textures and shape and NOT the color!

diy lamp home decor thrift flip

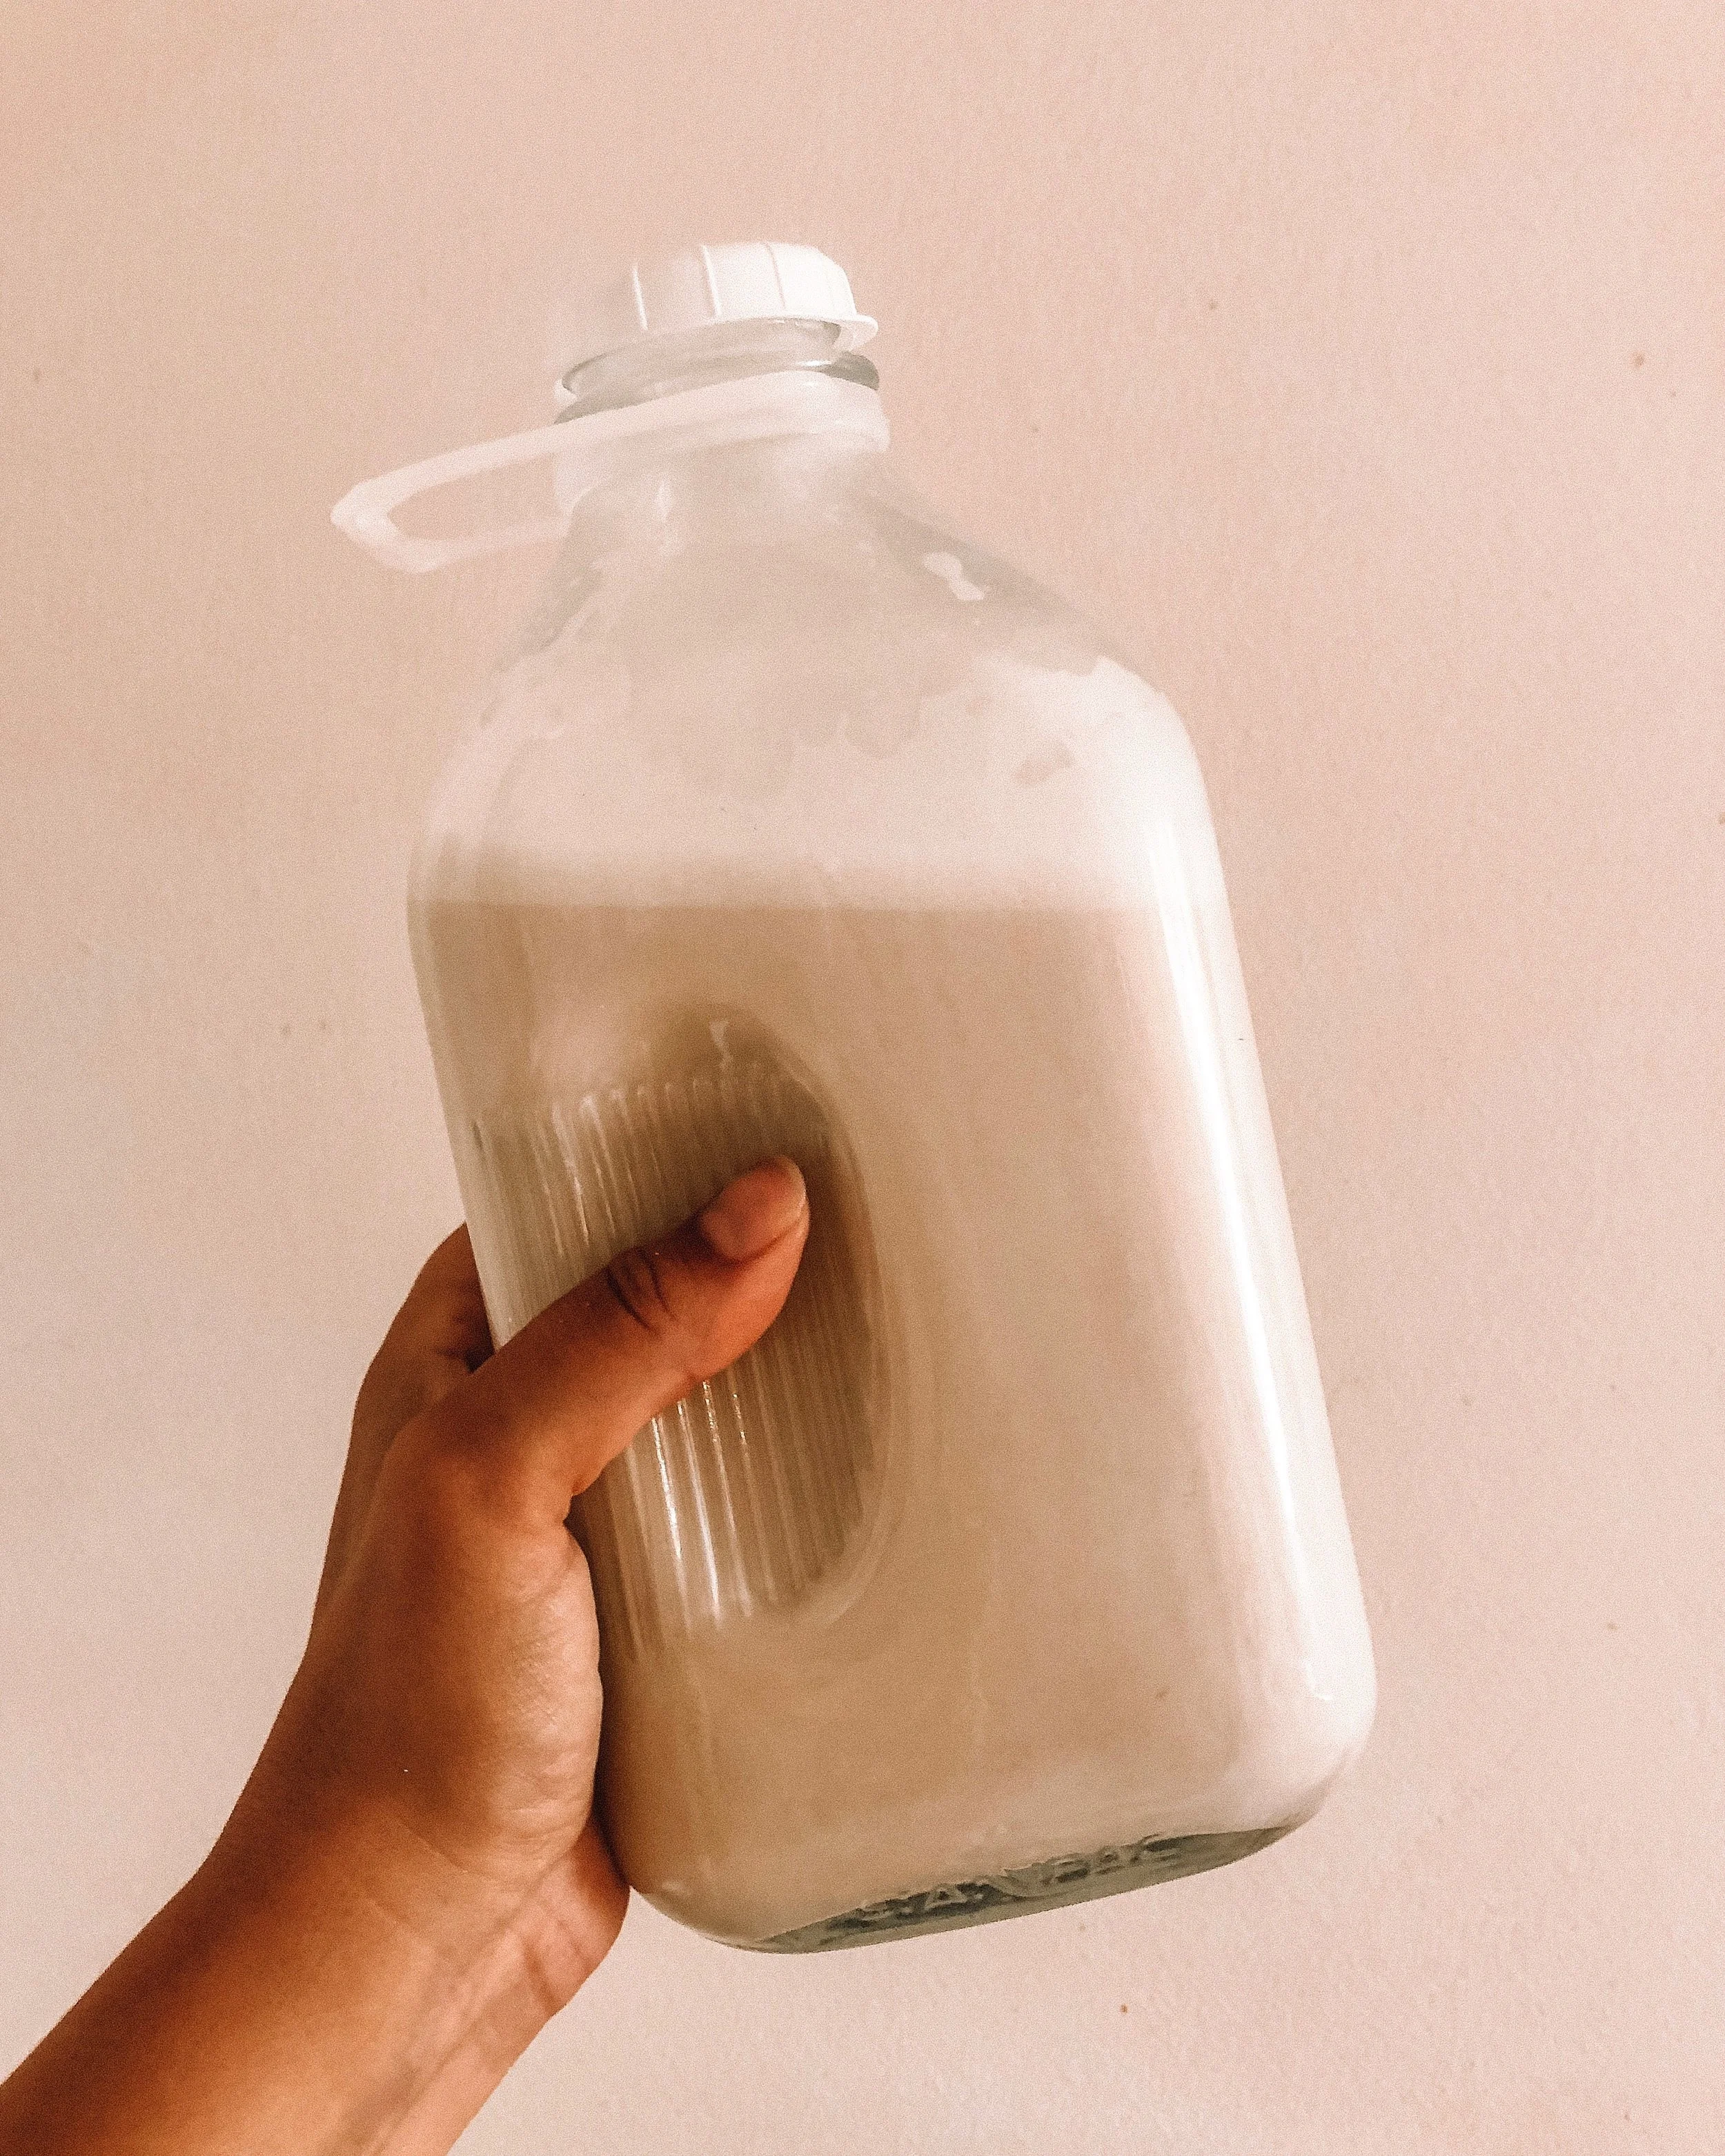
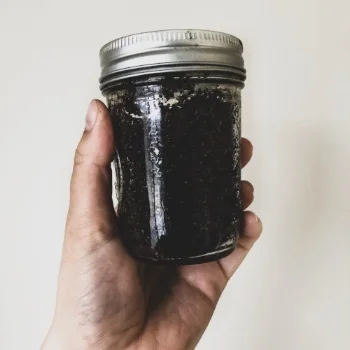
Terra Cotta Hurricane Candle Holder

My last spray paint thrift flip, I had this huge clear glass hurricane glass vase laying around for years, not knowing what to use it for. I decided to try the Terra Cotta spray paint, fill it with coffee beans, and use it as a way to turn a candle into a statement piece for fall. I love that when the candle warms, it makes the coffee beans smell stronger. I’m excited to use this piece from season to season, changing up what’s inside for different holidays!

diy thrift flip home decor candle terra cotta
diy thrift flip home decor terra cotta spray paint

Which thrift flip is your favorite? Have you been inspired to spray paint something?! haha Let me know in the comments below.

Sending you cozy vibes,

Andrea

Fall Makeup Look feat. NARS Extreme Effects Eyeshadow Palette

Yesterday, on my IGTV I shared a video showing you how I used the new Nars Extreme Effects Eyeshadow Palette to create a beautiful warm fall look. If you missed you, you can watch the video below. Below that I’m sharing links to all of the products that I mentioned and used in this video. Thanks for all of the great feedback on this video! I’ll keep making more like this.

Disclosure: Some of the above links are Affiliate links meaning that I make a commission off the purchase of the product through my link. This does not affect the price of the product on your end. I would never recommend a product that I didn't love and all opinions are my own. I am thankful for you choosing to purchase through my links, as it helps me create more content for Andrea Fontana Beauty

Five Minute Miracle Shower

Friends. I’m about to change your life. This is a routine I started doing a while ago because I don’t always feel like dealing with a bath and sometimes don’t have the time. I find that as I age, I am trying to create small routines that can center, ground, and relax me in a short amount of time. Enter the five minute miracle shower. This is perfect if you don’t have a bathtub, don’t like baths, or simply don’t have the time! I personally like to do these miracle showers on days when I’m not washing my hair because my showers are really short and this doesn’t add in a lot of time. This is extra amazing if you are a night shower-er and can use it to calm down before bed!

Follow these steps and I guarantee you will get out feeling calmer and more centered:

  1. Turn off the lights.

    No candles. No lights. If you have a window this may be a little difficult if you don’t have curtains but try to make the room as dark as possible. I like to crack my bathroom door so I have the smallest amount of hallway light coming through. If you want to turn on some spa music, white noise, waves, etc…feel free!

  2. Get in and sit on the shower floor.

    However is comfortable works, just make sure you are facing away from the water. I like to adjust the shower head and position myself so that the water is hitting my neck and trickling onto my back.

  3. Take 3-5 deep breaths.

    I’m talking the best deep breaths you’ve ever taken. Work on focusing your breathing and breathe a little deeper with each one.

  4. Facial Massage (30 secs to 1 min)

    Make sure your face is a little damp and using your ring and middle fingers, move in slow circles starting at the center of your chin and moving upward and outward across your jawline. Once you reach your ears, move back to the center of your face just above where you started the previous line of circles. Move outward and upward again slowly, repeating this process until you reach your forehead.

  5. Pressure Points (30 secs to 1 min)

    Using your same ring and middle fingers, make even smaller circles, applying pressure to your temples, starting of your brows (orbital bone), and under your cheek bones right where you would contour. Don’t actually lift your fingers off your face while making the circular motion.

  6. Back (1 min)

    Lean forward slowly letting the water massage hit your entire back. Once you reach the lower back slowly lean back into your initial sitting position.

  7. Neck circles (1 min)

    Slowly circle your neck a few times in a circle, letting the water pressure hit your head and massage your scalp. Do the same amount in the opposite direction.

  8. Take 3-5 deep breaths.

    Try to take even slower deep breaths than the beginning and repeat this whole process if you have more time and need more calming.

Remember, this was a practice I invented myself that was born out of what feels good. If you find that something feels good add it to your routine. Leave me a comment below if you try this and let me know what you think!

Have a calm and centered night,

Andrea

Maybelline 'Soda Pop' Palette Makeup Tutorial Video

I am finally back with another YouTube video for you guys! My bridal season this fall has been amazing, but so incredibly busy, which means I’ve been neglecting my YouTube channel. I’m finally starting to feel inspired again however, so I sat down and filmed this really easy, warm & purple fall eyeshadow look for you using the Maybelline ‘Soda Pop’ palette. Let me know in the comments below if you have tried this or the Lemonade palette by Maybelline!

As usual, the products I’ve used are listed below the video. Let me know if you like this style of video and want to see more! I have a lot of fun creating these for you!

Products Used in order (Click on products for Links):

Weleda Skin Food

NYX Honey Dew Me Up Primer

MAKE UP FOR EVER Ultra HD Foundation

Maybelline Master Strobing Liquid Illuminating Highlighter in Light/Iridescent

IT Cosmetics Airbrush Buffing Foundation Brush

Maybelline Soda Pop Eyeshadow Palette

Real Techniques Deluxe Crease Eyeshadow Brush Set

MAC Pro Longwear Concealer NC20

Beauty Blender

RCMA No Color Powder

Fenty Beauty Match Stix Matte Skinstick in Amber

Milani Baked Blush in Luminoso

Rituel de Fille Rare Light Luminizer in Anthelion

L’Oreal Voluminous Lash Boosting Conditioning Primer Mascara

L’Oreal Voluminous Voluminous Original Carbon Black Mascara

L’Oreal Lipstick in 008 Fairly Nude (Apparently they don’t make this anymore…sorry!)

Hope you enjoyed this video and have the best weekend,

Andrea

Disclosure: Amazon links are Amazon Affiliate links meaning that I make a commission off the purchase of the product through my link. I would never recommend a product that I didn't love and all opinions are my own. I am thankful for you choosing to purchase through my links, as it helps me create more content for Andrea Fontana Beauty.

How to Touch Your Face

I know the title of this post might seem strange but hear me out. Think about how many times in your life you will remove makeup or do your skincare routine...A LOT right? We read post after post about different products people recommend but have you really ever learned how to use your hands differently depending on what step you're on? If you have, great! I'm proud! ...But if you don't, this post is for you. I'll be sharing my tips on how to correctly touch your face. 

When removing makeup:

This depends on how you remove your makeup. My main concern is with your eyes. When removing eye makeup, always use your ring and middle fingers to follow the shape of your eyelashes and move down and outward away from your tear ducts. Don't EVER move in circular motions rubbing your eyes. You can get product in your eyes that causes unnecessary irritation. If you need to clean up under the lower lash line, always use your ring fingers, as they are the weakest of your fingers and will do the least amount of damage. Instead of rubbing harder, find a good makeup remover that will dissolve makeup easily so you don't have to apply as much pressure to your face. 

When cleansing:

Cleansing is a really important step that you do often so it's important to understand how to do it correctly. You always want to make sure that you are massaging your cleanser in with your ring and middle fingers. You will have plenty of control, but you won't apply as much pressure as you would with your index fingers. Another key part is that you are massaging in small circles in an upward and outward motion. Imagine you were to draw a line down the front of your face. Move in circles, away from this line in an outward and upward direction. When you are cleansing your face, you should not be scrubbing your eyes either. Depending on your cleanser (i.e. if it has AHA's, BHA's, etc) it might not belong anywhere near your eyes. So be sure to remove your eye makeup and rinse your eye area before hand.  

When applying toners:

Toning is a vital step in skincare routines and can be done in a few different ways, and ultimately depends on what step you're on and what type of toner you are using. If you are hydrating your skin with a rose toner for example, I recommend spray toning. Cover your eyes and mist the toner all over your face a couple times. If your toner cannot be sprayed, apply a little to a cotton pad and gently swipe it from the center of your face in a…you guessed it…upward and outward motion! Make sure not to press too firmly or tug at your skin.

When applying serums & moisturizers:

Depending on the product, the texture can vary, but you should use the same method of application unless specified by the product. Put a few drops or one pump in the upper 2/3 of your fingers of one hand. Using your other hand, gently swirl the product around and using your fingers, press into the your facial skin. Do not pull on or rub the skin, but continue the pressing motion all over the face.

Remember:

Don’t forget that drying off your face when cleansing is equally important. Make sure you are always using a separate towel, different from the hand towel for drying your hands. Bacteria can harbor in hand towels so it’s important to keep the face and hand towels separate. Of course make sure you change them at 1-2 times a week, or more if you are dealing with acne.

Let me know if you found this topic helpful! If you have any tips on how to touch your face when applying products and doing your skincare routine.

Have a beautiful day,

Andrea

Easy Wedding Guest Makeup Look

I haven't done a step by step picture tutorial in a while for you guys and since it's wedding season, I thought I'd bring you one that is so easy! You only need 3 eyeshadows and a black eyeliner pencil and you're good to go. The technique can be done with WHATEVER colored eyeshadow you want. I used a brown one with copper sparkles but you can do a bright color like teal or maybe navy; both of which I think would be stunning. The possibilities are endless, so practice the technique and get to experimenting! I like how it gives a darker, soft and smokey look which is perfect if you have weddings to attend late summer/early fall! I used three shadows from the Anastasia Beverly Hills Artist Palette but you can use whatever you want! You'll just need a matte shade close to your skin tone, your main color, and a shimmering/metallic shade to jazz it up a bit! The brushes I used were simple and few too; one fluffy blending brush and one pencil brush! That's it! Now let's get started...

Before I began, I prepped my eyelid with some leftover concealer. Then I used the skin tone shade (Buttery) and put it all over my lid using the fluffy blending brush. I also added a thin line of black eyeliner.

Before I began, I prepped my eyelid with some leftover concealer. Then I used the skin tone shade (Buttery) and put it all over my lid using the fluffy blending brush. I also added a thin line of black eyeliner.

Next, I applied my main shade (Baby I'm a Star) with the pencil brush all over the eyeliner and blended it out slightly. Then I took my blending brush and blended the line out a little bit. The blending causes the pigment and shimmer to be lost so a…

Next, I applied my main shade (Baby I'm a Star) with the pencil brush all over the eyeliner and blended it out slightly. Then I took my blending brush and blended the line out a little bit. The blending causes the pigment and shimmer to be lost so add a little more shadow.

Keep adding more shadow and blending it out, until you have your desired intensity and smokiness. Lastly, I added the same main color on the outer 2/3 of my lower lash line and blended it out, and popped a little of my metallic shade (Beigely) to th…

Keep adding more shadow and blending it out, until you have your desired intensity and smokiness. Lastly, I added the same main color on the outer 2/3 of my lower lash line and blended it out, and popped a little of my metallic shade (Beigely) to the inner corner. 

FullSizeRender.jpg

Here are the shades that I used from the Anastasia Beverly Hills Artist Palette just for reference (the camera doesn't quite pickup the copper glitter in Baby I'm a Star but that's what makes this color fun). Remember thought! You can use whatever colors you want! I'm just trying to teach you the technique so you can create a perfect simple, but smokey eye makeup look that you can wear to any special nighttime event (or wear it in the daytime! I'm not here to judge)!

And now for the final look! I just finished the look off with one of my favorite mascaras (Loreal Voluminous Lash Paradise) and the eye look was complete! All other makeup details are listed below in the photo's caption!

Makeup Details: Foundation - Makeup Forever HD; Concealer - MAC Cosmetics Pro Longwear; Contour/Bronze - Fenty Beauty Match stix in Amber; Blush - Sephora Collection Colorful Face Powder in 007 Too Hot; Highlight - Milk Makeup Holographic Stick in M…

Makeup Details: Foundation - Makeup Forever HD; Concealer - MAC Cosmetics Pro Longwear; Contour/Bronze - Fenty Beauty Match stix in Amber; Blush - Sephora Collection Colorful Face Powder in 007 Too Hot; Highlight - Milk Makeup Holographic Stick in Mars; Lips - Nothing!, Brows - Nothing!

What do you guys think? Would you wear this look to the next wedding you need to attend? Leave a comment below and let me know what you think! And if you ever recreate it, send me a photo or tag me with #andreafontanabeauty on Instagram so I can see it!

Have a great weekend,

Andrea

My 'Party's Over' Detox Skin Tips

Welcome back! If you don't follow me on Instagram (...but like why aren't you?) then you wouldn't know that I spent 5 days last week in Chicago working a wedding and then frolicking with friends in the city. This meant more gluten than I normally eat, little sleep, wine instead of water, and all sorts of anti-clear skin habits. Am I paying for it? You betcha. Was it worth it? HELL YES! Because spending quality time with my best friends is priceless and I have the tricks to get my skin back to where I want it once the party's over. 

Today I'm sharing what I've been doing to get my skin back to where I want it & my body feeling normal again. These are my "Party's Over" Detox Skin Tips. Whether you're back from vacation or just celebrated your birthday week (...or month haha) I hope you find these tips helpful to getting back on track with your skin & body.

1. Get rid of all the guilt. Do not spend one second stressed about the fact that you had 2 donuts instead of 1. We've all been there. We've all done it. But that's the point. It's done and all you can do is accept that you cannot change it and get back on track now.

2. Cut out your trigger foods for a week. The first thing I had to do when I got back was get back to eating gluten-free every meal. I usually had one or two meals with gluten when I was in Chicago and since it affects my skin so much, I have cut them out for a week to boost my clear skin and feel better. Whatever your trigger food may be, skip it for a few days or a week and it'll help you to start feeling like yourself again.

3. Do an At Home Detox Facial: Chances are you were a little more lax with your skincare routine when on vacation so it's time to get your skin back into shape. This is especially important for me because my diet caused some serious texture issues and breakouts. I cannot recommend this enough. Here's how I do it.

  1. Start by cleansing your face & toning. I'm currently using this Juice Beauty Green Apple Brightening Gel Cleanser, but if you don't have it try to go for one with a gentle chemical exfoliation to help get rid of any congestion. This cleanser was in my July Favorites; click here to read why I liked it. 
  2. 1st Mask: Chemical exfoliation; I like the Herbivore Botanicals Blue Tansy Mask because it's great for blemishes. Leave on for 15-20 min until dry and wash off & tone again.
  3. 2nd Mask: Detox and clarifying; I prefer the Aztec Healing Bentonite Clay because it boosts circulation and detoxifies so well! Click here to read my post on this mask. The clay comes as powder and I like to mix it with apple cider vinegar or water and add a few drops of tea tree oil until it forms a thin paste. I apply it and leave it on for 30-45 min depending on how long it takes to dry/how long I can handle it. It tingles! Rinse and tone again.
  4. 3rd Mask: Hydrate & Nourish; I love the Farmacy Honey Potion Renewing Anti-Oxidant Hydration Mask to hydrate and heal my skin after I've neglected it. It warms on contact and is such a comforting and nourishing experience. Leave this one on for about 15 minutes and have a cup of tea. Rinse off, tone, and apply your normal spot treatments & serums. 
  5. Lastly it's time to re-hydrate your skin due to your preference of wine over water. I like to throw on my Laneige Water Sleeping Mask in place of my moisturizer so I can really benefit from all the hyaluronic acid and feel hydrated when I wake up.

4. Try reducing your caffeine intake. I know what you're probably thinking. Wait, I need MORE coffee to recover from a great time than less, but trust me. Your skin and your body will adapt better with less caffeine. Try sleeping more instead! Crazy I know...

Go ahead bookmark this post for easy access next time you have a girls night out, staycation, or simply need weekend recovery. If you're like me, you're not 21 anymore and can use the tips to getting back on track. Maybe you'll feel a little less stressed about skipping your routine when it's time to simply have fun!

Have a great week,

Andrea

How I make Almond Milk/Flour:

This post has been so highly requested and I'm happy to finally write it for you. After doing my elimination diet a few months ago and feeling what it felt like to be eating 100% unprocessed, I was hooked. I've always had the belief that life is about balance in many aspects. I would never want to deprive myself of the foods I love but also think there is an alternative to eating heavily processed treats. I have kind of always operated on the idea that if I can make it myself I'm allowed to eat it.

IMG_4222.JPG

Almond milk isn't necessarily bad for you, but when you buy it in the stores it unfortunately has to have stabilizers and other ingredients that keep it fresh for you to enjoy at home. Making almond milk eliminates all of this processing and tastes SO MUCH BETTER. Plus, since going gluten free I like to have almond meal (aka flour) on hand and it's expensive! Making your own almond milk yields the milk, but also about 1 cup of almond pulp that you can easily turn into meal! This means it's a zero waste process and will save you money, especially if you use almond meal on a regular basis! Today I'm going to take you through how I make my almond milk and turn the pulp into meal!

First let's go over what you will need for this process:
- 1 cup of almonds (I buy mine in a big bag at Costco)
- 7 cups of water
- Vanilla or salt if wanted
- High speed blender or food processor (I use a ninja) --> Here's the one I have and LOVE (Side note: I took FOREVER to decide on a blender and this is the one I went with. I've had it for over a year and use it constantly. I can't recommend it enough if you're looking for a high quality blender but don't want to shell out the money for a Vitamix)
- Glass container to store milk up to 3 or 4 days --> I purchased this one from Amazon
- Nut Milk Bag --> I purchased this Nylon 2-pack from Amazon.

1. You'll need to soak the almonds for at least 4 hours (I usually just do it overnight) in order to soften them and make them easy to blend.

2. Empty the water that the almonds have been soaking in and add the cup of softened almonds, 7 cups of water and a splash of vanilla and sprinkle of salt to the blender. I have made it with no salt and vanilla and it was great too! Choice is up to you. If you're used to unsweetened original almond milk, leave it out!

3. Blend for 2 minutes on a high speed.

4. Pour your blended mixture through the nut bag into a bowl and squeeze all of the liquid out with your hands! I love the nylon ones I purchased from Amazon because they are super easy to hand wash and keep clean (I also use them to strain my kombucha!)

5. Store in your glass container for up to 4 days!

YES It's really that easy! Now for the almond meal:

1. Preheat your oven to 100 or 150 degrees.

2. Spread your almond pulp onto a baking sheet and break up all of the clumps with your fingers. The more liquid you squeeze out the easier this will be.

3. Bake for 1-1.5 hours until the almond meal is dry, checking on it every 15-20 min to make sure it's drying out evenly. 

4. If your blender hasn't ground it fine enough, you can put it back through the food processor, blender or even a coffee grinder to make it finer!


One of the cool things about making your own almond milk is that you can flavor it however you want! I cannot wait to add turmeric, cinnamon, and more to my almond milk in the fall to make yummy drinks (Thanks for the suggestion Detroit Wifestyles!) 

Have you ever made your own nut milk? What kinds of combinations do you do? Leave a comment below and let me know!

As always, have a beautiful day!

-Andrea

Disclosure: Amazon links are Amazon Affiliate links meaning that I make a commission off the purchase of the product through my link. I would never recommend a product that I didn't love and all opinions are my own. I am thankful for you choosing to purchase through my links, as it helps me create more content for Andrea Fontana Beauty.

Kim Kardashian Met Gala Makeup Tutorial Video

I'm back with another YouTube video! This time it's a tutorial showing how to create this stunning look that Kim wore to the Met Gala last week. I love the shape of the eye shadow and how dramatic it is! Remember you can use brown or other colors to make it not as dramatic if you want. 

Comment below if you want me to recreate a specific look for you! I had fun making this for you guys. 

My birthday is tomorrow and I would really love for you to Subscribe to my Youtube Channel if you haven't already as a way to wish me happy birthday ;)

Hope you are having a beautiful week,

Andrea

Top 5 Tips for Getting Your Dream Brows (My Brow Secrets)

Welcome back!

Today I am sharing my Brow Secrets. Yes you read that right. I am sharing my Top 5 Tips to helping you get your dream brows. If you want to reshape or regrow & see how I fill in brows to be super natural but full looking, this video is a must watch!

I hope you have a beautiful weekend! I'm off to kick off bridal season with a huge wedding tomorrow!

Enjoy,

Andrea

First Impressions Video (Ulta/Sephora Haul Proucts)

Last Monday I shared the products I picked up from the Ulta and Sephora spring sales and thought it'd be fun if I filmed a video trying the products I picked up for myself (not my kit). I really loved the look that came out of it! You'll have to watch below to see which products I loved!

I was honestly a little shocked that I picked so many products that I LOVED! I will say though this probably comes from years of experience swatching products and testing things. I can pretty much tell by a formula or shade if I'm going to like it. Sometimes I'm still surprised though and some things might not work out as well as I expect. 

Comment below which palette you want me to do 10 looks with!

Have a wonderful weekend!

Products Mentioned:
Weleda Skin Food *** https://amzn.to/2I4tSXS
IT Cosmetics CC Cream in Light
Maybelline Master Liquid Strobe Cream in Light/Iridescent
MAC Cosmetics Pro Longwear Concealer
Laura Mercier Universal Setting Powder
Fenty Beauty Matchstix in Amber
Benefit Hoola Bronzer Sephora Collection Blush in Too Hot!
Milk Makeup Holographic Stick in Mars
MAC Pro Longwear Paint Pot in Soft Ochre
Glossier Boy Brow in Black *** (10% off your first order) http://bff.glossier.com/hWksm 
Fenty Beauty Mini Matchstix in Sinamon
Morphe 9B Bronzed Babe Palette
Loreal Voluminous Lash Paradies Mascara
NARS Powermatte Lip Pigment in Walk This Way

Make Your Own Chemical-Free Body Scrub

IMG_2812.JPG

I have a really great body scrub currently in my bathroom that I love and while reading the ingredients I realized I could very easily make a similar type of body scrub with ingredients from my pantry. This got me to thinking that I might as well make it for you guys and share with you how I made it. 

The ingredients you'll need are few and you can edit this recipe as much as you want and create your own unique scrub.

You will need:
- Coffee grounds (I used organic french vanilla from TJ's because I love how they smell)
- Coconut oil (Again I used organic unrefined so it still has the coconut smell)
- Brown sugar (you could use granulated white sugar but I like how soft brown sugar is)
- Essential Oils (I used peppermint to make my scrub SMELL LIKE A THIN MINT!)
- Some sort of container (I used a mason jar with a screw top lid)

Now the exact amounts you use will be completely dependent on how big your container is and the consistency that you like. I personally like my scrubs to be wet but really crumbly so that I get a good exfoliation (REMEMBER use these scrubs on wet skin only and NEVER on your face). 

FullSizeRender.jpg

In my jar I mixed 5 tablespoons of coffee grounds with 5 tablespoons of brown sugar. I mashed them together to make sure that they were evenly mixed and then added 1 tablespoon of melted coconut oil. Next, I added about 10 drops of peppermint essential oil and when I smelled it I WAS IN HEAVEN. Thin mint in ajar. I cannot wait to smear this all over my body tomorrow when I shower.

If you are looking for a chemical free body scrub, this is a great way to make your own! The coffee is stimulating due to the caffeine and will help with circulation. The brown sugar will exfoliate all of your dead winter skin cells off, and the coconut oil is great for moisturizing your skin!

If you make a scrub and use different oils or measurements be sure to leave a comment below and let me know what concoctions you create!! I honestly don't think I'll ever buy body scrubs again!

FullSizeRender.jpg

Have a beautiful night,

Andrea