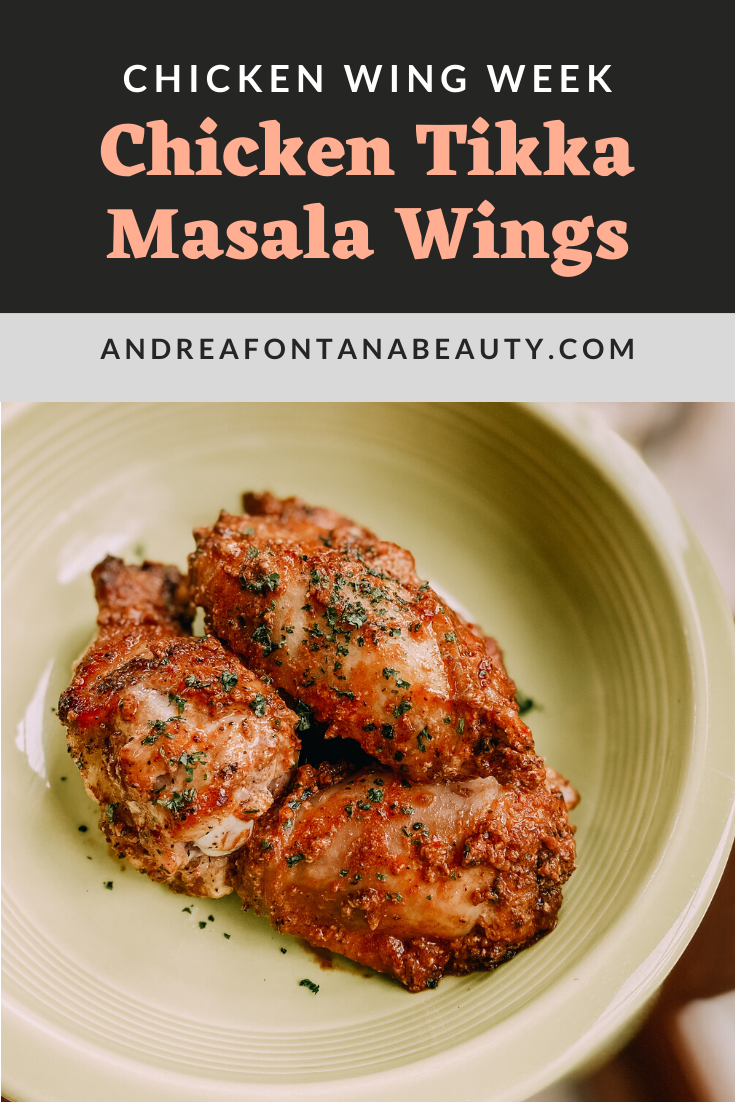
Chicken Wing Week: Day 4 - Chicken Tikka Masala Wings

Chicken Tikka Masala is probably Mikey’s favorite thing that I make. He asks for it every week, so I thought why not get creative and make the same magical spice combinations in wing form?

chicken tikka masala wings

Chicken Tikka Masala Wings

This recipe makes enough for about 24 wings!

Ingredients:

Marinade

  • 1 cup plain Greek yogurt

  • 1 TB lemon juice

  • 1 TB garam masala powder

  • 2 tsp ground black pepper

Other Ingredients

  • about 2 dozen traditional bone-in chicken wings (about 4 #)

  • 2 TB Avocado Oil

  • 3 TB butter

  • 1 TB minced garlic

  • 1/4 cup tomato paste

  • 1/2 cup half n half, heavy cream, or full fat coconut milk

  • 4 tsp garam masala

  • 1 tsp paprika

  • 1/2 tsp salt

  • Helpful tools: wire rack that fits inside your baking sheet, tongs, aluminum foil, and a meat thermometer.

Directions:

  1. In a large mixing bowl, mix all of your marinade ingredients. Add your wings and coat them evenly. Cover your bowl and put in the refrigerator to marinate for 30-60 minutes. NOTE: I like to cover use a bowl that has a lid (i.e. Pyrex) so that I can shake the wings up a bit to coat them better.

  2. Remove your wings from the refrigerator and preheat your oven to 425 degrees F. Cover your baking sheet with a layer of aluminum foil and place your wire rack on top. NOTE: If you don’t have a wire rack, that’s ok too! You’ll just need to flip your wings half way through the baking time. The wire rack allows for better air circulation and crispier, evenly cooked wings.

  3. Heat a big soup pot or dutch oven to medium-high heat, then add your avocado oil. Using your tongs, place some of your wings skin side down, into the pan. Hearing a sizzle is VERY important at this step. If you don’t hear a good sizzle, your pan isn’t warm enough yet and you won’t get a good sear to lock in the juices. It’s also important not to over crowd your pan because then you will steam your wings instead of searing them. Make sure they aren’t touching. You will most likely need to do this step in a couple batches depending on the size of your pot and amount of wings you are making.

  4. Sear the chicken wings for about 3 minutes until golden brown, then flip and repeat on the other side. Once both sides are seared nicely, use your tongs to remove the wings and place on the wire rack, that is on top of your baking sheet and repeat the process until all of your wings are seared and on your wire rack.

  5. Bake in the center rack of the oven for 25 minutes at 425 degrees F. If you don’t have the wire rack, make sure you flip the wings halfway through this 25 minute cooking time.

  6. While the wings are baking, it’s time to make your chicken tikka masala sauce to coat your wings! Reduce the heat of your soup pot to medium heat and add 2 TB of butter. Once melted, add your minced garlic and saute until fragrant (about 30-60 seconds).

  7. Add your tomato paste, half and half, and water and mix well until combined. Add 4 tsp garam masala, paprika, and salt. Allow to come to a simmer, reduce heat a little to medium-low and let cook until your wings are done baking.

  8. Remove the wings from the oven and turn the oven onto broil. This is the part that is magical for the crispy skin, but you must keep a close eye on it since everyone’s oven is different, and broiling happens quickly. In my oven, I broil for 2 minutes on each side, with the wings on the top rack. They should be close to the broiler but not touching ANY flames. Therefore, they broil for 4 minutes total. NOTE: It’s important to measure the temperature of your wings to make sure they are cooked throughout and at least 165 degrees F. If you prefer a drier wing, you can take them up to 175-180 degrees F. This part you can adapt to your preferences.

  9. While wings are broiling, add your last TB of butter to the sauce and let melt and mix in evenly.

  10. Once your wings are cooked to your preference, toss them in a couple TB of sauce to coat and serve. I like to serve with a little chopped cilantro on top but that is optional.

I hope you have been enjoying Chicken Wing Week so far! We still have THREE more recipes coming at you! Head to Margie’s blog tomorrow <<click here>> because she’s up next and you don’t want to miss her next creation!

Happy Wednesday,

Andrea

Tips for Hosting an Easy Dinner Party

It is no secret that I love to cook. Feeding people is my love language and my house will always be open to transform empty bellies into full and happy ones. I hosted a dinner party the other night and when I shared a few snippets of it on Instagram, a few of you reached out and asked me to share my tips on how to make hosting a dinner party easier. I am proud to say that it was amazing and I was able to create a dinner party magic in less than 2 hours. You read that right. I started cooking/setting up around 4:45 and my guests walked through the front door at 6:30. So how did I do it? I will show you how.

Planning:

In order to whip something like this up so quickly, you have to plan. I did a few major things that made this night super easy for me:

  1. I planned my menu out at least a week in advance and checked with all of my guests that they were fans of foods that not everyone loves, i.e., mushrooms in this case. I chose dishes that were not super detailed and needy, so that I could be cooking multiple things at once (I’ll get more into this in a little bit).

  2. I grocery shopped the night before and left everything out on my counter that wasn’t perishable, and put everything together in the fridge that I’d need. This allows you to pull everything out and not go searching through your cupboards/fridge trying to find each ingredient. You’d be surprised how much time you can save when you don’t have to keep walking to the pantry.

  3. I made a rough timeline of what I wanted to cook when. For example, my appetizer was something that needed to sit and stew a little, so I started this first. This allowed me to not have to think about what I needed to do next because it was all written down for me. I just check things off my list.

Decor:

When it comes to decor, I love to have things like books, place mats, candles and such all around. Instead of getting extra decor out to decorate my table, I just used what was already sitting out around me. I walked around my living room and grabbed things like pumpkins and candle sticks, and brought them to my table. I have a little storage cupboard by my front door, who’s top houses my keys and such, but inside I actually hide away all of my entertaining dishes, so that when it’s time to bring them out, they are all in one spot.

Personally, I find a rustic and cozy atmosphere to be the most appealing at a dinner party, so don’t get to stressed about things matching. In case you didn’t notice in the pictures above, I only had four of the gray and white tassel place mats, so I just grabbed a gray and white striped tea towel from my kitchen and added it for my 5th place setting. I’m not big on patterns matching perfectly but I generally always buy my entertaining dishes in neutral colors so that they always go together well enough.

Also, don’t be afraid to get out of the box and get creative with items that might not normally be used on the table. I like playing with height, so I stacked some big and really old coffee table books about Italian food right in the center of the table and placed my bowls for olives on them.

Cooking:

Now for the main portion of the planning and why this dinner party was so easy, did I mention everything was Gluten and Dairy Free? Here are the things I did to make my life easy:

  1. I chose recipes that didn’t need to be babysat, but would still wow my guests.

  2. I baked my pumpkin spice cake the morning of the dinner party at 6:30 am and did yoga while it was in the oven. BAM Kill two birds with one stone people. Also, you will automatically fill your house with the aroma of dessert all day which is a great way to start off prepping for a dinner party!

  3. My appetizer was a slow cooked tomato and garlic spread for crackers (recipe to come in a special announcement). I also set out two kinds of olives and would normally do cheese as well if the crowd wasn’t dairy-free.

  4. I also made a super easy and light mushroom soup because once the onions and mushrooms are sauteed and seasoned, it literally sits on the corner burner and stews for a little while, which means you can do other stuff! (Recipe also coming in that super exciting announcement…haha)!

  5. My entree was a homemade vodka sauce (I swear by this recipe from Rachael Ray) over brown rice and red lentil pastas. Can you guess why I picked it? You’re right, it’s super quick and easy and only stews on the stove for like 20 minutes! But you’re actually making a homemade sauce so it tastes like heaven.

If there is one piece of advice I can give you for hosting a dinner party it’s this….CLEAN YOUR DISHES AS YOU GO! There is nothing worse than having the world’s best dinner party full of laughter and happy tummies and then everyone walks out the door and you have a WHOLE kitchen to clean and you get depressed and want to ignore it and walk straight to your bedroom to sleep instead. So I always do this… While I’m cooking I wash every dish I can at every chance I get. I’ll even start placing food in their serving plates so that I can wash the pots they were cooked in. I even go as far as to wipe up my counters and stove before anyone arrives. This way the only things left to clean afterwards are the dishes you eat on and the serving plates. You can quickly rinse all the food off so they are mostly clean, load them in the dishwasher or leave them in the sink for the next morning and get to sleep instead.

I love dinner parties because of how relaxed and enjoyable they are. If you plan ahead and do certain tricks, you can make it enjoyable to host as well. If you have any tips or recipes you love for hosting dinner parties, be sure to comment below! I hope you enjoyed this post and remember; the details aren’t necessarily the most important part of the dinner. The food is a vehicle and excuse to experience the laughs, the stories, and the love among your amazing guests.

Happy hosting!

Andrea