Dre Does Top 5 Brow Tips

So you probably know by now that I am an Arch Expert for Benefit Cosmetics. 95% of my job is either waxing and shaping brows or helping women (and men too) learn how to fill them in. With that being said, I've seen a lot of brows and fixed a lot of them. I absolutely love brows and think they are the most important thing about your face. 

If you want to look more put together without looking like you're wearing more makeup, give some attention to your brows. They frame your face and when done right, can be the thing that makes you look so much better that people can't quite put their fingers on. So I bring you my Top 5 a Brow Tips; the things that are crucial and most important when filling, waxing, etc.

1. Grow them out! If you are unhappy with the way your brows look you need to grow them out. I'm talking at least a month of no touching, tweezing, or anything! Even on that hair that you're positive would get removed anyways! You can't expect your esthetician, hairstylist or who ever does your brows, to change much, if you look like you just had them cleaned up. 

2. Go to a professional and get them waxed. If able, go to a Benefit Brow Bar in your area because you will not be sorry. The Benefit Brow wax is an experience; you get to know what your brows will look like before we remove the hair, we conceal you so you aren't red, and most importantly, we can teach you how to fill them in CORRECTLY! Now I'm not just saying this because I wax brows for a living but because I have never met a pair of brows that I can't help. Even if you think there is no hope for your brows and there is nothing to wax, go talk to an Arch Expert at least. Even if you need to fill them in to look like you have something, let us do the hard work by shaping your brows so you have the perfect blueprint to fill them in! It will make your life easier!

3. Bring inspiration. If you like a certain shape or arch bring a picture in. The biggest difficulty when it comes to brows is miscommunication. Clean up to you may mean something completely different and extremely thin to the person doing your brows. 

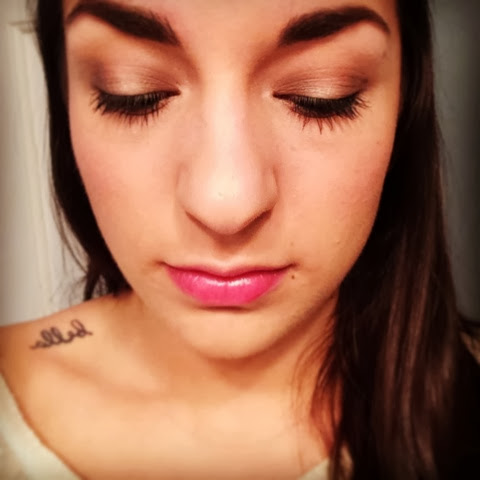
4. Look at the brows of the person doing yours! I can't emphasize this enough. The amount of women that have told me they shouldn't have had the last person who did their brows, do them because of the look of their own brows is crazy! If you don't like what they do with their own brows, don't trust them with yours! As an esthetician my brows are my biggest billboard and advertisement. Women have told me the first time that I do their brows that they trust me more because of how they like my brows. So don't let anyone touch your brows that you don't want to! Be observant. 

5. Fill them in. So many women are terrified to fill them in because they don't want to look like their grandma who uses a red pencil to draw thick lines where their brows used to be. Brow products have come a long way. There's new techniques and tools to help you. I personally haven't touched a brow pencil in a very long time because I prefer gels and wax/powder duos, so find what works best for you. Also accept that you may never have the fullest and thickest brows in the world. Yes, there are things to help them look fuller than they are naturally, but sometimes you have to sacrifice fullness if you want them to still look natural. 

I hope you enjoyed these tips! Let me know if you'd like to see my brow routine and how I fill in my brows both on natural and full makeup days! 

Have a beautiful day, 

Dre

*This tips and views are completely my own opinion and don't represent Benefit or Ulta. 

Dre Does a Shaving Routine for Sensitive Legs

I probably should have shared this in the beginning of the summer but since we shave our legs all year round this is something I'm always dealing with and you may be too!

I have extremely sensitive legs. It's something I've experienced ever since I started shaving in middle school. If I try to use any kind of shave gel, soap, or lotion during or after I shave, I get terrible a razor burn that's probably on the verge of a mini allergic reaction. Bumps and burning that sometimes make me think I'd rather just not have shaved at all! As an esthetician, I tried going the waxing route which for a while was amazing. No razor burn, my legs stayed smooth for longer and the hair was coming back looking much finer because you're seeing the tip of the hair versus the blunt middle of the hair shaft that a razor cuts at. However, the hair started coming back so fine that I was getting a huge amount of ingrown hairs on my shins due to the hair not being strong enough to break through the surface. So I was back to having bumps on my legs that no amount of exfoliation could prevent. So after 6 months of trying it I picked my razor back up and shaved my legs. 

I'm happy to report though that I think I've got it down to a science now. The right products and what exactly causes the problems. I figured I can't be the only person with this annoying smooth leg issue, so I'm here, ready to report what I've found gives me silky smooth legs! 


The Exfoliation: Since I cannot use a shaving cream or lotion, I have figured out a way to moisturize and smooth my legs without using one. I take a good moisturizing exfoliator (the one I show above is a shea butter sugar scrub from Tree Hut) and give my legs a good rub. I find that this moisturizes them enough to give me a good shave after but doesn't irritate anything because most of the product gets washed off before I shave. The sugar helps get rid of dead skin cells which will help with over all smoothness.

The Razor:  I have used all sorts of razors. Expensive ones with 500 blades, ones with the moisturizer all around the edges, and I find that the ones that are the best for my sensitive legs are the good old cheap BIC Silky Touch Disposable ones you see in the picture above. Normally they're in at least a 10 pack for $3 or $4 and they are good for a few shaves. Since they are so cheap, I don't mind only using each one a few times, which I think is also a secret to getting a close shave; I'm always using newer blades. No shave cream, just water.

The After-care: Now this is where I typically see the most irritation. My legs hate all lotions after I get out of the shower, so what I'll typically do is skip the lotion for a few hours. I find that the shea butter exoliator gives me enough hydration to last this time until my legs heal a little from the shaving. Then I'll add my favorite body butter later on which is usually either the Satsuma or Coconut Body Butter from The Body Shop.

So there you have it. This is my perfected shaving routine to give me smooth legs when dealing with high sensitivity! Let me know if you have any tricks and if you try this out!

Have a beautiful week,

Dre


Dre Does Tips on Summer Makeup

When it comes to makeup in the summer, I try to wear it as little as possible. However, there are some times when you need to look put together and going makeup-free is unavoidable. I'm here with my quick tips and alterations to my makeup routine that I use for the summer to make it either last longer or look more put together with less products.

1. Less is more. When I think of summer skin, I think of tanned, glowing beautiful skin. I'm generally happier with my skin in the summer so my philosophy behind summer makeup is different than what I would do in the winter. I want my natural tan and glow to shine through, so I like to use a lighter foundation with less coverage as a base and then I go in and spot conceal the areas that need more attention. This gives the skin a more natural look and ultimately helps your makeup hold up all day because you're using less products and those that are lighter. My theory is the less products you add, the less there are to melt off in the heat and humidity right? haha I will be doing this foundation routine later in the week so look out for it!

2. Change your focus. Summer is a wonderful time to experiment bold new makeup trends. My favorite is to try new lip colors because most of us can generally pull off more shades when we have a little extra color in our skin. If you want to go lighter on the skin and keep it more natural this is a great time to bring the focus to another area of your face. A dramatic cat-eye wing with a waterproof gel liner is a great way to bring drama to your makeup while using a product that is guaranteed to stay put and not budge in the summer.

3. Primers. Find yourself a great face primer and eye primer that work for your skin type. I personally love the Cover-FX Mattifying Primer with Anti-Acne Treatment (click here if you missed Monday's review on this awesome product). If you're oily or have acne prone skin, you need to check it out. For my eyes I love the classic Urban Decay Primer Potion in the original formula. Primers do a whole bunch of beneficial things but most importantly in regards to what we're discussing, they are going to give your makeup something to hold onto. You want to really lock in your makeup so it doesn't go anywhere and this is the first key product I recommend to get your makeup to stay and not crease.

4. Invest in a good setting spray. I recently purchased Urban Decay's Deslick Makeup Setting Spray to use on my brides for the summer because I had yet to try it. So far...I'm in love. Spray a setting spray after you are done with your makeup and it will help set everything, make it look seamless, and make it last longer. I especially like this one from Urban Decay because it helps with oil-control and has temperature-control technology that lowers the temperature of your makeup so it lasts longer. Pretty fancy huh? One quick additional tip is to spray your setting spray after your primer and before your foundation to give your foundation something extra to grab onto and to create basically a barrier that will keep you oil-free longer.

5. Set your liquid products. Make sure you have a good setting powder to set both your concealer and liquid foundation. You want to make sure that it is finely milled so it doesn't set it any fine lines and you if you're going to be around flash photography, stay away from HD powders. They are generally made of mostly silica which can give you a terrible white powder flashback in your pictures! Setting your liquid products will help absorb excess shine and oil and also lock in your makeup to make it last longer (bet you didn't see that one coming...haha). 

So there are some of my tips on doing your makeup in the summer! If you have any tips on summer makeup feel free to leave them below!

Have a beautiful day,

Dre

Dre Does A Necklace Trick

If you know me at all, you know that my brain is constantly going. I'm always thinking of new things and am a bit crazy at times but it just fuels my creative side...right...? Haha anyways I have this one area on my counter where I always throw my jewelry when I'm taking it off at night and too lazy to put it where it goes. Well one morning after I did this I noticed that my necklace was flipped over and the back of it looked like a completely different necklace but still looked good...? (Now you understand the crazy brain reference). Well this got me thinking. Geometric necklaces and shapes are huge right now in the statement necklace world, so I wonder what would happen if I just wore my necklaces turned around... Turns out they look pretty cute! I really like how I can have a huge statement with the normal patterned side of the necklace, but if I want to I can just flip it over and have a more subtle gold necklace that is still the same shape as the original necklace. So I recommend going through your statement necklaces. You might be surprised what you find! I've been honestly wearing my necklaces more on the plain gold sides instead of the original sides.

Here are some examples of the two necklaces I have been doing this most with!


Don't be afraid to look at jewelry, fashion, makeup, anything with an open mind. There are no rules and the only person who has to like what you're wearing is you! If you want to rock necklaces backwards do it! 

Have a beautiful day,

Dre

Dre Does Quick Tips on How to Make the Most of Your Wardrobe

As much as we try to wear everything in our closets, I think we can all admit sometimes we only gravitate towards some items. I have a few tips to help get the most out of everything you own.

1. Every time you wear an item from your closet flip the hanger around so it faces the opposite way. Every two weeks or even month, flip everything back to the same direction. This way you can easily keep track of what you've worn recently and the items that are being neglected. Then try really hard to put those items to good use and break them out! You might find things fit you different or look better than you remember! 

2. Reorganize your closet! This might seem like no brainer, but if you can't see everything your wardrobe has to offer you're more likely to stick to the same items. I have so many items that if I don't see them, I honestly sometimes forget all of the options I have. 

3. Take an evening to go through your closet and pre-plan outfits. You can even take pictures of combinations you like and keep them for when you're feeling uninspired or don't know what to wear. If you take the time to try everything on and see what works together you'll know when you're crunched for time what works and what doesn't. 

4. Think outside of the box! Just because you bought a certain item to wear a specific way, doesn't mean you have to. The best part about fashion is that there are no rules. There are so many great places to find inspiration now online so don't be afraid to look and try some new things! 

I hope these tips help! What are some ways you get the most out of what you already own? Let me know in a comment below. 

Have a beautiful day,

Dre

Dre Does Quick Tips

Some of my favorite posts to share are my quick tips. I love being able to share tricks I've discovered with you all! So here are two new ones for you:

1. This is an awesome trick I learned in school for getting hair out of your hairbrush. Simply tap it firmly bristle side down, against the palm of your hand. This will cause all if the hairs to gather at the tips of the bristles and make it easier to remove them. 

2. If you have a hard time getting your eyelashes to curl try heating your eyelash curler with your blow dryer for a few seconds. However, ALWAYS test the temperature before you use it to make sure you don't burn yourself! Think of it as a mini curling iron for your lashes!

I hope these help! Have a beautiful day,

Dre

Dre Does a Makeup of the Day


I posted this a sneak peek of this makeup look yesterday. I think it's the perfect Natural makeup look. It's also really quick and easy. I did my normal face routine, but I wanted to point out some key aspects of the look. First off, whenever I'm doing a super natural look I always make sure to fill in my brows. It's a simple way to give your face structure and make you look polished and put together without much makeup on. I use the color Faint (a medium to dark brown) from my Urban Decay Naked Basics palette and a small angled brush. Then I just set it with a clear mascara so my brows stay put and the color lasts longer. 

Next, I did all of the tips from yesterday's post on making your eyes look bigger and brighter. You can especially see how I defined my eyelids. I applied a Maybelline Color Tattoo cream shadow in Barely Branded (70) and then on top I used my Naked Basics palette again (I wasn't exaggerating in that post a couple of weeks ago about how much I loved it haha). I added the lightest shade Venus in the middle of my lids, added Faint in the inner and outer corners, and blended everything together nicely. That's it! Even though they're matte shadows, I love the glow it gives my eyes. They really pop and look bigger! 

All I did after this was apply my Rimmel Lash Accelerator mascara and add some Chapstick and I was done! I've listed all the products below to achieve this look. It's seriously my go-to easy makeup when I'm rushed and still want to look put together! 

Laura Geller Spackle Tinted Under Makeup Primer in Bronze
Covergirl Outlast Stay Fabulous 3 in 1 foundation in buff beige
Sonia Kashuk Hidden Agenda Concealer Palette in 07 light
NYX Wonder Pencil in 01 Light
tarte Amazonian Clay Bronzer in Park Avenue Princess
tarte Amazonian Clay 12 hour blush in treasured
tarte Amazonian Clay Highlighter in Champagne
Revlon Photoready Transulecent Face Powder
Maybelline 24 HR Color Tattoo Metal in Barley Branded
Urban Decay Naked Basics Eyeshadow Palette (colors Venus and Faint)
Maybelline Great Lash Mascara in Clear Transparent (for brows)
Rimmel Lash Accelorator Mascara in Extreme Black

Have a beautiful day,

Dre

Dre Does a How-To: Bigger and Brighter Eyes

Do you get way less sleep than you should and have the resulting exhausted looking eyes when you wake up like me? Don't worry. Thanks to my third cup of joe I've compiled a list of tips on how to make your eyes look brighter and bigger and thus fooling everyone into thinking you've gotten enough shut eye! 

1. Highlight your inner tear duct. Do yourself a favor and get a nude colored pencil eyeliner now! I love this new one from NYX called the Wonder Pencil because it comes in concealer-type shades but is in a easy to apply form as a pencil eyeliner. This new best friend makes it super quick and easy to highlight the inner area of your eye. You'd be surprised how quickly this trick brightens and makes you look more awake. 

2. Highlight your bottom waterline. You can use the same nude pencil liner to line this area. Normally you would put a darker color here to define your bottom lash line, but applying a nude color will help open your eyes and make them look bigger. Some people like to use white for this, but I prefer nude because it's less harsh and more natural looking. 

3. Set your under eye concealer. If you want to keep those dark circles under your eyes hidden until bed time and avoid creasing, you must set your concealer. Make sure to use a good concealer in this area that brightens this area (try pinkish tones) and set it using a fluffy brush and a finely milled powder. I like the Sonia Kasuk Hidden Agenda palette because it comes with three concealer shades and one setting powder. I use this 'setting brush' by Real Techniques to set the powder and I love how it applies the powder! You want to make sure you use a fine powder so that you don't run the risk of it settling in any fine lines, making you look more tired.

4. Define your eyelids. One technique that I love for a really natural look is to define both the inner and outer areas of my lids and highlight the center of my lids. This makes your eyes look huge and gives them a really nice glowy appearance. In the picture below I've done my makeup this way and you can see how it enlarges my eyes and gives them that glow. You might be surprised when I say that all I used is two matte shadows to complete it. So it's an extremely quick and easy look. Come back tomorrow for a post on how exactly I created this look! 


Have a beautiful day,

Dre

Dre Does a Quick Tip

Happy Monday!
I'm here with a quick tip dealing with dehydration and exfoliation. As I previously wrote about, you can check your skin to see if you're dehydrated. Click here if you missed that post where I show you a cool trick to do it yourself. I recommended water intake of at least half your body weight in ounces every day. If you're drinking this much water but still finding that your skin seems dehydrated, this is a sign that something else is the issue. A huge reason for this could be that you need a good exfoliation. If you have a lot of dead skin cells sitting on the surface of your skin, it doesn't matter how much water you drink, you will not hydrate that top layer. So I recommend giving your skin a good exfoliation. I also recently did a post on exfoliation that describes it's importance and what happens to the skin cells as they reach the surface. Click here if you'd like to read about that!

Have a beautiful day,

Dre

Dre Does 5 Quick Mascara Tips

If you ask any woman if she wants longer and fuller eyelashes I guarantee the answer would most of the time be yes. I don't know what it is about mascara, but I find myself on this continuous search for the holy grail mascara that will change my eyelashes forever (tad dramatic? Maybe...but don't we all agree?).

While I don't have the answer for you because we are all unique when it comes to what products work for us, I can give you a few tips that will help you improve whatever mascara you currently love. 

1. Wipe the wand off with a tissue every time you use it. Yes you read that right... Every. Time. It's collecting dried up chunks of mascara that are hindering the wand from doing whatever it's designed to do. I know this seems like a waste of product but it really helps. Plus, mascaras are only meant to be used for 3 months then tossed due to bacteria. 

2. Do not move the wand in and out multiple times in attempt to 'load as much product as you can'. This causes more air to enter the tube and your mascara will dry out faster.

3. Never curl your lashes after you have applied mascara. This is never a good idea because you can break or damage your lashes in the curler. Always curl prior to mascara application. If you were ever a preteen experimenting with makeup like I was, I'm guessing you know what this feels like...(and if not, trust me).

4. If you get any mascara on your upper lids or under eye area when applying mascara let it dry! I know it's hard to leave it there when we are all tempted to rub it off, but it will most likely smear causing the makeup already applied there to need to be touched up. If you let it dry, you can easily flick it off with a Q-tip.

5. One of the easiest tricks to make your lash line look fuller doesn't involve mascara at all! Simply line your upper water line (that little watery rim under where your eyelashes are attached) with a black eyeliner. Careful though, because if you are not used to it, it can tickle and take some getting used to. 

I wish you much success on your quest for the perfect mascara, but in the mean time, I hope you enjoyed these tricks to getting the most out of those beautiful lashes you were already born with!

Have a beautiful day, 

Dre