Dre Does a Beauty Secret

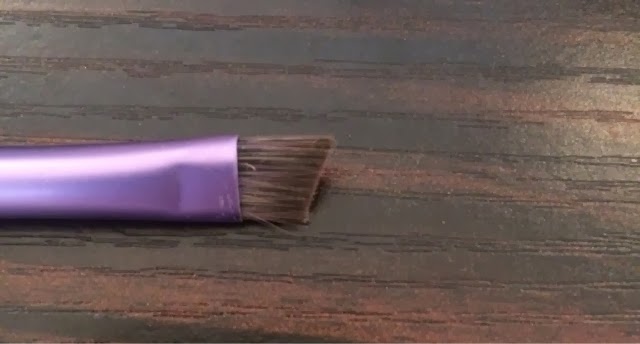
If there's one thing us makeup artists and makeup enthusiasts can agree upon, it's that cleaning brushes is the bane of our existence. It's the thing that we know we have to do but always dread. Well I'm here to share a tip I discovered about a year ago but didn't actually try out until very recently. I'm happy to say I'm never going back to my old ways!

So what it is? A solid brush cleanser. You may have heard of the most famous one from Beauty Blender that retails for $16 for 1 ounce of soap. The idea is that you wet your brush or sponge and swirl it around on soap, pick some up and then use that to clean the brush in your palm or whatever you normally use to clean your brushes. I have always used baby shampoo for deep cleansing my brushes because it's just how I was taught and what has always worked. Mind you this always takes forever when you have a lot of brushes and I feel like I'm always wasting shampoo because I'm pouring it into my palm.

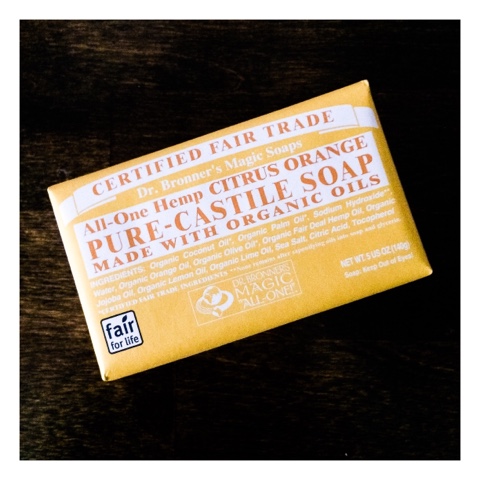
Well I heard another makeup artist suggest trying Dr. Bronner's Pure-Castille Bar Soap as a solid cleanser and seeing as it costs a shocking $4.69 for 5 oz, I figured it wouldn't hurt to try. OMG! Ladies go out and buy this completely organic soap ASAP and try it. Not only is it ridiculously cheaper than the Beauty Blender's alternative, but it's organic, conditioning for your brushes with coconut and tons of other oils, and it comes in so many different scents. Since it doesn't come with a container to store it in like the Beauty Blender one, just make a trip down the travel sized beauty section like I did and snag yourself a clear 97 cent container to store your bar of soap in.

I love how quickly I can wash everything too because I'm not picking up a shampoo bottle and pouring out and wasting extra product with every brush. It also cleans the brushes quicker than I've ever seen! I've linked the Citrus scent above which is the one I am currently using.

If you try this out and love it, let me know! Also please feel free to share any other beauty secrets you might have!


Have a beautiful week,

Dre

Dre Does Ipsy Favorites

Happy May! My favorite month of the year because not only is it my birthday month but it's when it really starts to warm up and feel like summer is on it's way!! It's no secret that I haven't been doing my monthly Ipsy Glam Bag reviews but I am still receiving them. I decided a good way to catch up would be to share some of the products that I have loved recently that I would recommend to you. If you have never heard about Ipsy and curious to know more, look to the tool bar on the right and under favorites click the word 'Ipsy' to see all of my previous posts on the subscription service! (Hint: you can do this with any word you see to filter posts!)


1. Laura Mercier Invisible Loose Setting Powder: If you made me choose one product as the best thing I've ever received in an Ipsy bag, this would be it. I cannot tell you how much I love this powder. I don't normally use powders so the fact that I love this that much is saying something. I started using the new NARS Weightless foundation and I found that with the luminous finish I needed a setting powder so that it was easier to contour and blend my blush, highlighter, etc. I reached for this powder because it was in my collection and oh my word. This powder truly gives you the most flawless, airbrushed look without changing the finish of my foundation. I absolutely love it and will be purchasing it as as soon as my little guy is done. The full size retails at $37 for 0.4 oz, while the mini they sent me in my glam bag was 0.03 oz (a $2.78 value). I love to do the math when it comes to small samples like this because what it shows me is that if that sample lasted me a month, I can only imagine how long that larger one is going to last me! So worth the money! (Stay tuned to why this intrigues me more!


2. Dr. Brandt 'pores no more' anti-aging mattifying lotion: I can't tell you how excited I was to try out this sample because first off I LOVE Dr. Brandt products and second, as an oily girl, I have a really hard time finding anti-aging products that don't break me out. Generally, aging and more mature skin lacks the sebum (oil) production which disarms the protective nature of the acid barrier of your skin, so anti-aging products will try to boost that amount of oil. However, us oily girls can't handle more oil, but we still want to prevent aging! Luckily this product does just that. Provides anti-aging benefits (hello apple stem cells!) while still keeping our skin from breaking out and having too much oil. I love how quickly this absorbs into the skin and mattifies without feeling like you didn't put any moisturizer on in the first place. A full size retails at $60 for 1.7 oz. and the sample I received was 0.25 oz. (a $8.82 value).

3. Malin + Goetz Mojito Lip Balm: The second I opened the glam bag this came in, I put this on my lips and I've never looked back. I'm aware that sounds dramatic but this stuff is like heaven for your lips. It is the smoothest, most buttery lip balm I have ever tried and I will most certainly be buying this once it's gone. If you want it for the scent, I wouldn't get too excited though because I can't really smell or taste anything. This doesn't bother me however because I wear lip balms for the moisturizing factor not the scent. This one was a full size lip balm which retails for $12 on their site. I love keeping it in my purse because it's so easy to apply as well.

4. Crown Brush Infinity Shadow/Crease Duet Brush: I was really excited to see a Crown Brush come in my glam bag one month because I had heard great things about the company before but never had tried any brushes before. I'm always looking for great pencil/smudge brushes because I love a good smoked out lower lash line, so I was excited to give this duo brush a try. I do have to say I prefer the pencil side to the flat shader side but overall the brush is a great addition to my collection. The pencil brush is nice and precise! At a value of $17.50 online, you know it's a great deal to get in your glam bag!

5. Elizabeth Mott All Over Shadow Brush: While I have received Elizabeth Mott makeup products in my glam bag before I was excited to see a brush one month. I love when you get to try a diverse amount of products from a line to see how it is as a whole. This brush is pink and white so it's really cute as well. It is exactly what you would want from an all over shadow brush. It is soft and does a great job of picking up and packing on shadow to the lid. It is worth $9.99 which again is a great value to receive in a glam bag since it is a full size item.

What do you think of posts like this? I feel like posting every month can get a bit repetitive if I haven't really gotten the chance to review products, so I'd rather show you a quick snapshot of everything I got right when it comes in the mail and then every so often share favorites from multiple months. What are your thoughts?

Have  a beautiful Monday,

Dre

Dre Does a DIY: Recycling Candle Jars


If you're like me, you're probably stuck in this never ending winter cold. To keep your spirits up, you're probably burning a million candles in all sorts of spring related scents to help you remember that things such as flowers and fruits that require the sun do in fact still exist despite the desolate tundra outside. 

So what do you do with the plethora of used up candle jars once the yumminess of peach, lemon, and lilac is burned away? Find a new use for them of course! I'm going to explain how to remove the left over wax and such, and give you some ideas for using them in beauty related ways!

So what do you need? Used up candles, a sharp pointy knife, a freezer, soap and warm water, and whatever you're going to fill your new jars with!

1. First you have to freeze the old candles. At least an hour works, but I honestly just throw a bunch in and leave them over night, so they're good and frozen!
2. Once frozen, take a sharp knife and just press the pointy tip into the wax trying the crack it all the way to the bottom. Then you should be able to shake out all the broken pieces. 
3. If there's any leftover pieces you can pull them out with your fingers. Then pull out the little wicks that are glued to the bottom of the jars. If you can't get them out don't worry. Just move on to the next step of soaking.
4. Depending on the candle, you might be able to get away with running the glass jar under some hot water and the label could peel right off. If not, soaking it in hot soapy water for a little bit should loosen the glue. Now use the soap and water to wash the glass really well and remove all sticky residues.
5. That's it! Time to fill 'er up! 

Here's some ideas for you on how I like to fill mine up: 

Cotton rounds and Q-Tips by my bathroom sink

Makeup brushes on my vanity (it's good to have multiples for clean and dirty brushes or separating eye and face brushes)

Any makeup products that are better stored standing upright (should I be embarrassed to say these are just my lip stains and lip crayons...?)

Current favorite nail polishes or colors that inspire you for the current season

While these are just some of my favorites you can also use them to store bobby pins, hair ties, jewelry, tea bags, pens or other writing things, post it notes, random do-dads like safety pins or extra buttons, important little trinkets, beauty and perfume samples, etc...the list goes on and on!

The jars you get don't have to be plain either. Sometimes I find clearances candles that are in beautiful decorative jars. Even if I don't really love the scent, I'll still buy them with the intent of burning them up and using them later on for decorative purposes! 

As much as I love my candles, here's to hoping that we experience the scent of real flowers and plants soon!! :) If you do this let me know what you plan on using your old candle jars for! 

Have a beautiful day,

Dre


Dre Does January Favorites

| Click to Enlarge |
I'd really like to start sharing my favorite products from the month, both beauty and non beauty related. While reviews are great, I think it's more realistic and beneficial to know what people are using consistently. So here are my January Favorites!

1. Physician's Formula Organic Wear Mascara: I had heard some really great things about this mascara but I never gave it a serious thought because of the extremely tacky green metallic packaging. That sounds really stupid when you type it out...haha but seriously! If it wasn't for a ridiculously great sale at Rite Aid and a two for one package, I might not have ever tried it, but I really do love it! The brush is a little larger than I'm used to so that took some getting used to but I love it now. I like how it separates my lashes and gives me amazing volume, but the thing I like most is that I can apply multiple layers and it doesn't clump up like some volumizing mascaras do. I also really like how easy it is to remove, yet it doesn't flake off when you're wearing it. I absolutely hate mascaras that are really hard to get off. I don't care how great it makes my lashes look, I won't realistically wear it if it drastically increases my nighttime skincare routine (ie. Benefit's They're Real). I highly recommend it and now I'm even happier that I got two tubes for the price of one!

2. Briogeo Don't Despair, Repair! Hair Mask: I got this hair mask in my January Ipsy Glam Bag. Click here for my post on it! I managed to get 4 uses out of that sample and I would say I noticed a difference in my hair's texture. While my hair isn't very damaged, I could tell the mask made my hair softer and smoother. I am probably going to be purchasing the full size soon before that Ipsy discount expires! 

3. Maybelline's 'The Elixir': I won't go too in depth with these since I just posted a review here on them, but I am a huge fan. They are my new favorite lip gloss which is huge since I'm much more of a lip stick girl. I love the pigmentation and texture. They aren't sticky and smell yummy too! 

4. Aveda Beautifying Compostion: Since I've been going to an Aveda Institute since October I've been falling in love with all Aveda Skin Care Products. I could spend hours talking about which ones I love, but for the sake of this post I picked our Beautyifying Composition as a favorite because it's seriously such a multi-use product. It's designed for body, bath, and scalp so I use it as a deep conditioning treatment for my hair, a remedy for any dry skin patches on my body, in my baths, and especially on my cheeks because it's an anti-eczematic! That's only a few of its uses. I'm going to be doing a post on it soon so look out for that! 

5. Beyoncé's new album: I have honestly not been much of a Beyoncé fan in the last couple of years just simply because I couldn't get into her music. That all changed with her new album though. I absolutely love it all; the songs, videos, everything! So good. My top songs however would be Drunk In Love (obviously haha), Blue, Heaven, and Flawless. Just incase I wasn't the last person on the planet to buy it and you haven't listened yet, please do! 

6. Covergirl's Outlast Stay Fabulous 3 in 1 Foundation: This is another product I heard about through the YouTube world that was getting good reviews so I decided to pick it up at the end of December and it's amazing! When I saw the 3 in 1 claims (primer, foundation, and concealer) I wasn't expecting much. However, this foundation stays on really well, gives you a flawless finish, and conceals the majority of my hyperpigmentation and scarring problems. It has a matte finish though so if you are really dry or like a dewier finish it might not work best for you. I don't like my skin to be 100% matte so I mix it with a tiny bit of another foundation and I find this works well to add some moisture. I have a large amount of hyperpigmentation on my chin due to my Mediterranean skin that tans easily, so when I breakout I scar no matter what. I had to remove this foundation from my chin at school for a procedure and everyone was shocked at the scarring that this makeup was covering, so I have to give Covergirl credit for making an amazing product. I highly recommend this one. 

7. Real Techniques Expert Face Brush: I talked about this brush in my Brush Guide found here, but it's another must have for me. I've only reached for this brush when doing my foundation since I bought it a few months ago. Great price and great quality.

8. Celestial Sleepytime Tea: Sleepytime tea is my go-to night time tea. With no caffeine and lots of amazing herbs it smells heavenly and tastes so good. I've gone through a whole box in January alone because I drink it so much. It's so prefect for relaxation and getting you ready for bed (shocker I know since it's called Sleepytime...haha).

9. tarte Amazonian Clay 12 Hr blushes: To say that I love these blushes is an understatement. I have many and they are honestly the only blushes I grab for 95% of the time. Perfect amount of pigmentation, gorgeous shades, and they last longer than any other blush I've ever used. 100% worth the higher price tag. Go to your nearest Sephora or Ulta, swatch them all, and TRY to walk out without purchasing at least one...I DARE YOU! I'm like a kid in the candy store with all tarte products...

So there they are! The first month of 2014 is over and these are the products that helped me welcome the new year. What were your favorite products last month? Leave me a comment below and let me know!

Have a beautiful day,

Dre

Dre Does a Brush Guide

This has been the most requested post so here it is! It took some time to really choose which brushes are my favorite since let's be honest...I have way more than I'm going to show below. But I've chosen my top 12 brushes that I think every woman needs. Now some were purchased in sets or years ago, so they might not be available for purchase right now. However, the point is the shape and type of brushes. If a brush as a really unique shape, I've made sure to choose it only if it is still available. I'll leave links to all of the ones that I can at the end of the post, as well as information as to which were purchased in a set. I've also taken the pictures of the face brushes next to a normal sized nail clipper, so you have a guide for the approximate brush sizes. (Sorry if some are a little dirty, but I used them before I took these pictures...haha)

1. Foundation brush: My favorite is the Expert Face Brush by Real Techniques. I love this brush for the unique shape and because of how dense it is. It's really good at applying foundation evenly. A lot of people like flat top buffing brushes because you can get a really good natural looking application, but I find this brush gives me a similar finish. It's also great at getting around your nose and chin because of the rounded shape. 


2. Concealer Setting brush: Now I didn't include a brush for concealer because personally I prefer applying with my fingers. I find the warmth of my finger tips melts the concealer just right to give a more natural look when covering. However one place you can't skip out on is setting your concealer, especially under your eyes. A small fluffy brush will do the trick and as I've talked about before I love the Setting Brush by Real Techniques. It's slightly pointed at the tip, so it gets right under the eyes nicely. It's also fluffy enough to apply just the right amount of product. 


3. Contour Fluffy Brush: Now I know everyone doesn't contour their faces, but I still think a fluffy medium sized brush is important. It's a great multitasking brush. You can of course use it for contouring, but also for applying highlight or even blush in a pinch! I really like this one called the Contour Brush from Real Techniques (are you seeing a trend here yet? But more on that later...). It's the perfect medium size. 


4. Flat top dense medium brush: This brush is great for cream products. The synthetic dense fibers are great for picking up and blending cream products. So once again this brush is great for blushes, bronzers, or highlighters. The size is perfect as well. This one is called the Buffing Brush by Real Techniques but many brands make a similar one.

5. Fluffy blush brush: Everyone needs a brush for blush and I'm obsessed with this one from Sonia Kashuk. It's available at Target and it's a must have. It is super soft and going strong after at least 4 years of use. The thing I like most about it is the density. It's pretty fluffy so it doesn't pick up too much product, so it allows you to build up cheek color to just the right amount. I think the packaging looks a little different now.


6. Powder Brush: Now this brush is the least unique but it's still a must-have. In order for your makeup to stay all day or night long, you need to set it with powder. This is simply a large fluffy brush from a Sephora set from at least 5 years ago, but it's obviously great quality and has worked so well setting my powder all of these years that I still haven't needed a new one. 


7. Eye Shader Brush: This is another typical brush shape, but it's another must-have. You need a good  flat shader brush to pack color onto your lids. This is another Sephora one that has lasted me years, but every brand of makeup brushes sells a dupe for this.


8. Fluffy Pointed Shading/Blending brush: So this brush is extremely unique shaped but I had to include it because it is a dream for blending the outer "v" of your lid (aka the outer corner). It's fluffy enough for blending but the pointed tip gives you enough control to make specific shapes. I just love it and use it for almost every eye look that I do, so I'm being serious when I say you must own it! It is called the Base Shadow Brush by Real Techniques.


9. Fluffy blending brush: The key to beautiful and smooth looking eyeshadow is blending. That is no secret. While I own and recommend having multiple blending brushes of different densities and sizes, a simple fluffy brush is the first step. This one is the E35 Tapere Blending brush from Sigma Beauty but many companies make great ones. 


10. Definer Pencil Brush: Whether you want to do a dramatic crease, outer v, smokey eye, or natural eye, a pencil brush will work wonders in applying the darker shades where you want them before you blend them out. They are dense and great for smudging color into the upper and lower lash lines as well. This one is the Smudge Brush from Ulta and is a great size for getting into all of these places. It's a great multi-use brush. It is years old as well though, so it could be hard to find this exact one.


11. Eyeliner brush: A fine pointed eyeliner brush is key because it can do a lot for your lash line. Whether you use it with gel eyeliner, eyeshadow, or to smudge out pencil liners, it gives you precision. So make sure it has a nice density and a good tip. I got this one free with a Sigma Beauty purchase but it is the mini version if their E05 Eyeliner brush. 


12. Angled Brow brush: Lastly, we have a brow brush. I use this one every day to fill in my brows with shadow and I love it. This shape also works nicely if you want to smudge out pencil eyeliner, or set your liner with eyeshadow for a smokier look. This is another shape that you can find easily from a lot of other brands, but I have to say I love the quality of this Real Techniques one.


So those are my favorite brushes! As you can tell I'm obsessed with the Real Techniques brushes because they are amazing quality for the prices. They are extremely soft and durable. I also love my Sigma Beauty brushes, however they are a little more expensive. If you have the money, I say invest in the Sigma ones, but if not the Real Techniques ones are amazing as well. 

Now for where to purchase
Brushes 8 and 12 came in a 5 piece eye starter set from Real Techniques for $18 that you can find below online or at Ulta.
http://realtechniques.com/shop-collection/your-eyes-enhanced/starter-set

Brushes 3 and 4 came in a 4 piece core collection set from Real Techniques for $18 that you can find below online or at Ulta.
http://realtechniques.com/shop-collection/your-base-flawless/core-collection

Brushes 6 and 7 came in a 7 piece Deluxe Antibacterial Brush set with a case for $60 from Sephora.
http://www.sephora.com/deluxe-antibacterial-brush-set-P197107

The rest were purchased individually:
Brush 1 is $9 below online or at Ulta.
http://realtechniques.com/shop-collection/your-base-flawless/expert-face-brush

Brush 2 is $8 below online or at Ulta. 
http://realtechniques.com/shop-collection/your-finish-perfected/setting-brush

Brush 5 is $17.18 online or in stores at Target. 
http://www.target.com/p/sonia-kashuk-kashuk-tools-domed-blusher-brush-no-29/-/A-14346298#prodSlot=medium_1_49

Brush 9 is $14 below. 
http://www.sigmabeauty.com/product_p/e35.htm

Brush 10 I couldn't find online anymore but lots of brands including Sigma Beauty make pencil brushes. 

Brush 11 is $12 below.
http://www.sigmabeauty.com/product_p/e05.htm

Hope this gives you a place to start or add to your brush collection! 
Have a beautiful day,

Dre

Dre Does a How-To: Bigger and Brighter Eyes

Do you get way less sleep than you should and have the resulting exhausted looking eyes when you wake up like me? Don't worry. Thanks to my third cup of joe I've compiled a list of tips on how to make your eyes look brighter and bigger and thus fooling everyone into thinking you've gotten enough shut eye! 

1. Highlight your inner tear duct. Do yourself a favor and get a nude colored pencil eyeliner now! I love this new one from NYX called the Wonder Pencil because it comes in concealer-type shades but is in a easy to apply form as a pencil eyeliner. This new best friend makes it super quick and easy to highlight the inner area of your eye. You'd be surprised how quickly this trick brightens and makes you look more awake. 

2. Highlight your bottom waterline. You can use the same nude pencil liner to line this area. Normally you would put a darker color here to define your bottom lash line, but applying a nude color will help open your eyes and make them look bigger. Some people like to use white for this, but I prefer nude because it's less harsh and more natural looking. 

3. Set your under eye concealer. If you want to keep those dark circles under your eyes hidden until bed time and avoid creasing, you must set your concealer. Make sure to use a good concealer in this area that brightens this area (try pinkish tones) and set it using a fluffy brush and a finely milled powder. I like the Sonia Kasuk Hidden Agenda palette because it comes with three concealer shades and one setting powder. I use this 'setting brush' by Real Techniques to set the powder and I love how it applies the powder! You want to make sure you use a fine powder so that you don't run the risk of it settling in any fine lines, making you look more tired.

4. Define your eyelids. One technique that I love for a really natural look is to define both the inner and outer areas of my lids and highlight the center of my lids. This makes your eyes look huge and gives them a really nice glowy appearance. In the picture below I've done my makeup this way and you can see how it enlarges my eyes and gives them that glow. You might be surprised when I say that all I used is two matte shadows to complete it. So it's an extremely quick and easy look. Come back tomorrow for a post on how exactly I created this look! 


Have a beautiful day,

Dre