Ten Eye Looks. One Palette: Jaclyn Hill Edition
/I am so excited to introduce to you my newest series on Andrea Fontana Beauty!! "Ten Eye Looks. One Palette." is going to be a series where I (or you guys) pick a palette and I create 10 eye looks out of it. This idea came to me when I realized how many women come to me and say, "I bought this palette but I don't know what to do with it". I wanted to create some natural and some more bold, but wearable for everyone no matter your skill!
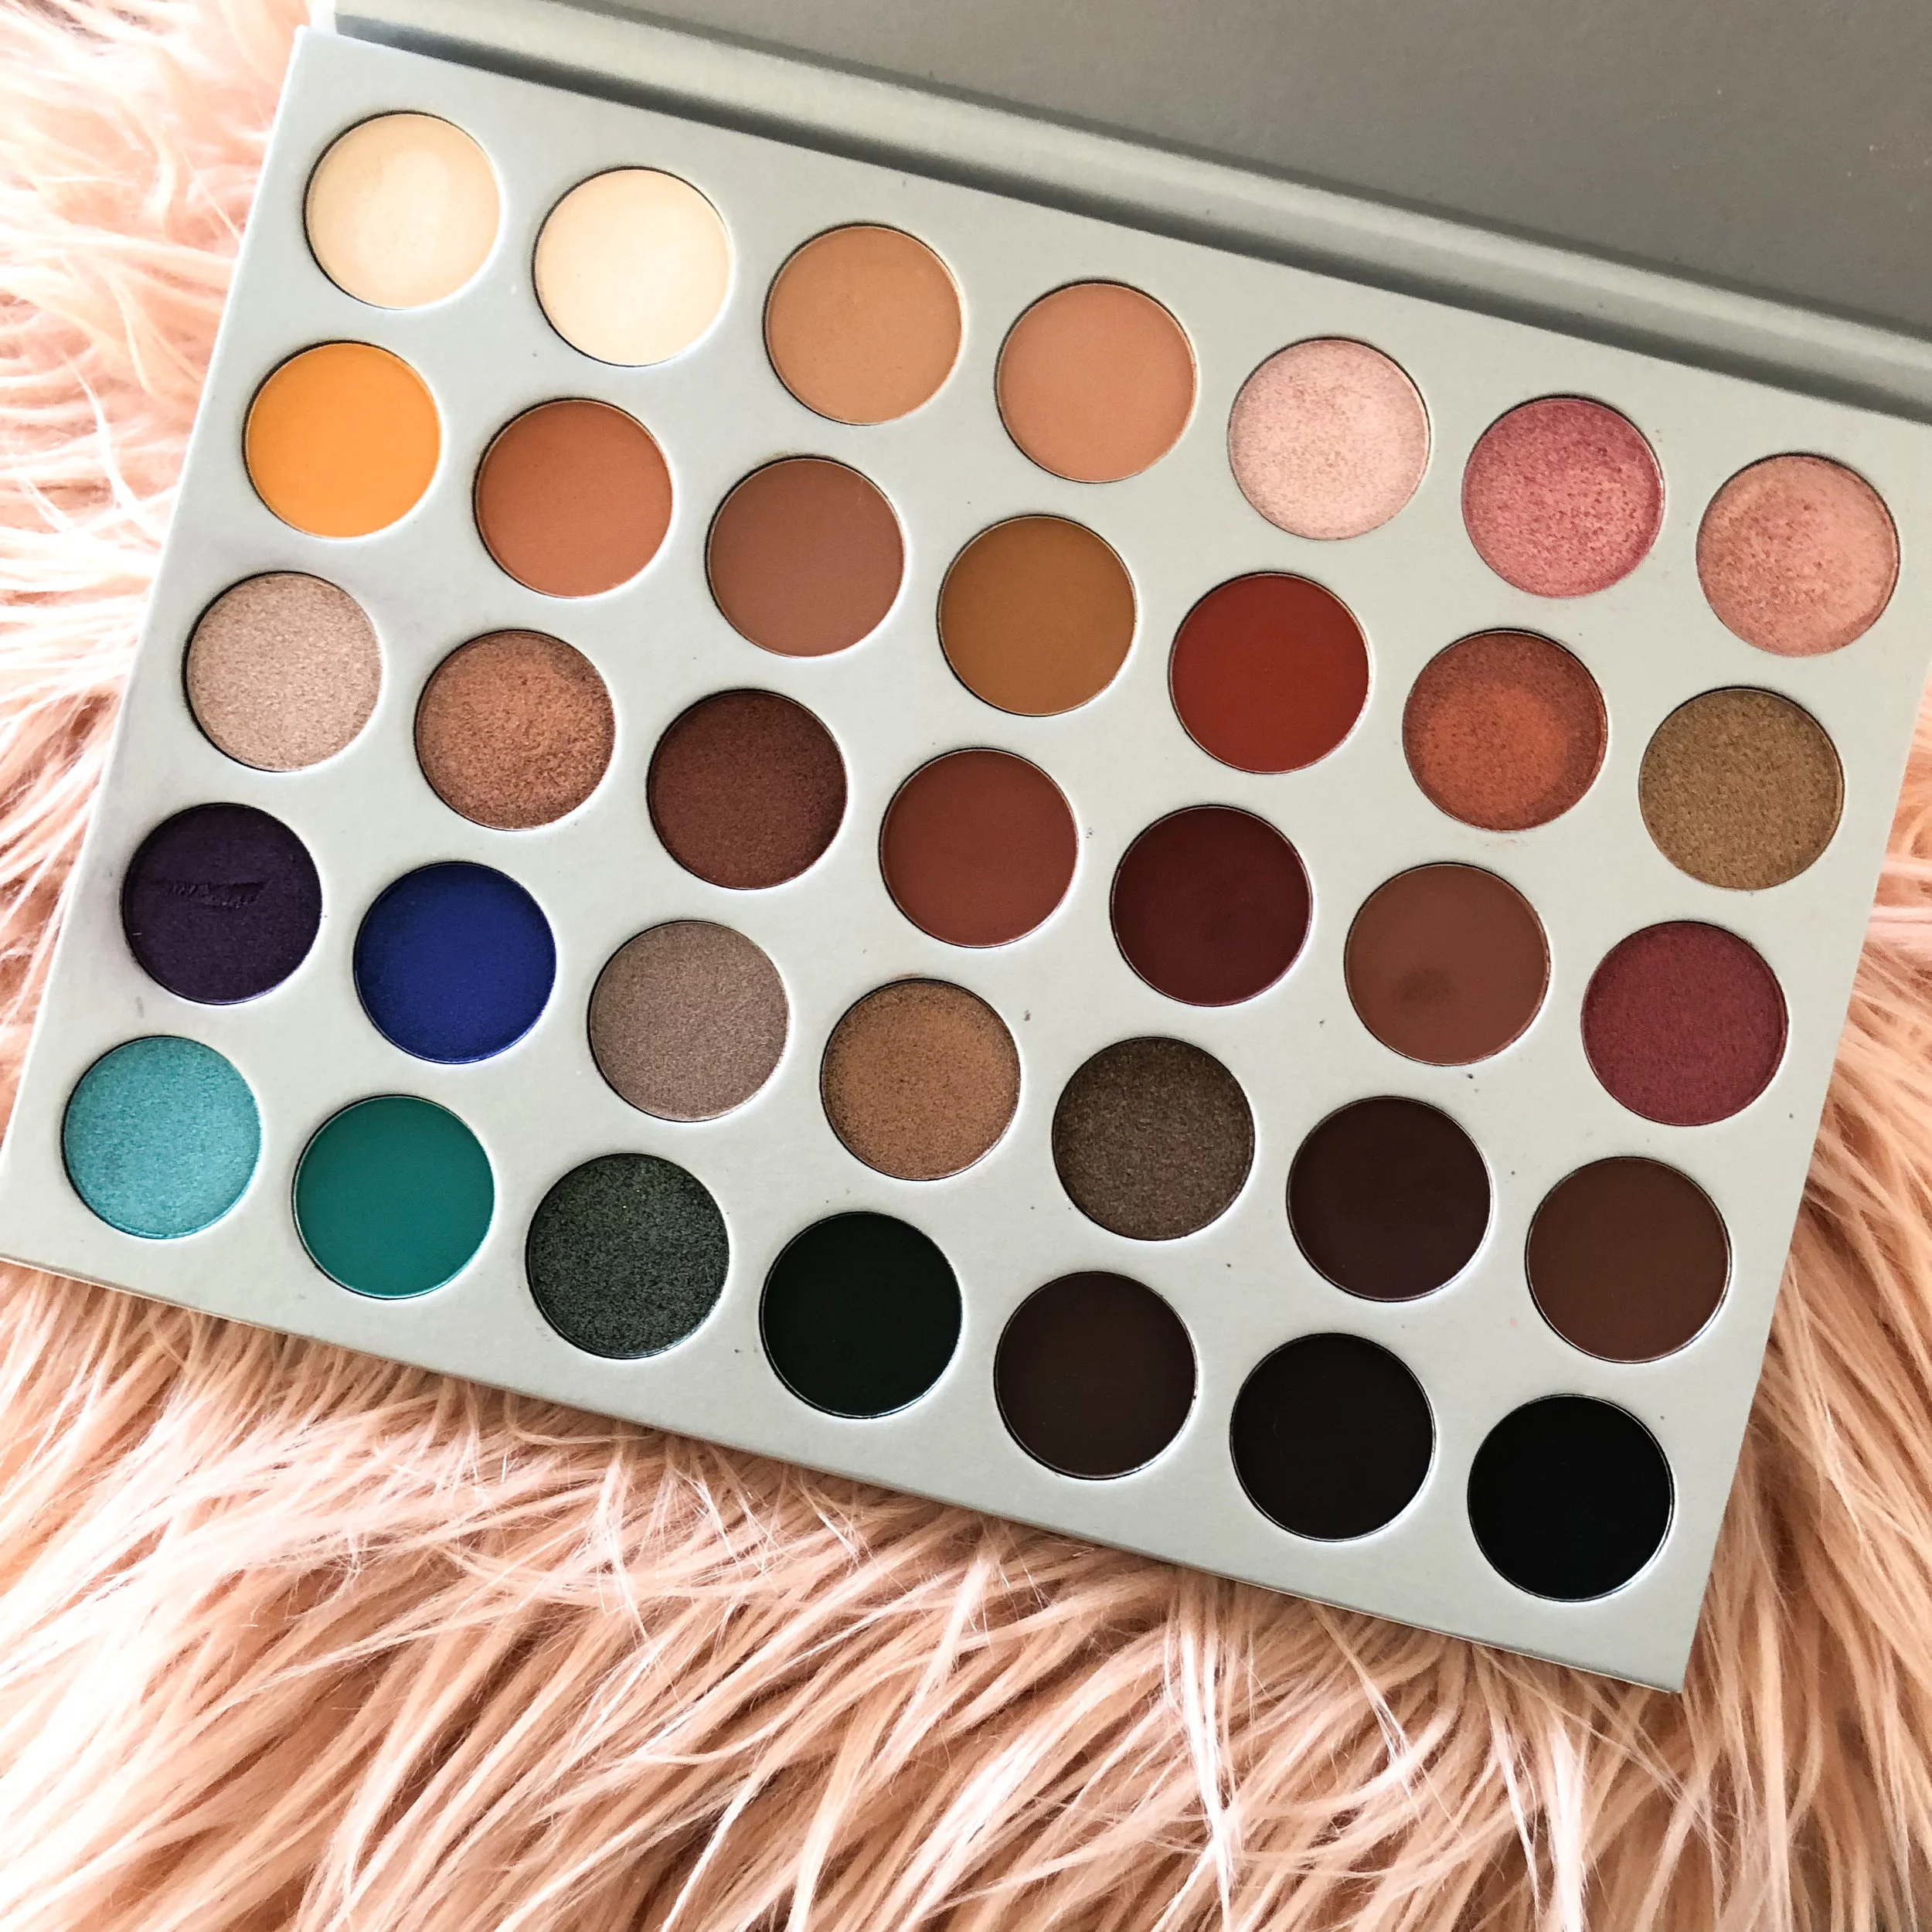
I'm excited to share the first in this series which is obviously the Jaclyn Hill for Morphe palette. I love the warmth of this palette and there's so many amazing shades that I felt really inspired. Over the past month and a half I have been using this palette for all of my eye looks and below is what I have come up with.
Through creating these looks I've realized a few things. Some of the shades are similar, but overall they are extremely creamy and blendable with great pigment and texture. My biggest con to this palette is still that they don't have a matte brow bone highlight for light skin tones like myself, but I tried my best to make it work without it!
I put a lot of time and work into this one, so I really hope you enjoy it! When you're done looking, comment which look is your favorite and which palette you want me to try next!
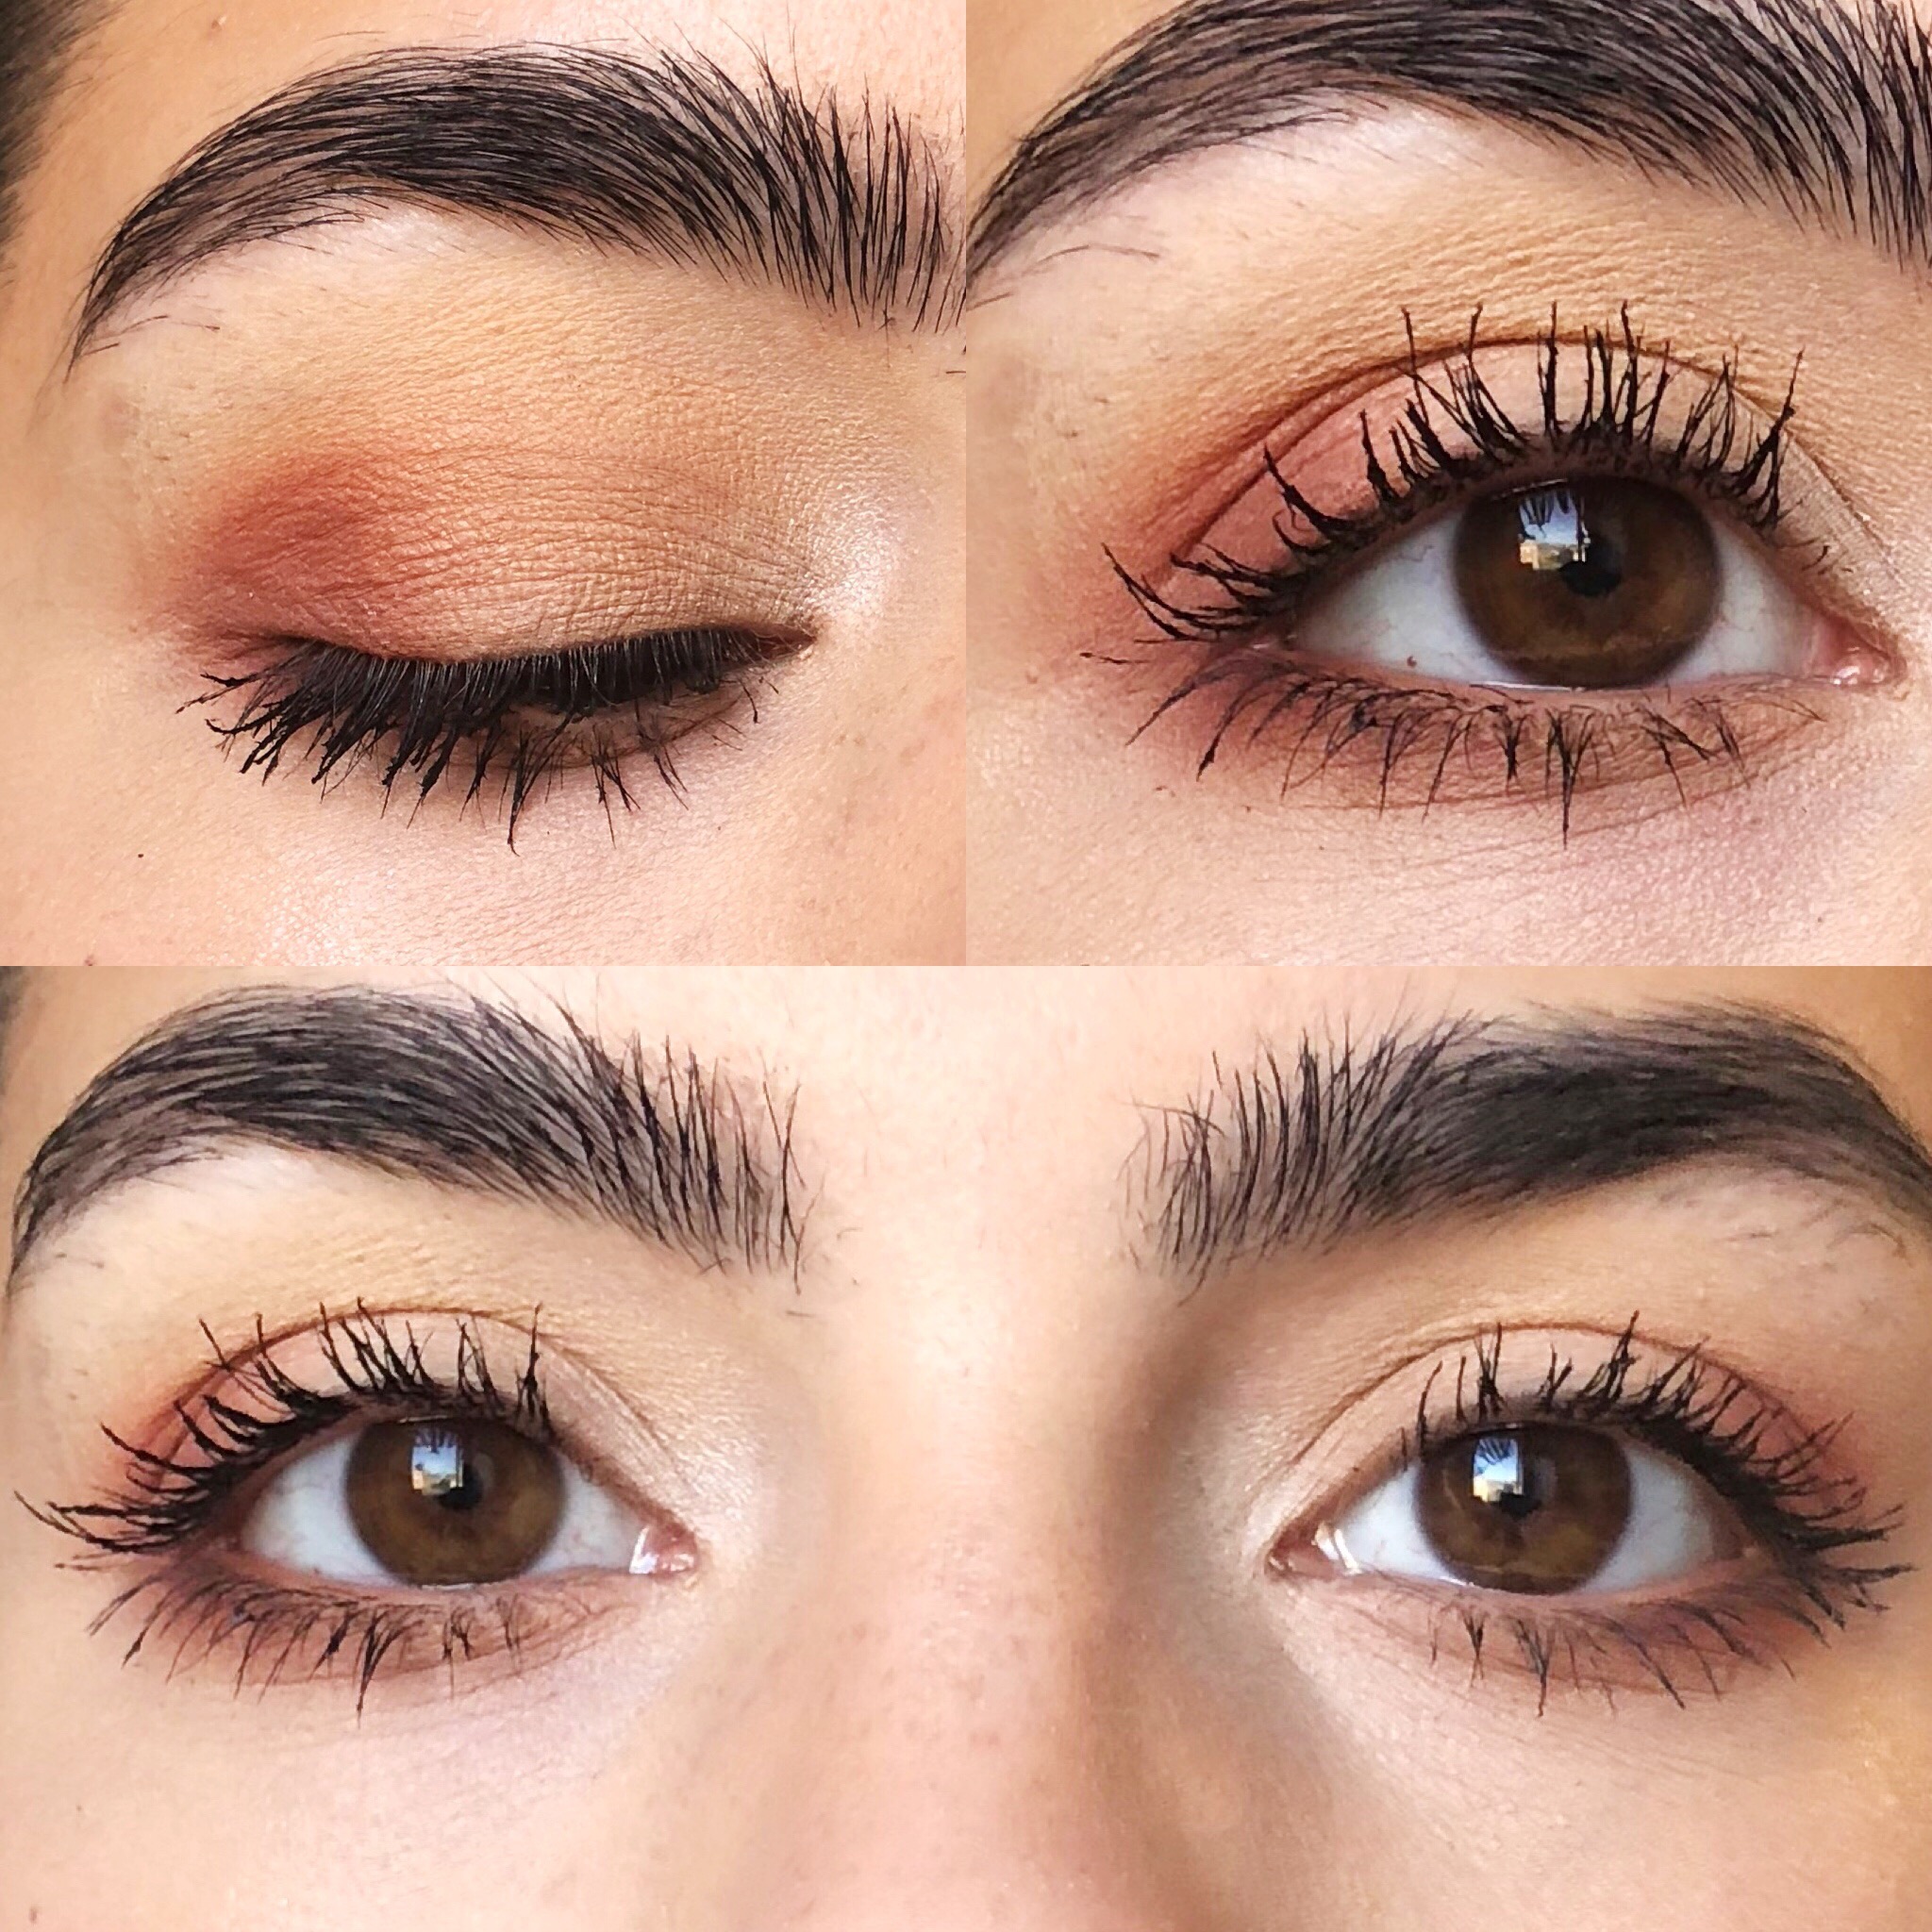
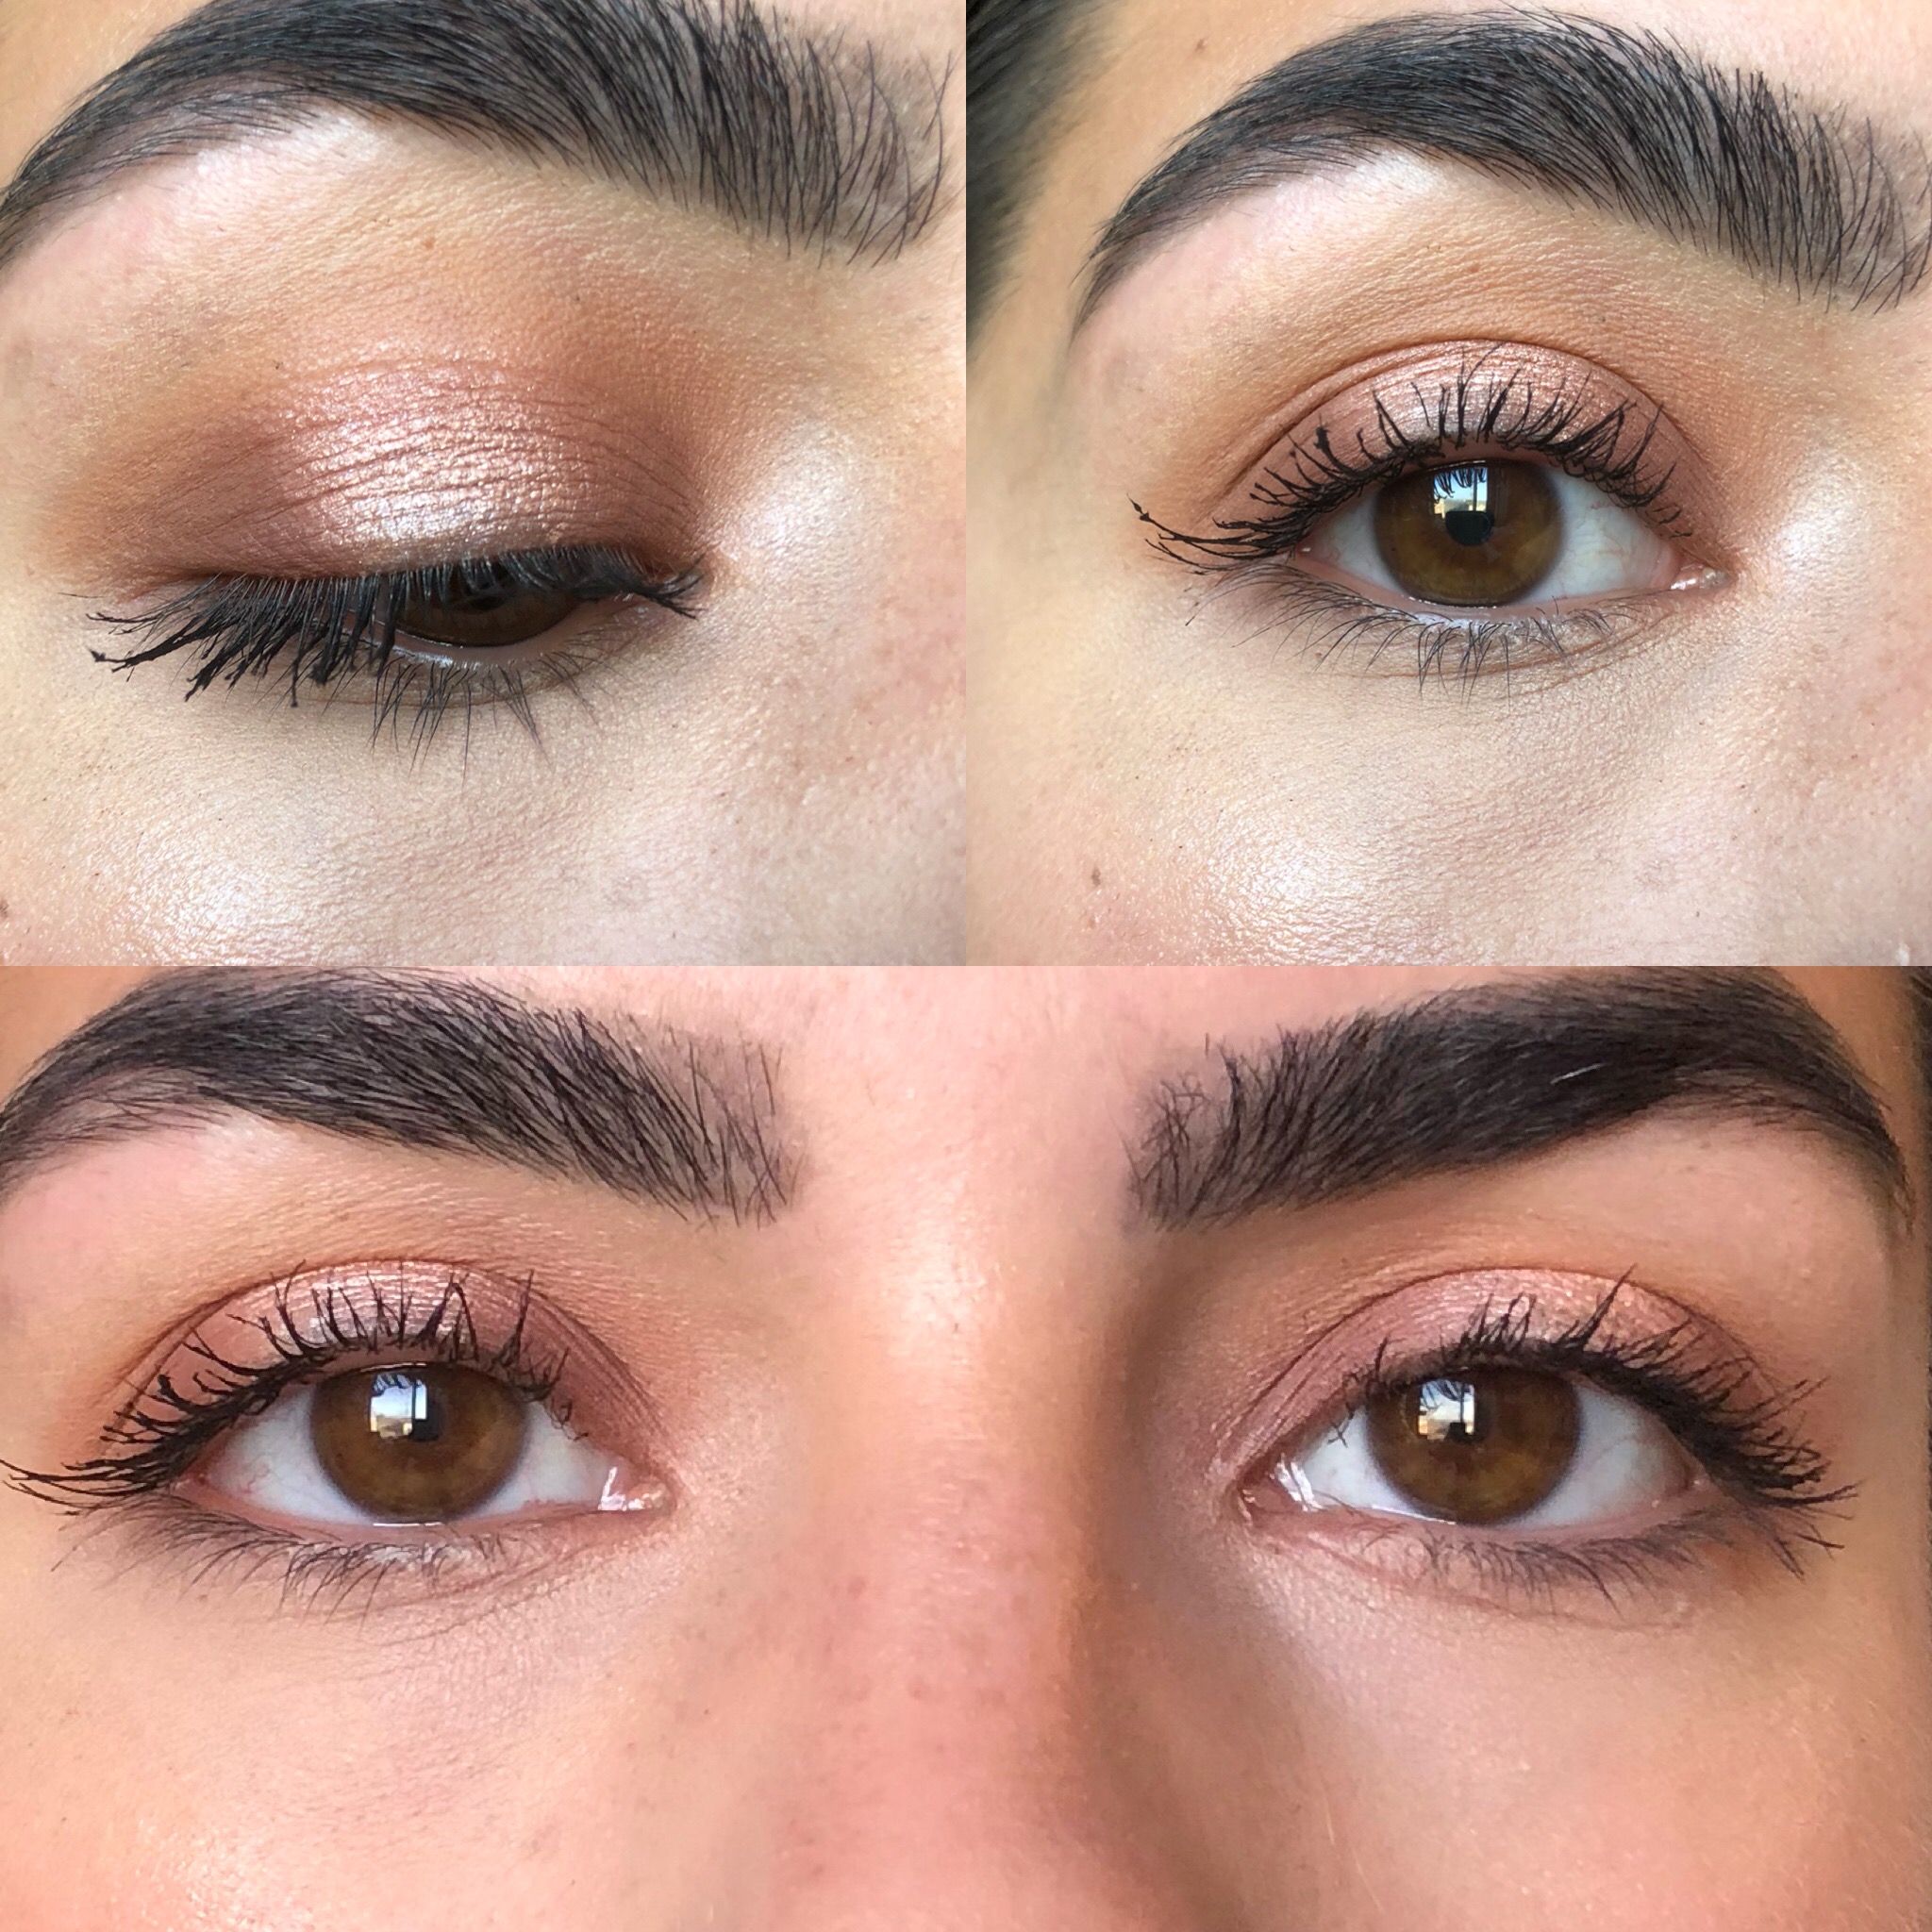
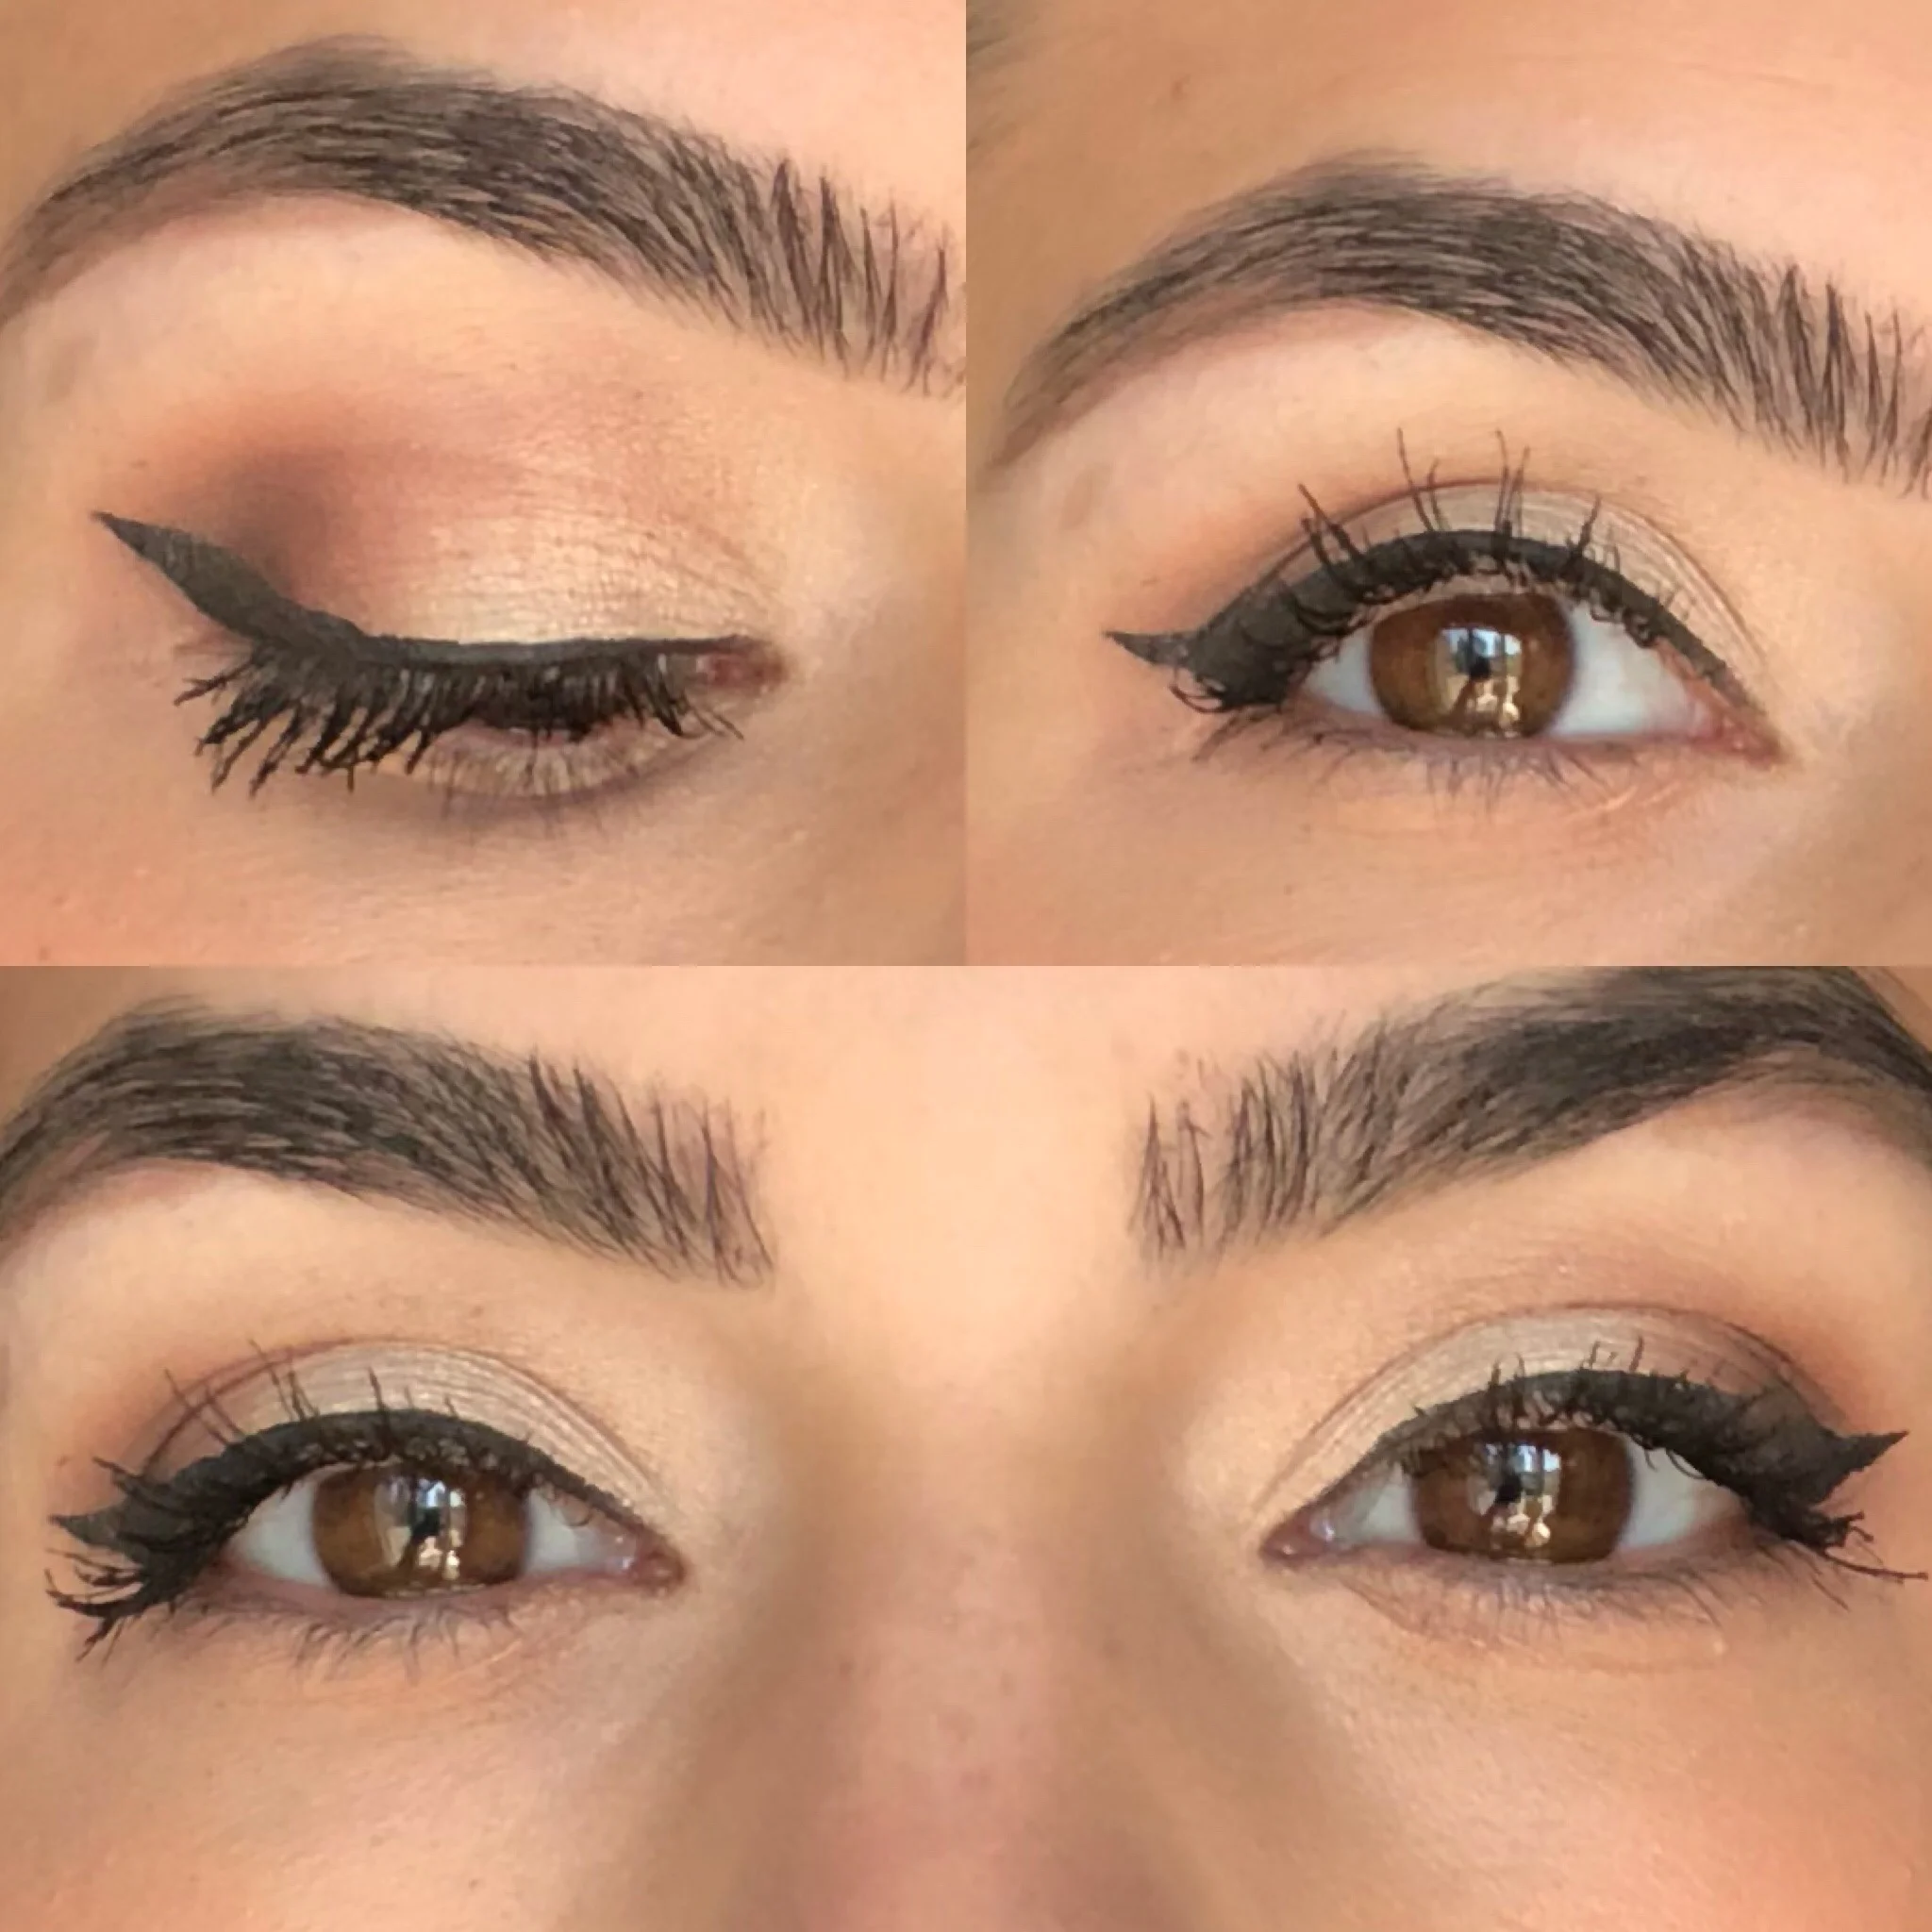
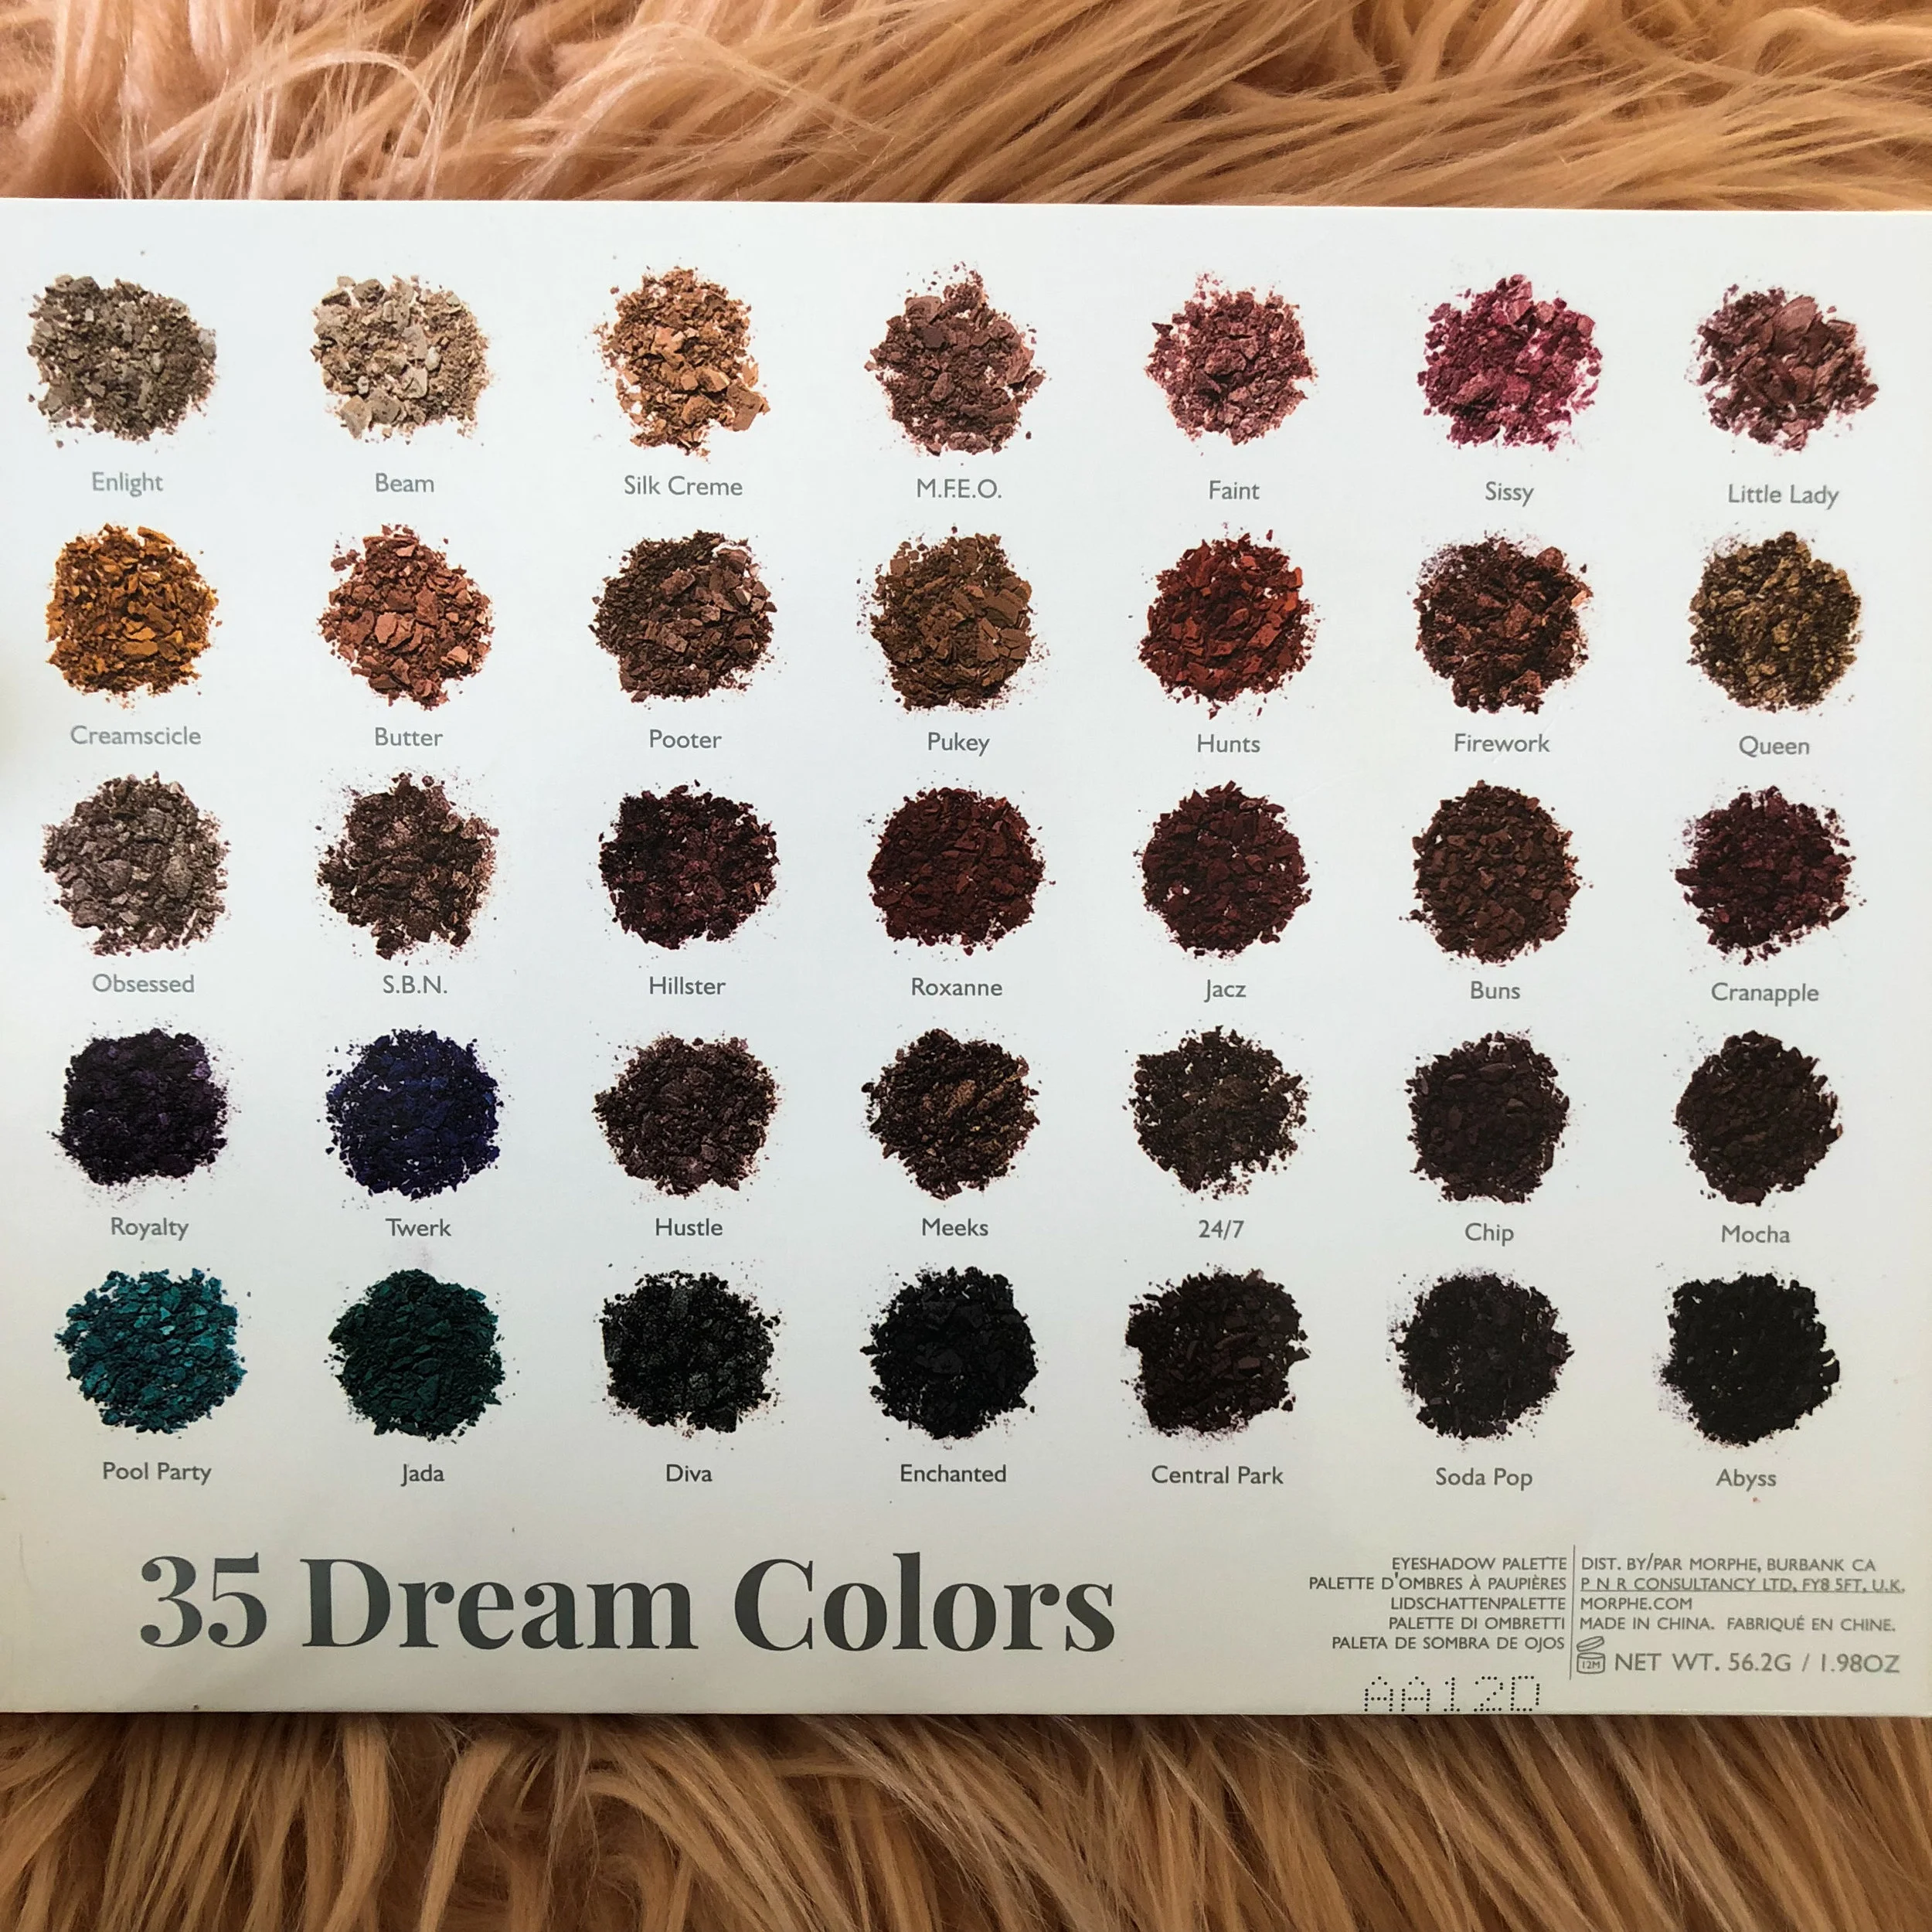
Look # 1: SILK CREME all over the lid and buffed out into the crease; HUNTS & JACZ in just the outer corner and blended out to soften; ENLIGHT in the inner corner to brighten; SILK CREME & BUTTER buffed out on whole bottom lash line; JACZ outer bottom half of lash line.
Look #2: SILK CREME in the crease; JACZ & CHIP in outer & inner corners; ENLIGHT in inner corner; OBSESSED on wet brush in center of lid for impact.
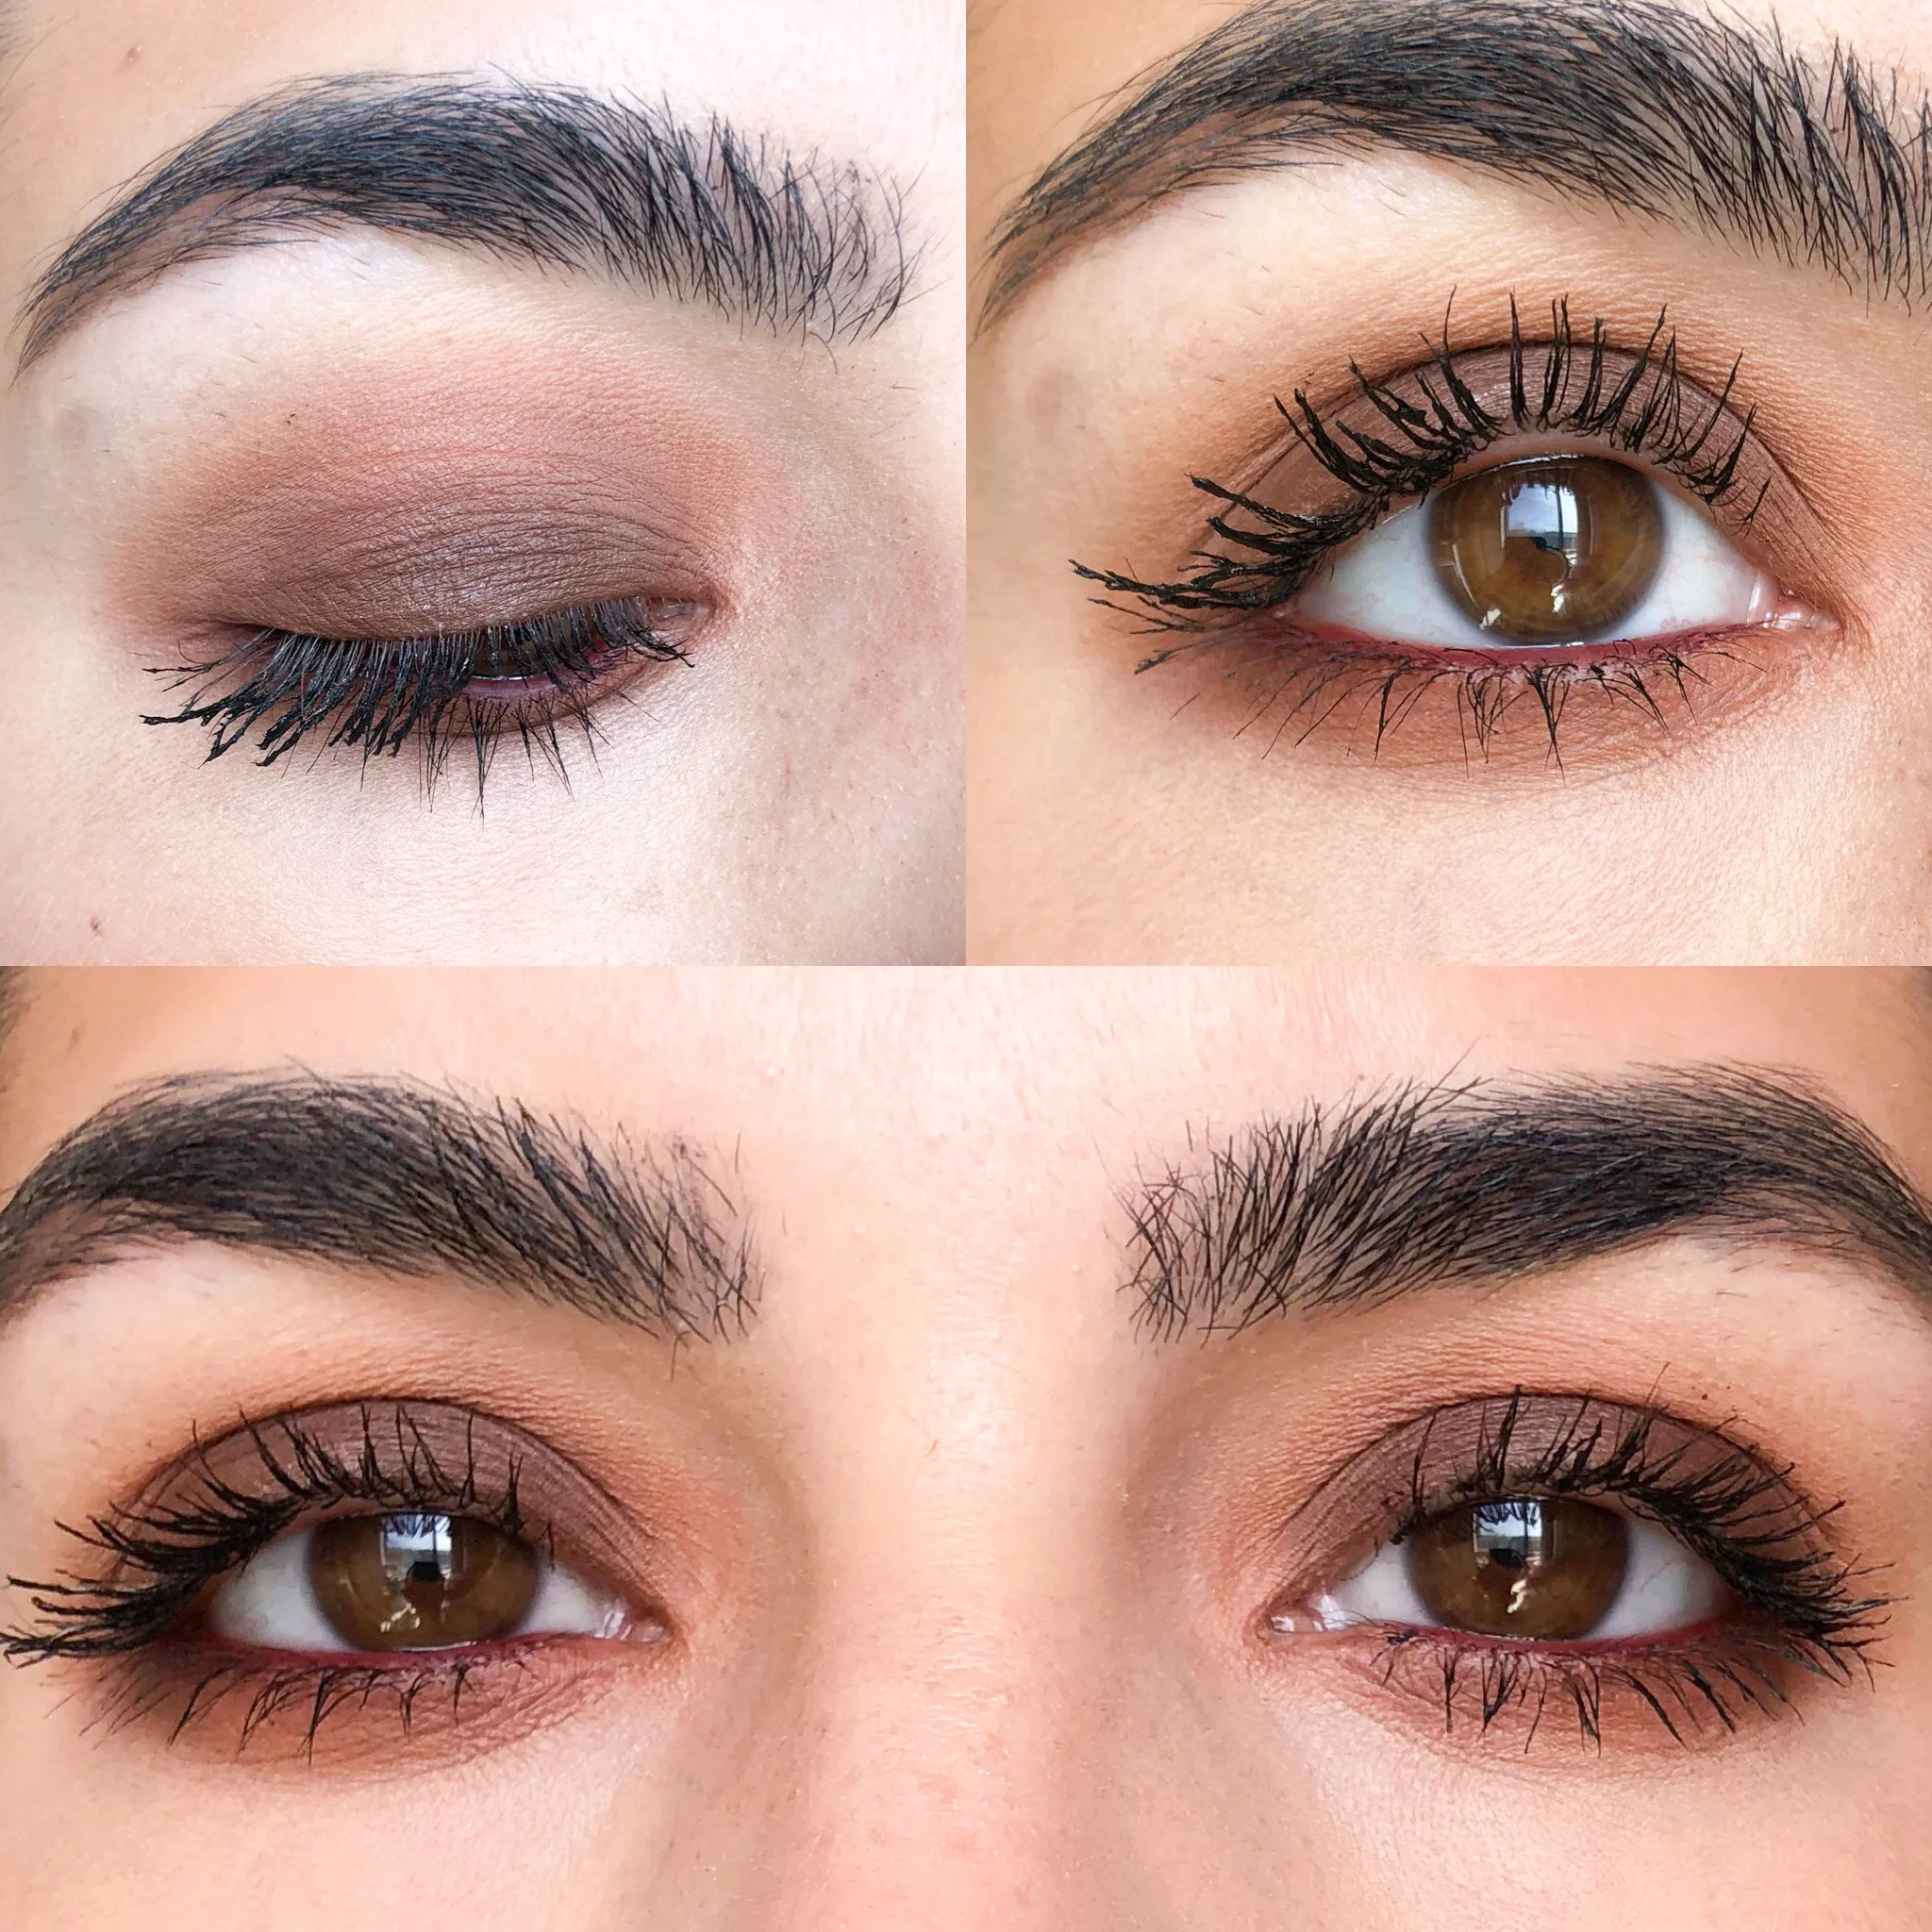
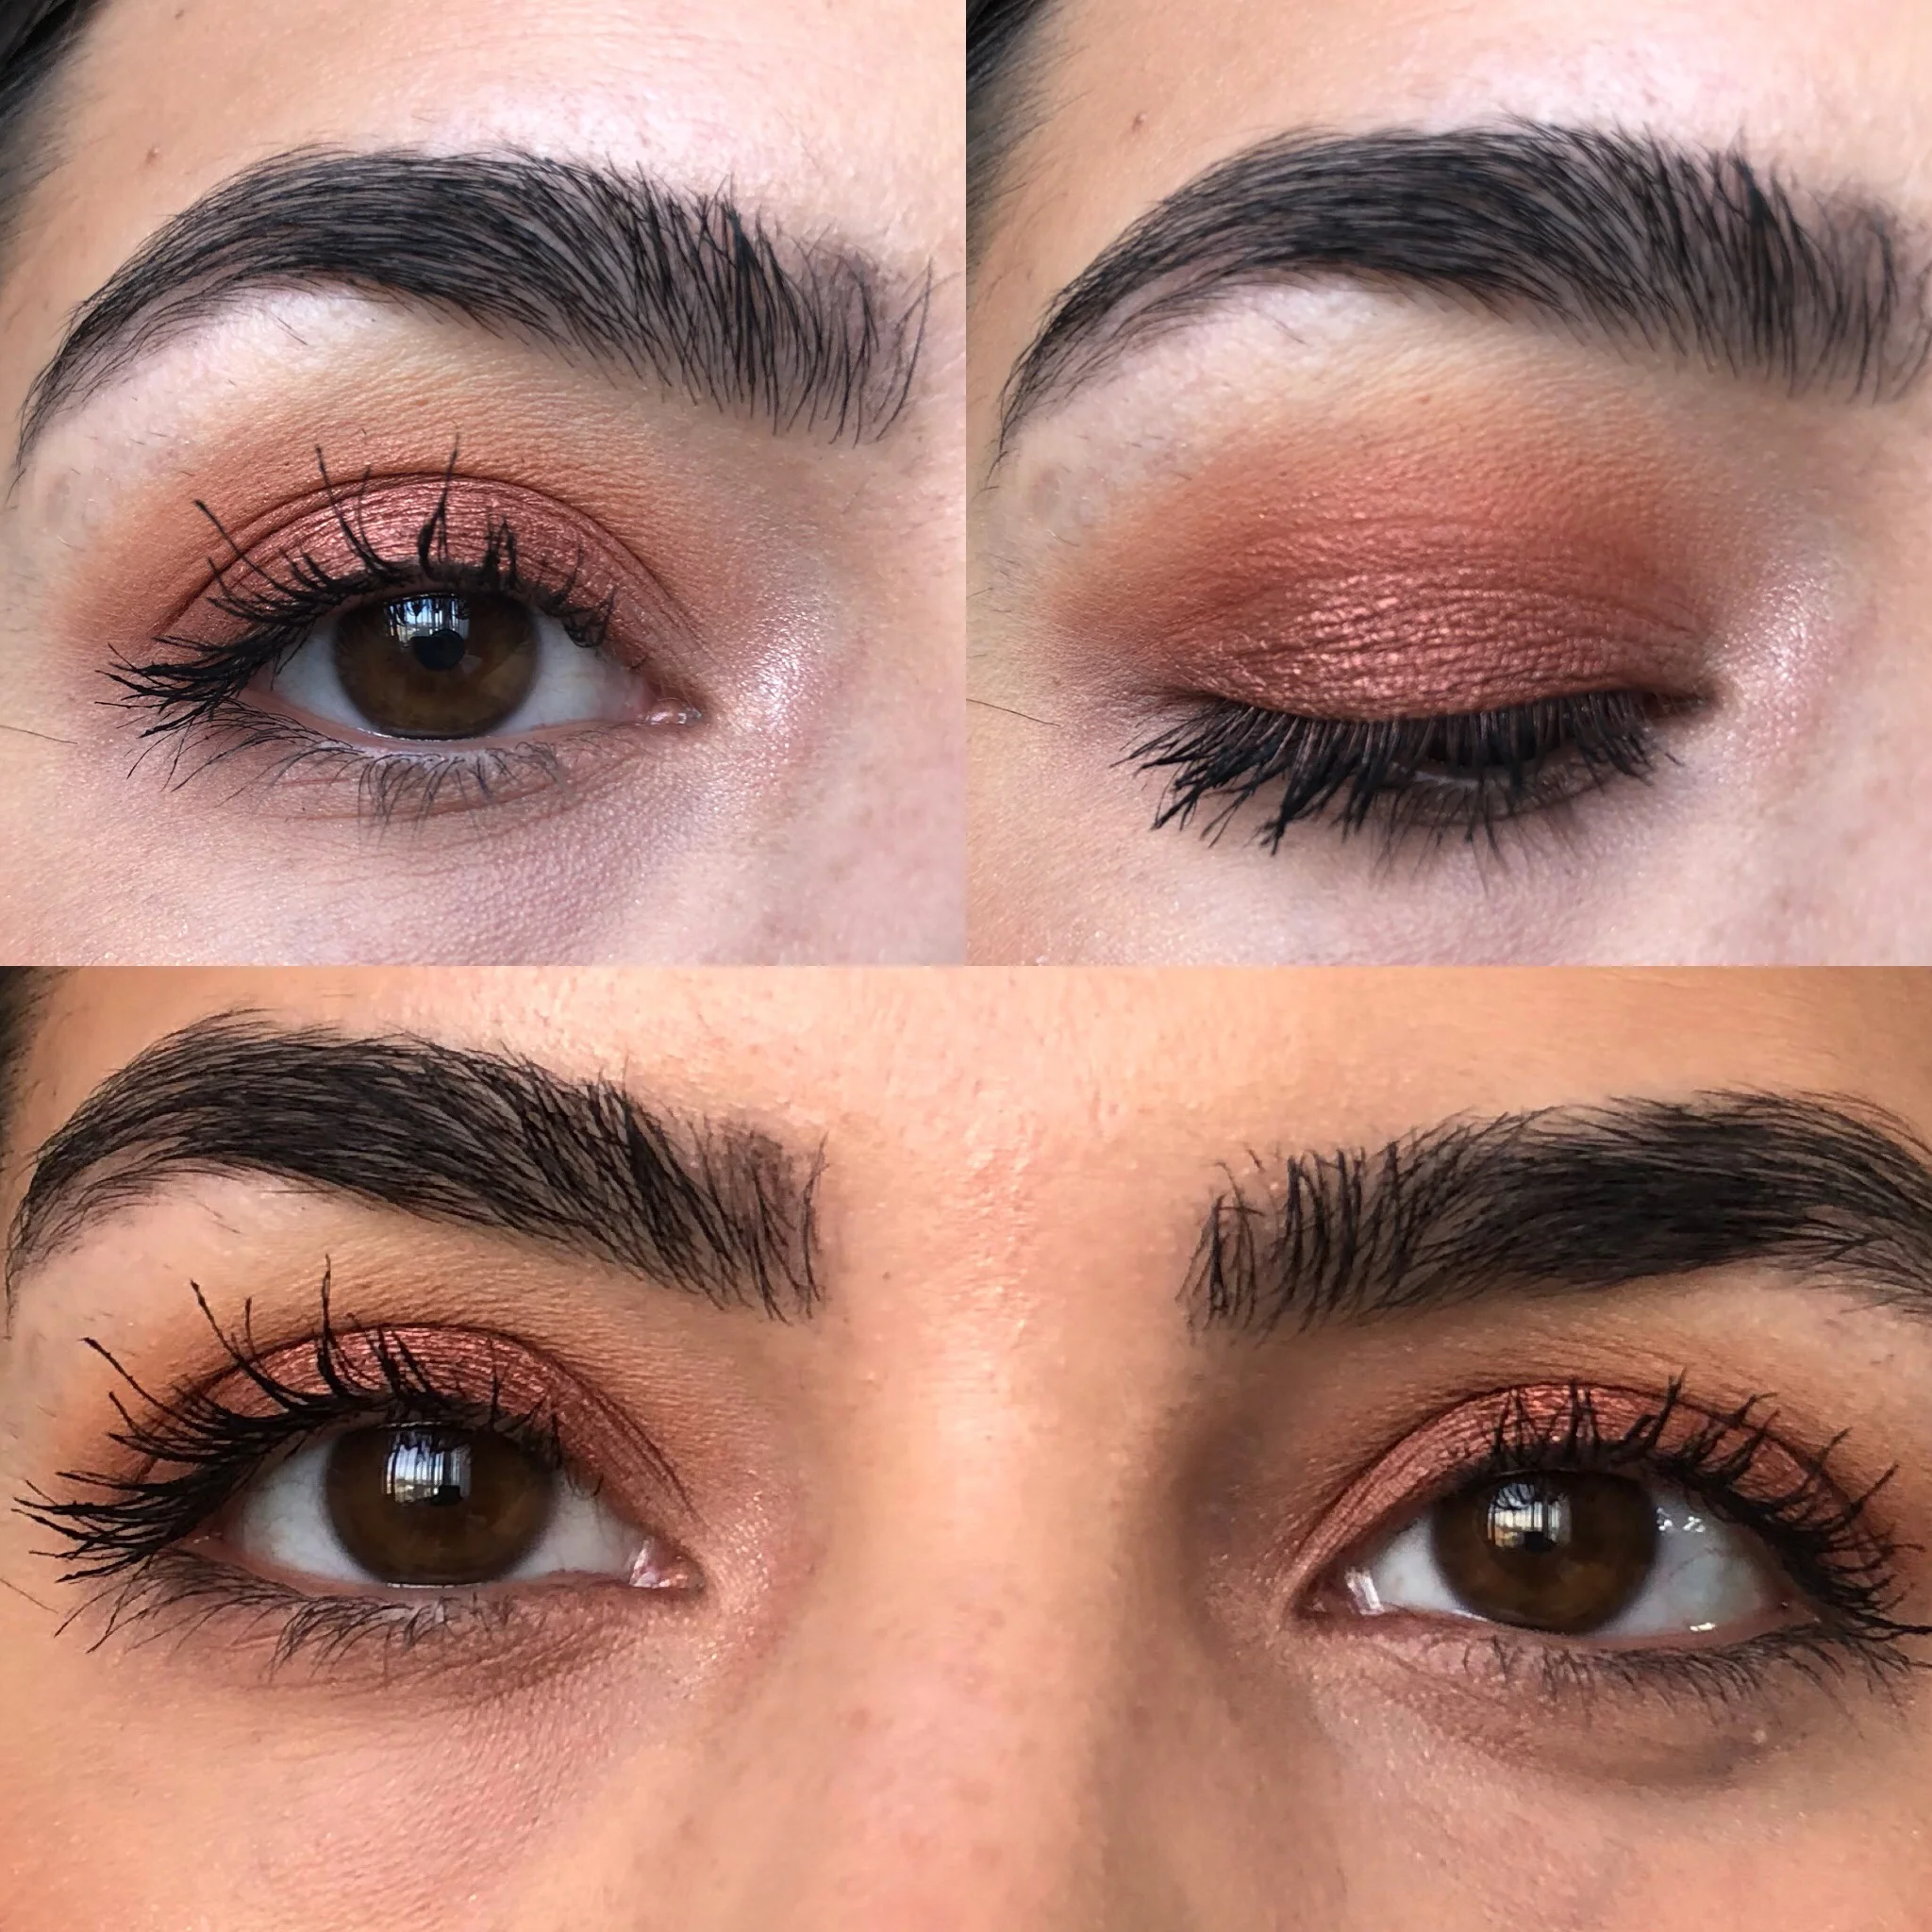
Look #3: SILK CREME blended into the whole crease; ROXANNE blended into the whole crease; MOCHA all over the lid; SILK CREME & ROXANNE buffed into whole bottom lash line; MOCHA blended into outer 2/3 of bottom lash line.
Look #4: SILK CREME & M.F.E.O. all over lid and blended out towards the crease; ENLIGHT in inner corner.

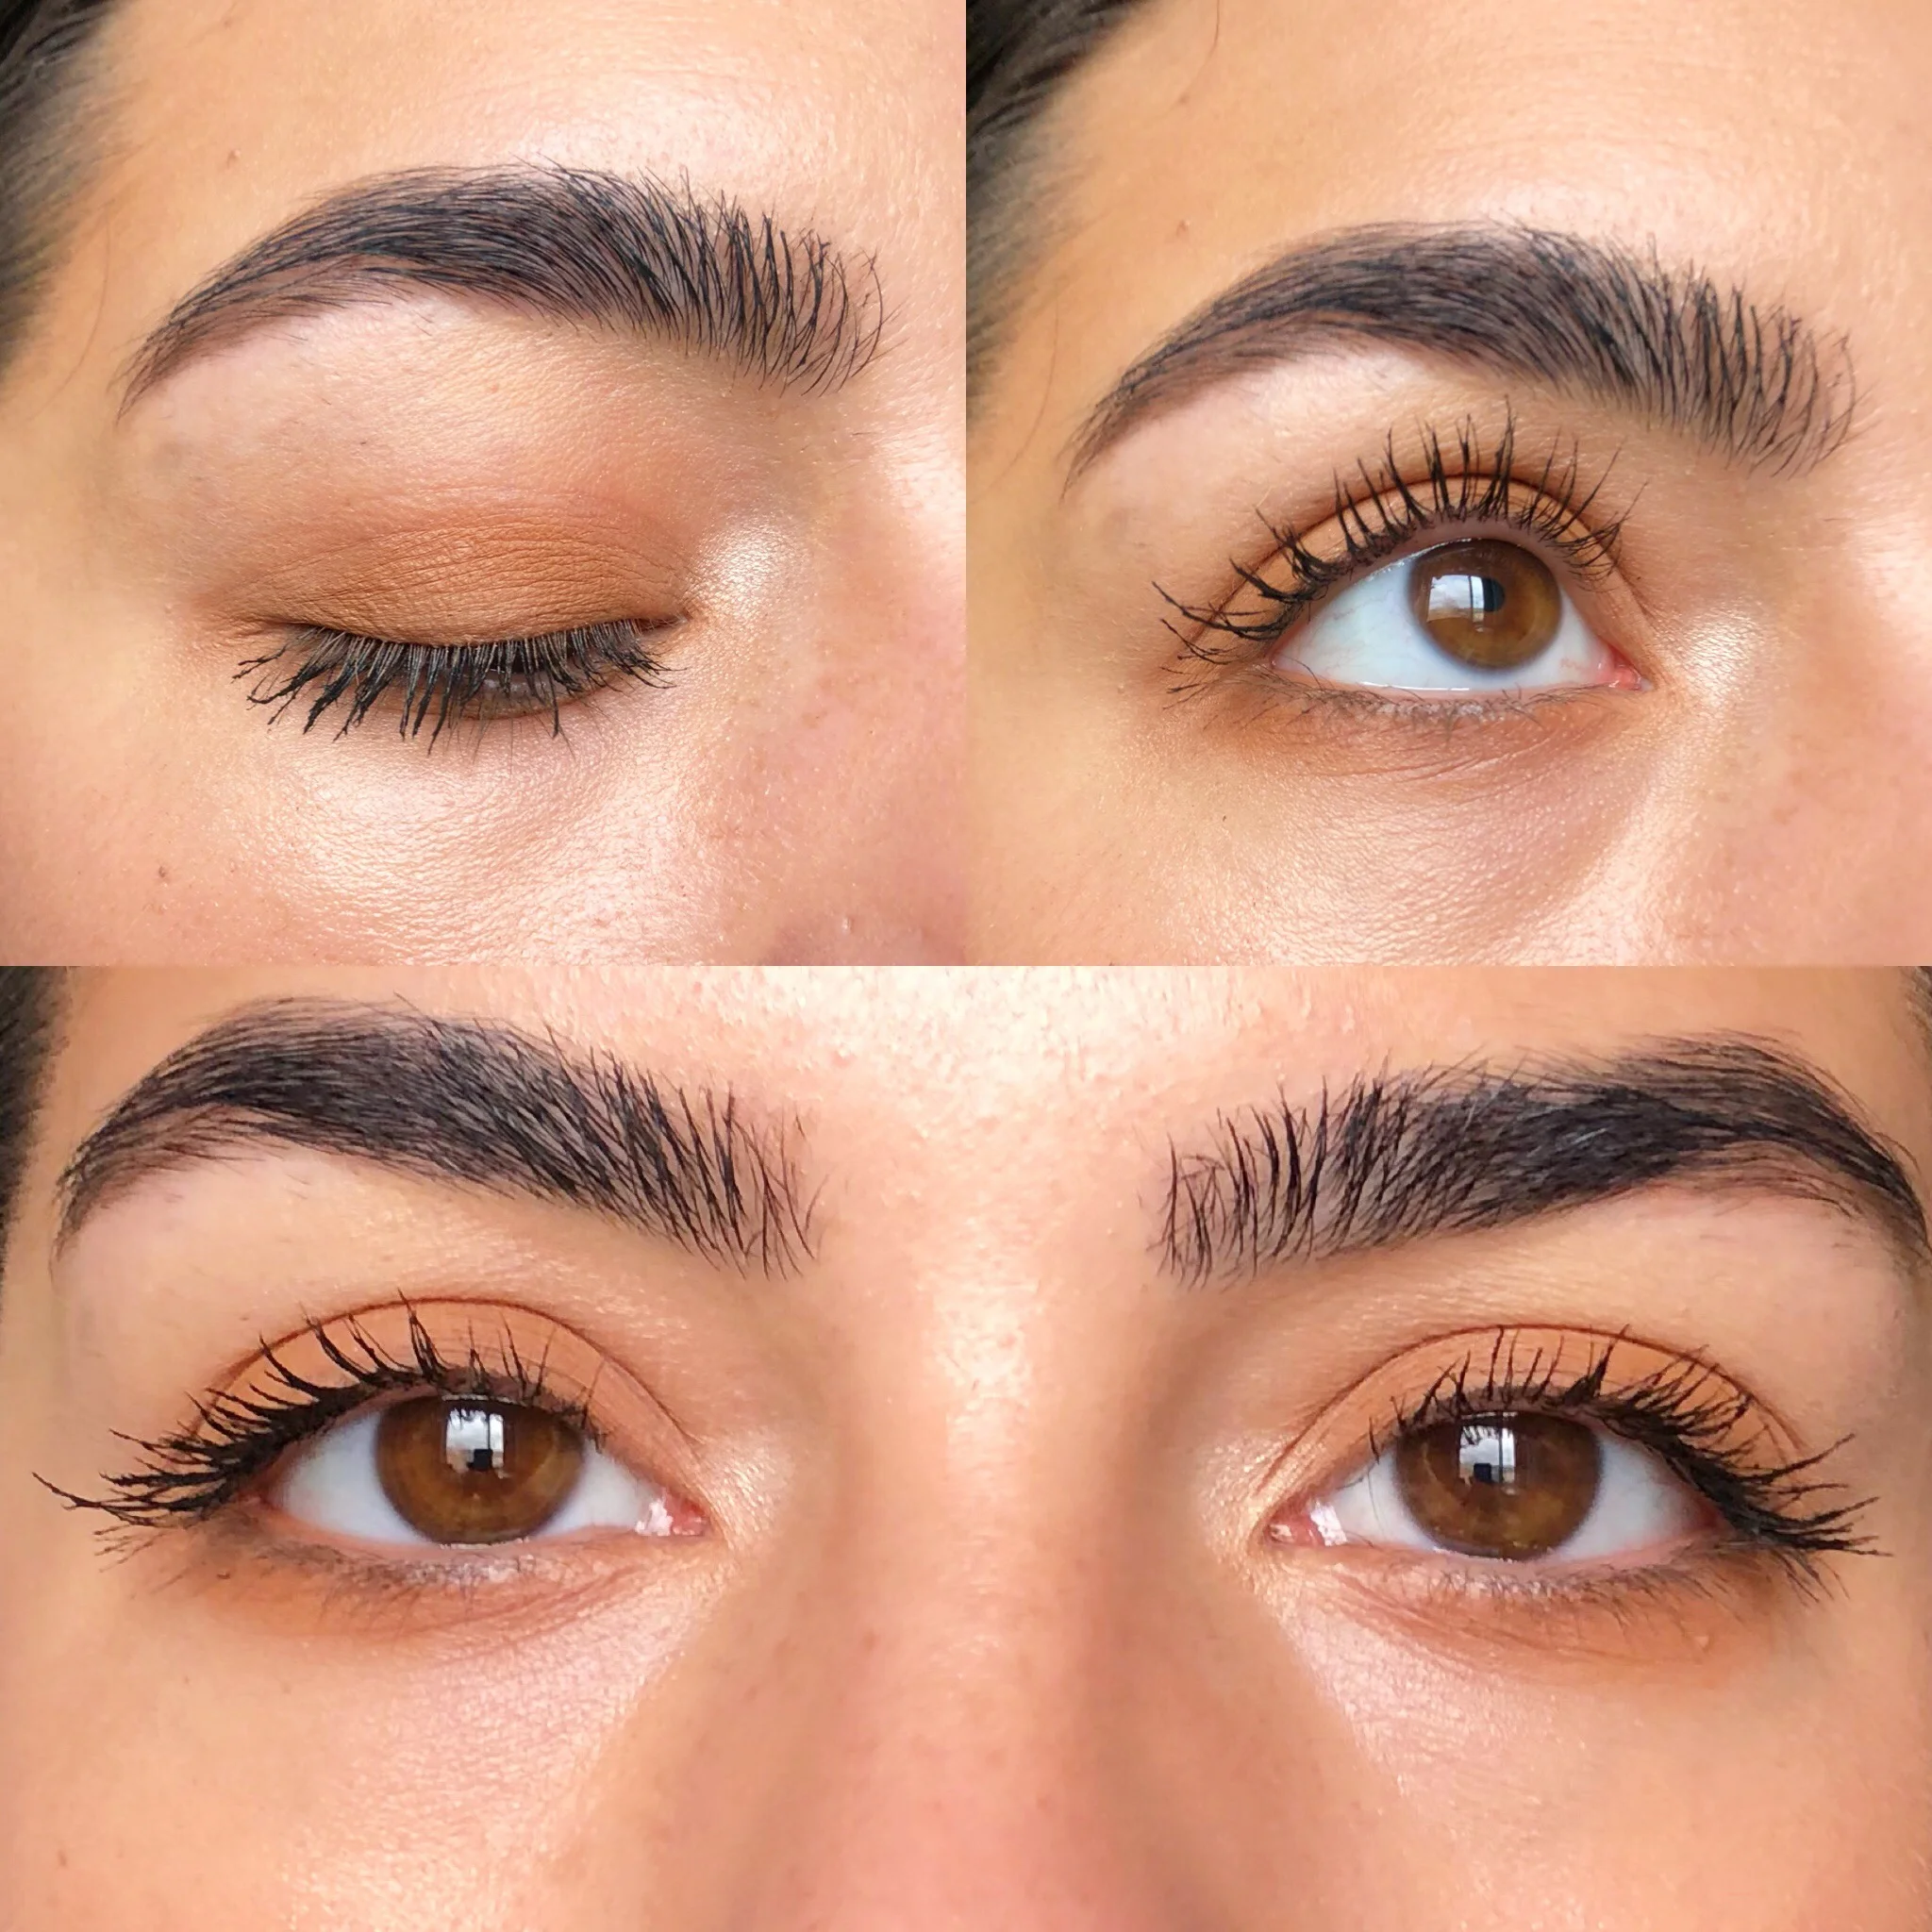
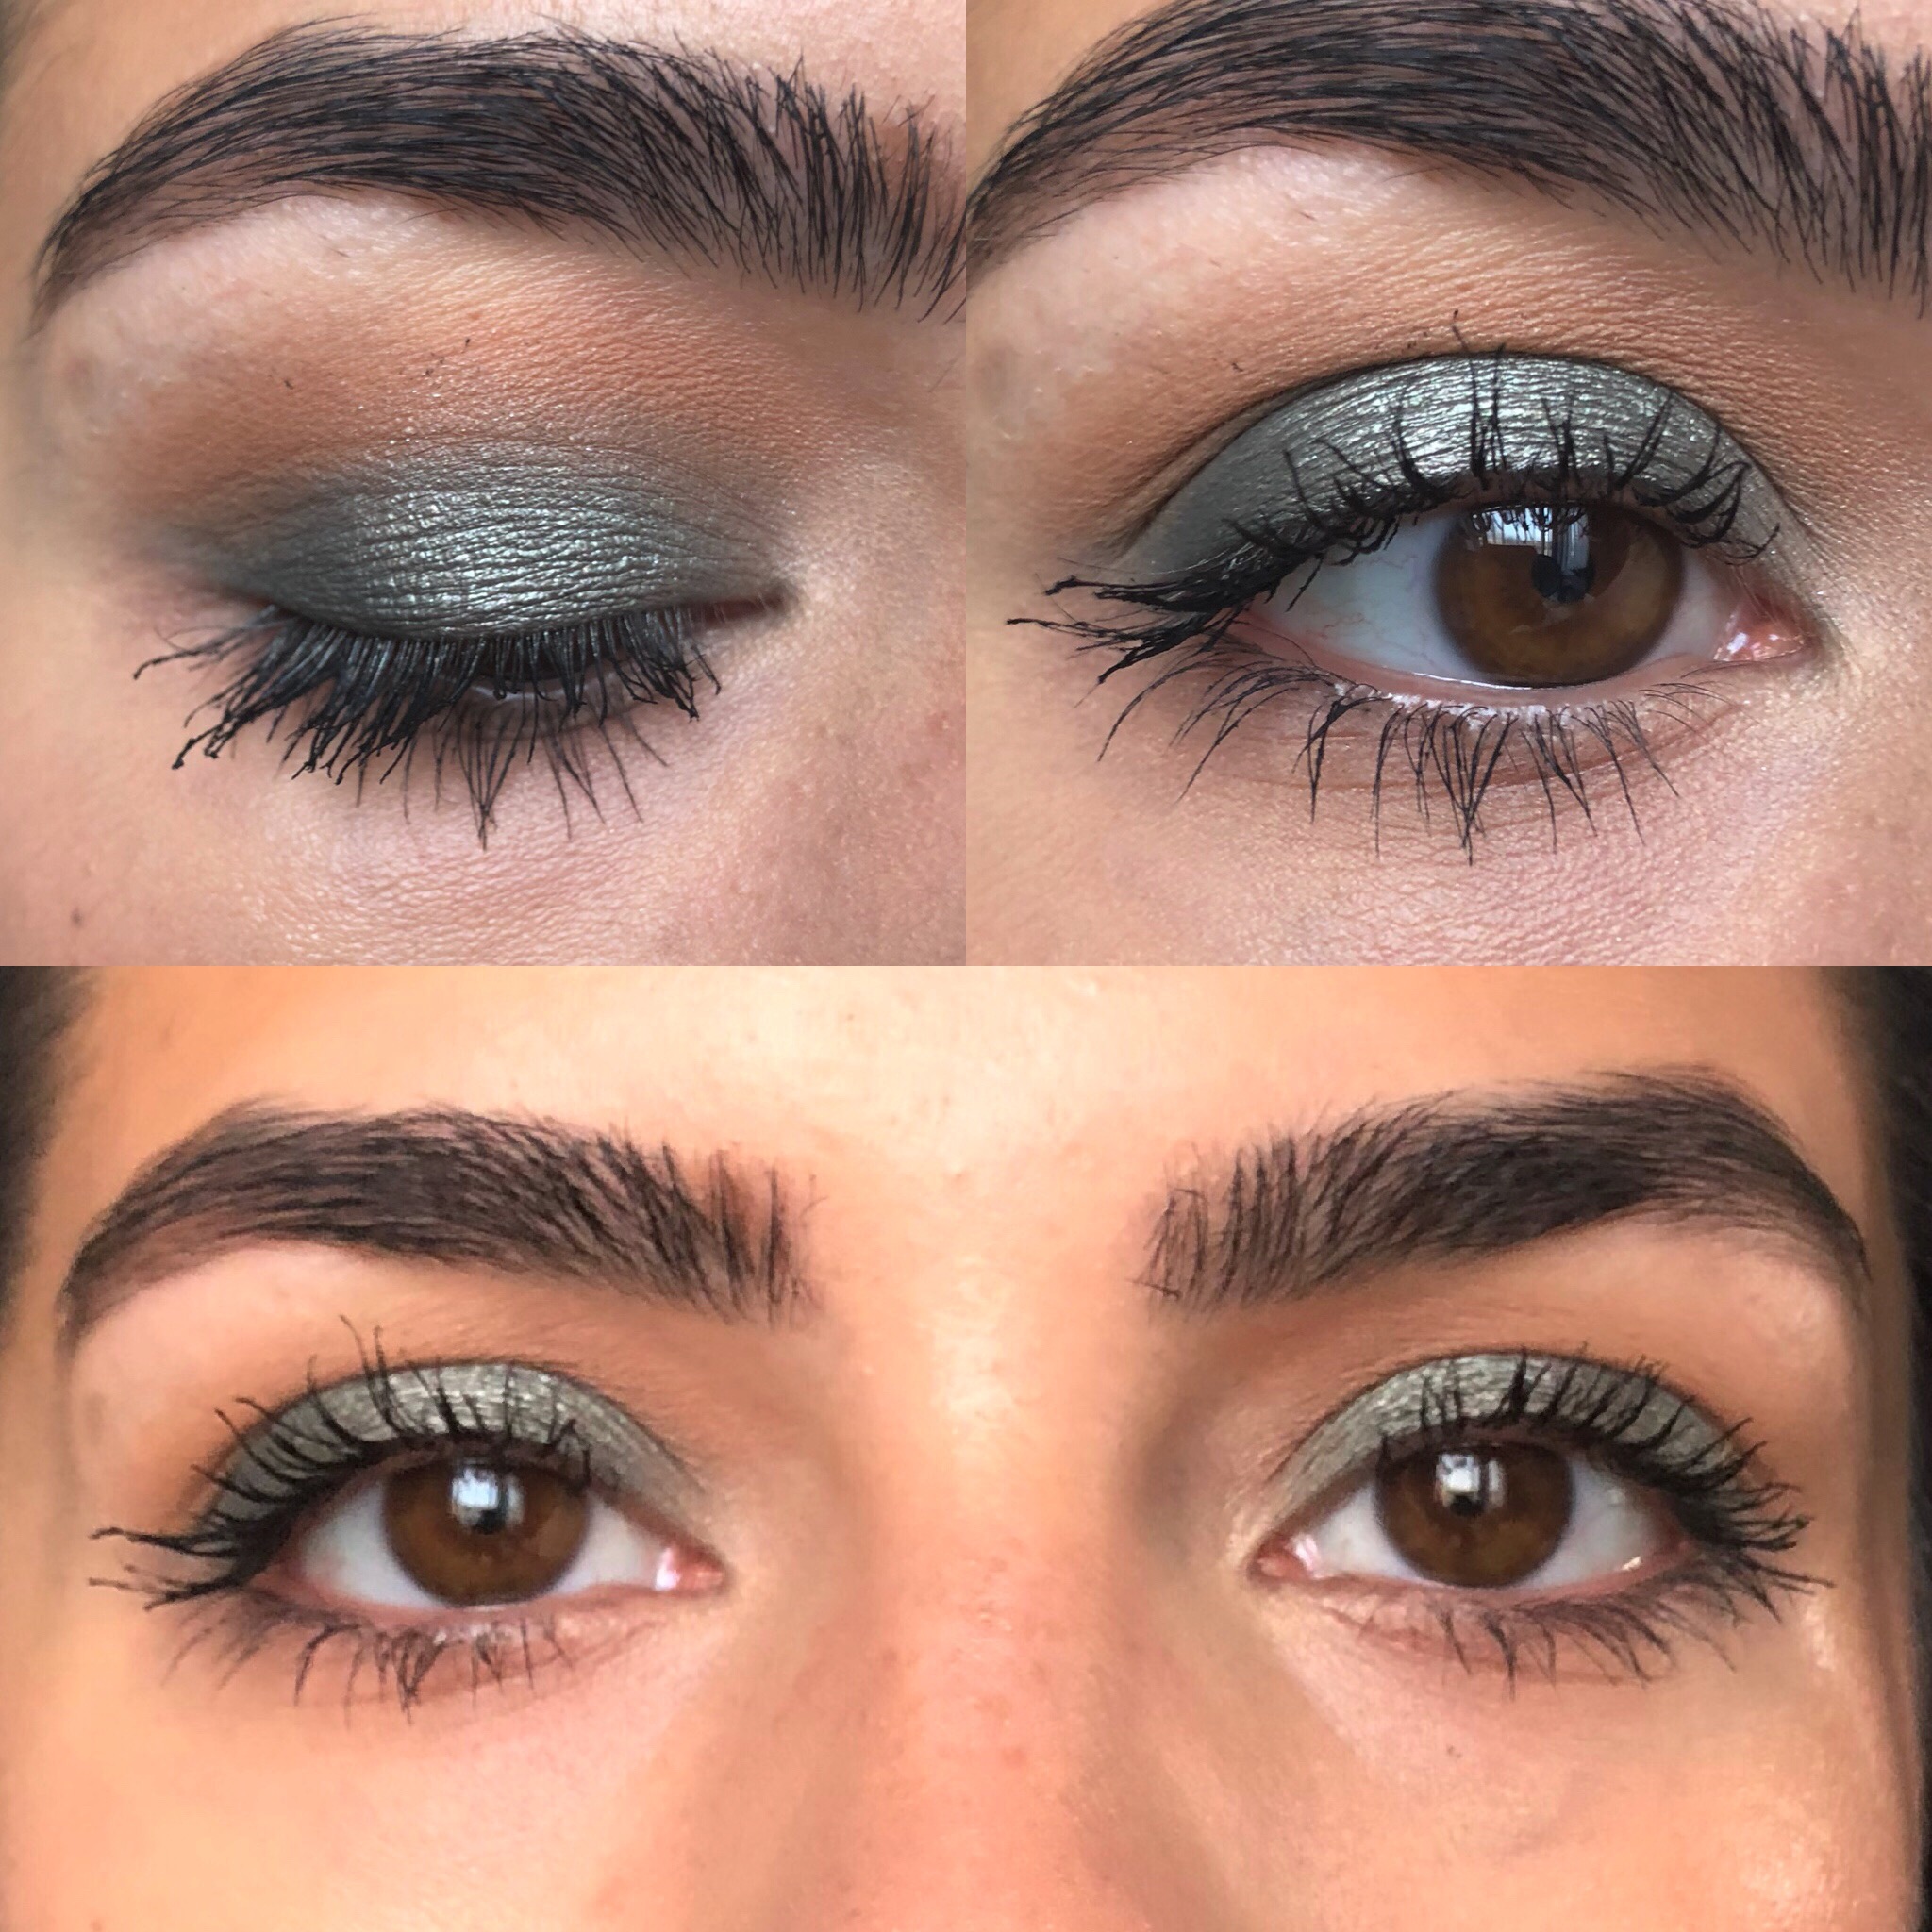
Look #5: ROXANNE blended into the crease but very concentrated in the outer corner; S.B.N. outer half of the lid; 24/7 inner half of the lid; SODA POP & CENTRAL PARK concentrated in the outer corner; OBSESSED in the inner corner.
Look #6: CREAMSICLE blended into the whole crease really well; QUEEN all over the lid and blended out to meet CREAMSICLE.
Look #7: BEAM all over the lid; BUTTER & POOTER mixed and concentrated in the outer corner; BUNS blended on top of that still in the outer corner; Next layer CHIP on top of that; Add winged eyeliner and then go in with smaller brush to concentrate a little bit of CENTRAL PARK in the outer corner.
Look #8: SILK CREME blended into the whole crease; DIVA all over the lid and blended to meet SILK CREME; ENLIGHT in the inner corner.
Look #9: CREAMSICLE blended into whole crease; ENCHANTED placed in inner and corner corners only and blended out slightly; HUSTLE added to center of lid; Darken inner and outer corners of lid as needed to create Halo shadow effect.
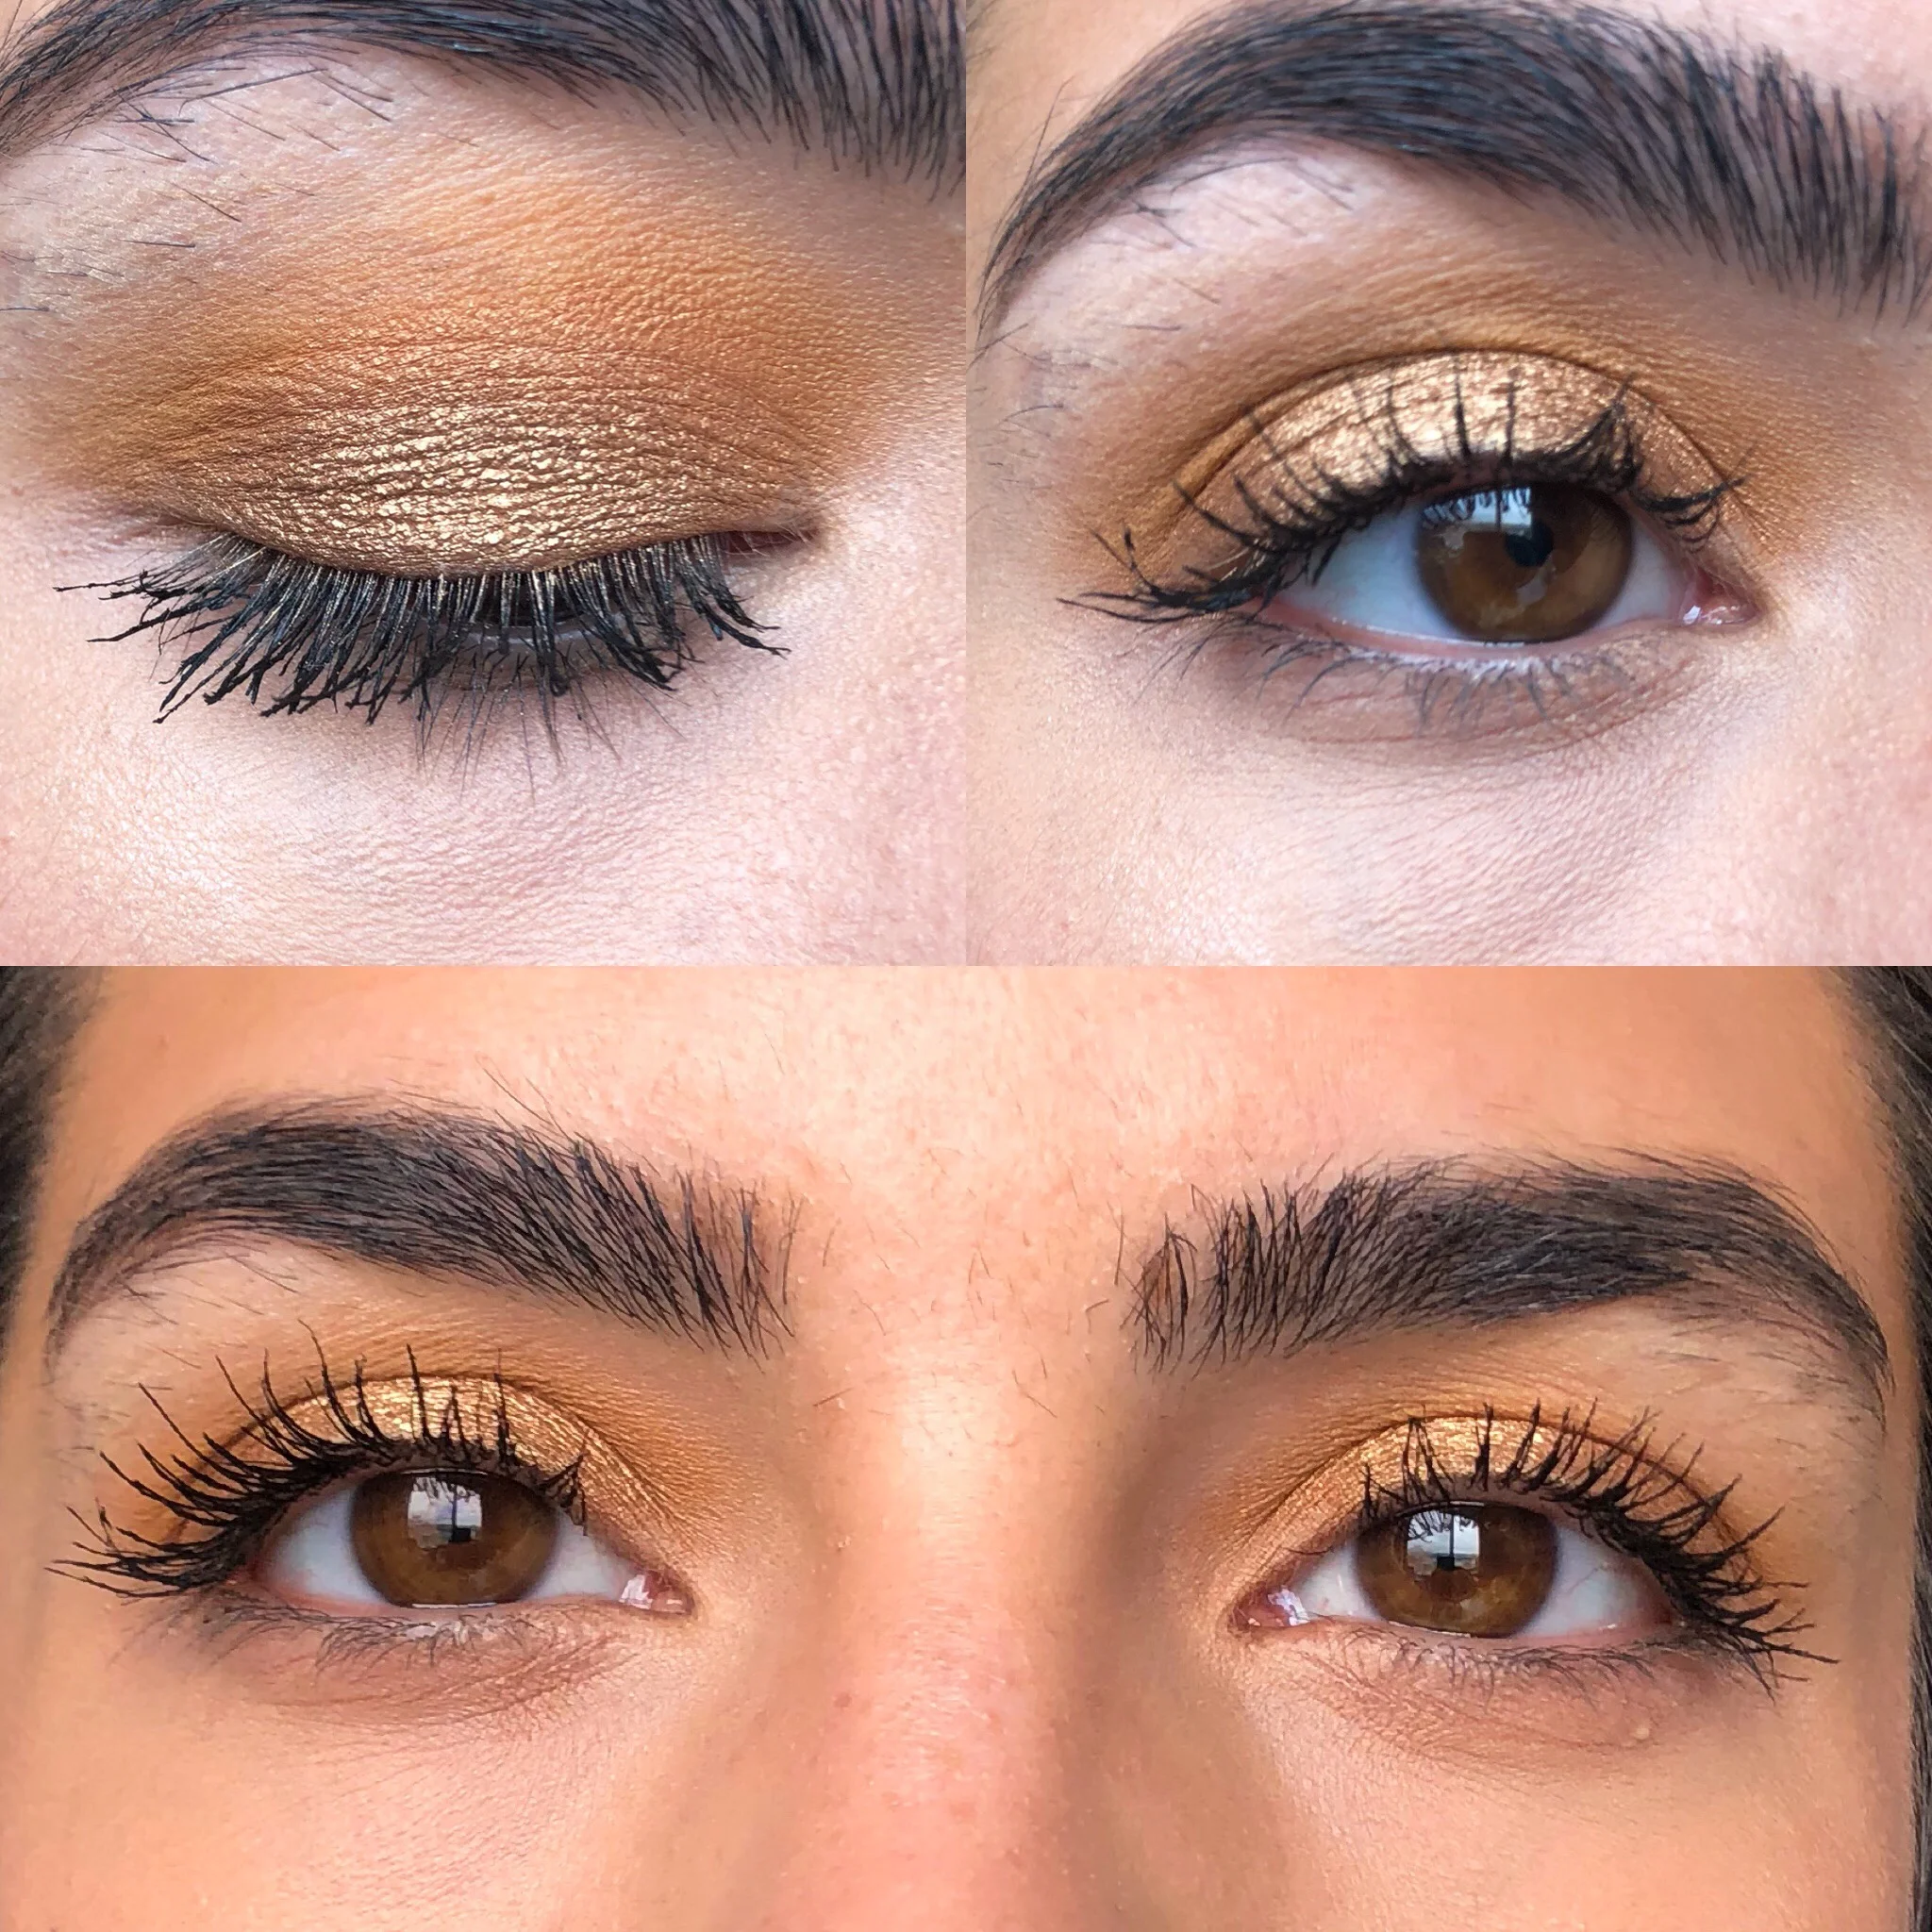
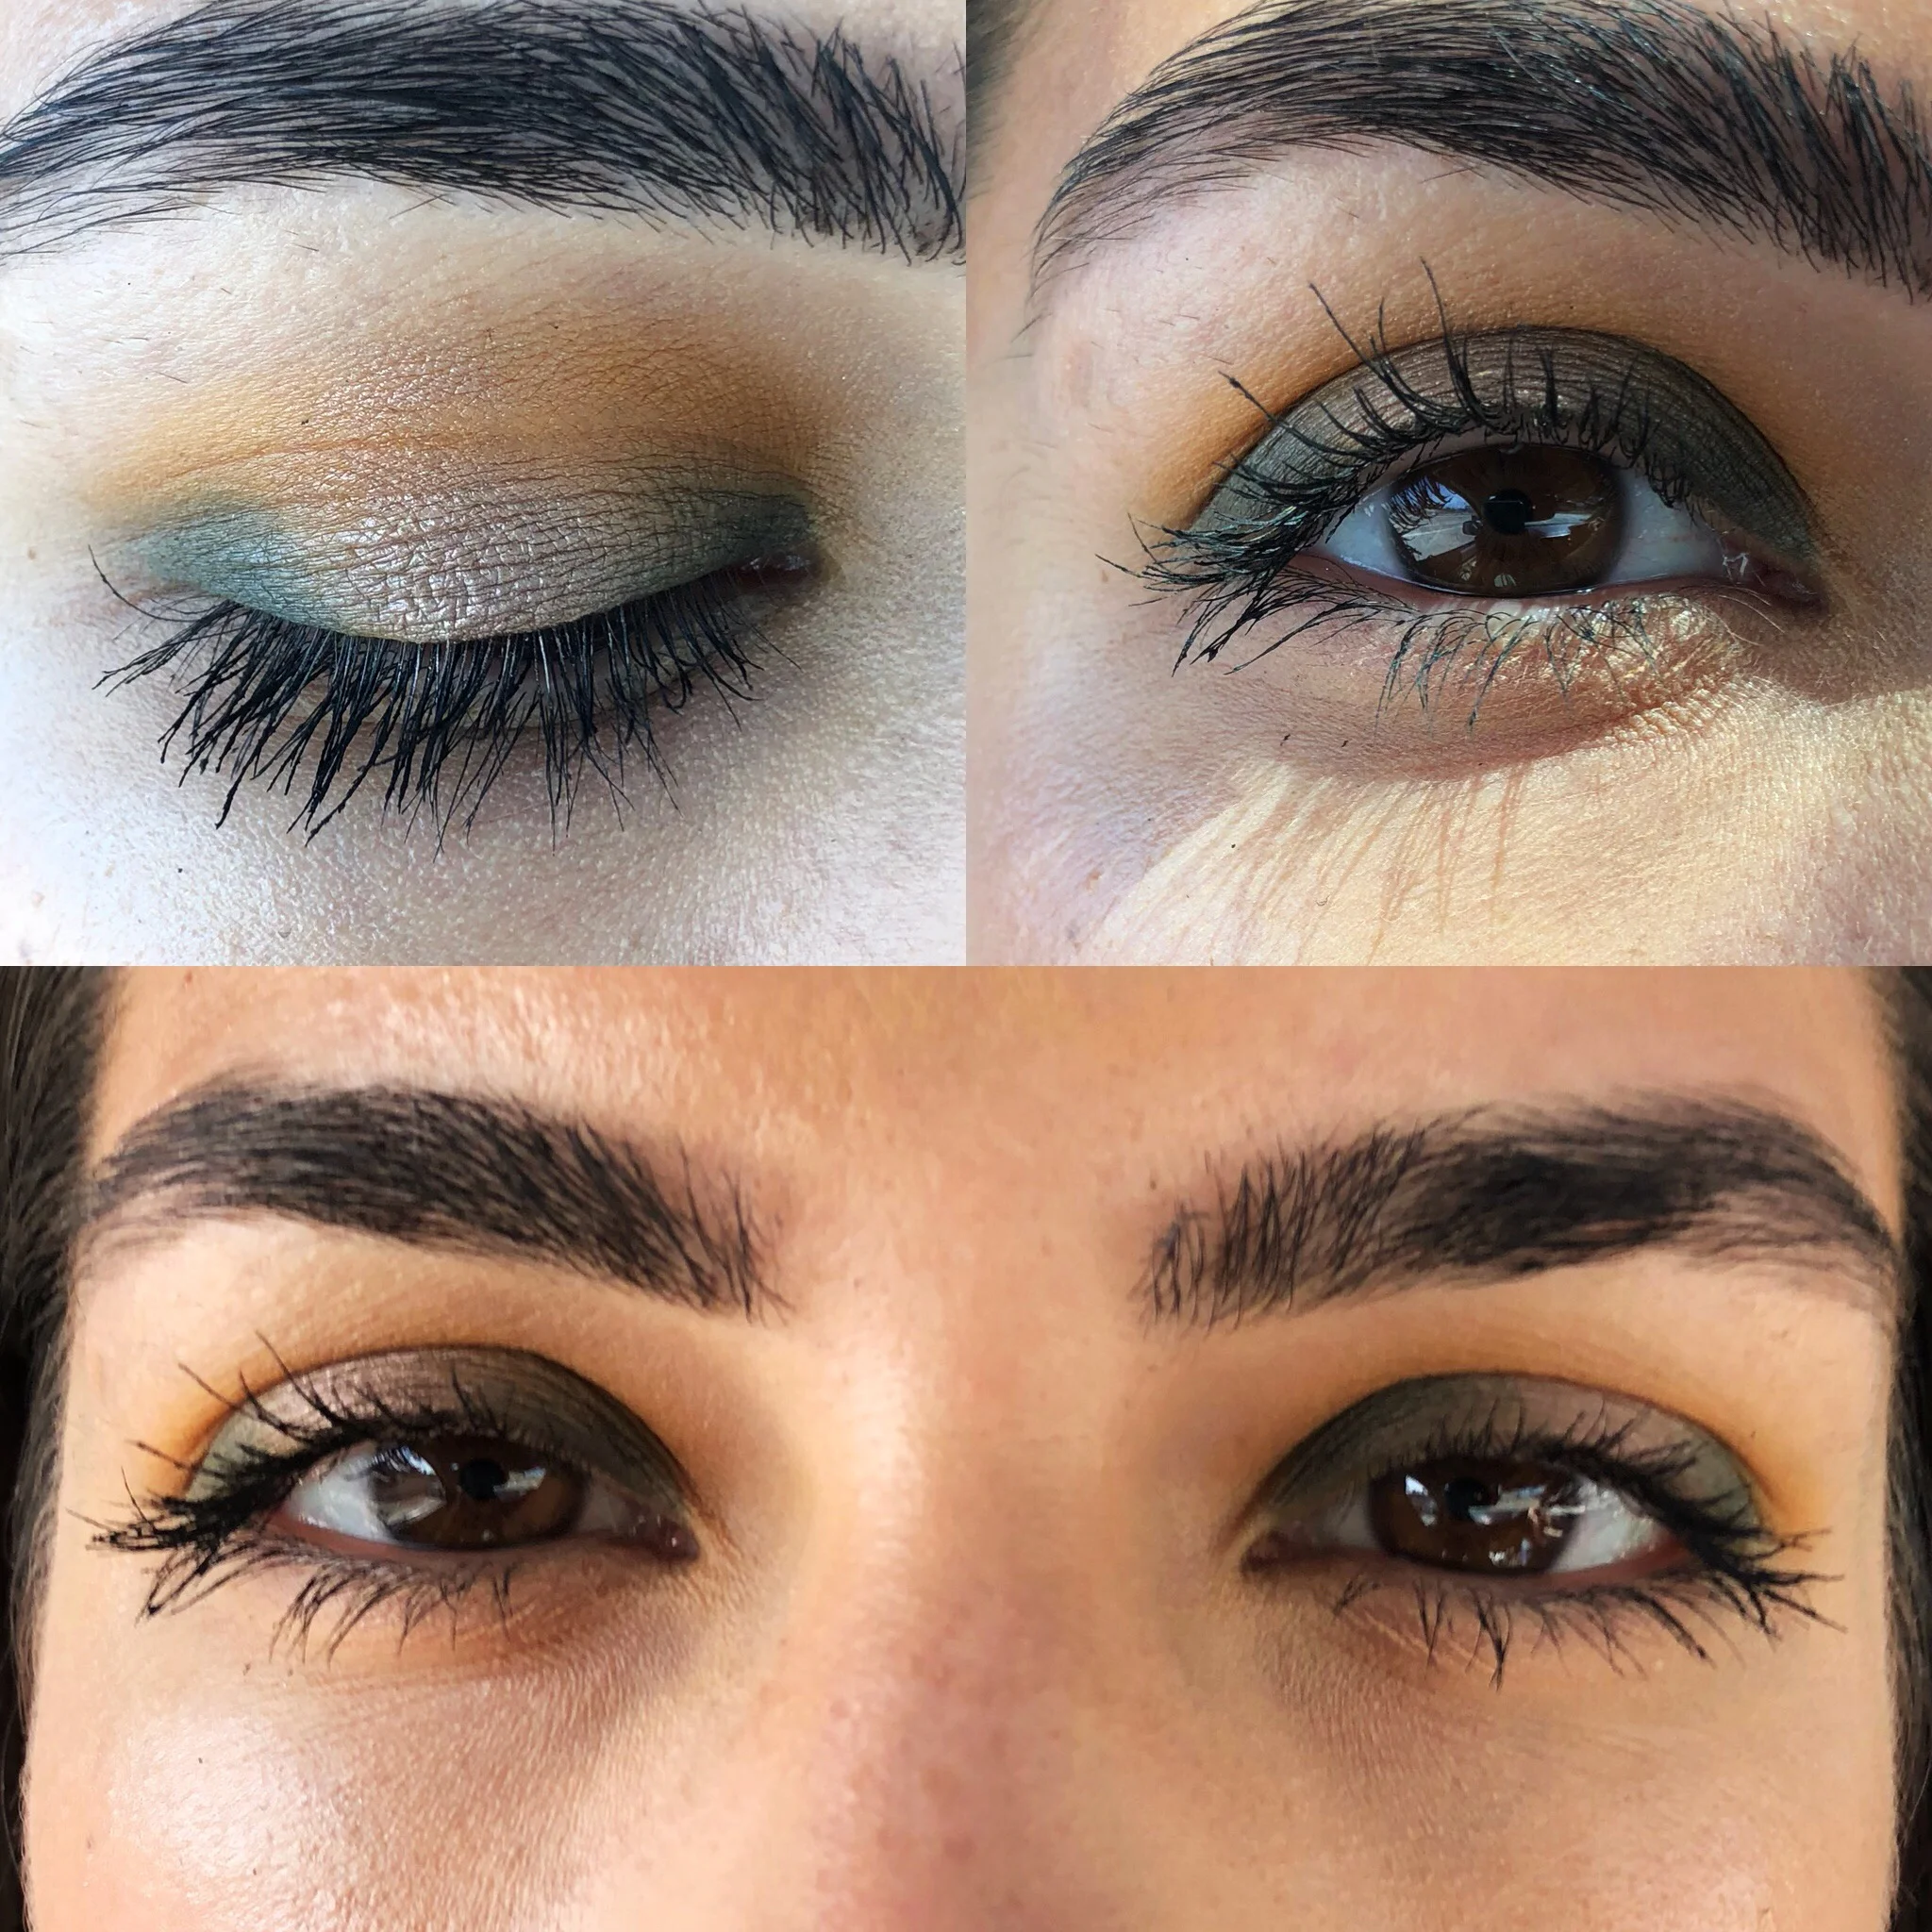
Look #10: M.F.E.O. blended into the whole crease; HUNTS added a little to deepen the crease slightly; FIREWORK all over the lid.
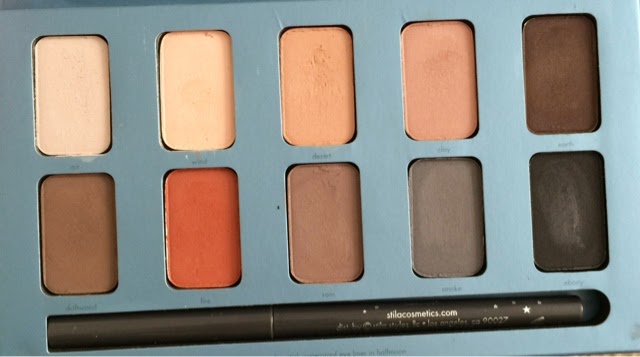
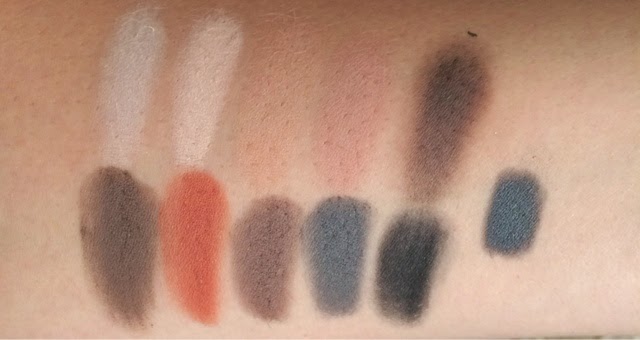
Below I've shared close ups of the shadows so you can see the whole palette and decide if you want to snag this one! I recommend it. I was actually surprised how many different types of looks I could create because when you look at the palette as a whole, there are many similar colors!
Some of the shadows towards the bottom look similar here, but up close and in natural light you can see that Enchanted is a deep forest green, central park is brown; and soda pop has some burgundy/ deep purple to it. Abyss is black.
Again, PLEASE comment below sharing which palette you want me to create 10 looks for next! I really loved doing this because it challenges me to create new looks all the time which is really fun as a makeup artist!
Have a beautiful day,
Andrea