Maybelline 'Soda Pop' Palette Makeup Tutorial Video

I am finally back with another YouTube video for you guys! My bridal season this fall has been amazing, but so incredibly busy, which means I’ve been neglecting my YouTube channel. I’m finally starting to feel inspired again however, so I sat down and filmed this really easy, warm & purple fall eyeshadow look for you using the Maybelline ‘Soda Pop’ palette. Let me know in the comments below if you have tried this or the Lemonade palette by Maybelline!

As usual, the products I’ve used are listed below the video. Let me know if you like this style of video and want to see more! I have a lot of fun creating these for you!

Products Used in order (Click on products for Links):

Weleda Skin Food

NYX Honey Dew Me Up Primer

MAKE UP FOR EVER Ultra HD Foundation

Maybelline Master Strobing Liquid Illuminating Highlighter in Light/Iridescent

IT Cosmetics Airbrush Buffing Foundation Brush

Maybelline Soda Pop Eyeshadow Palette

Real Techniques Deluxe Crease Eyeshadow Brush Set

MAC Pro Longwear Concealer NC20

Beauty Blender

RCMA No Color Powder

Fenty Beauty Match Stix Matte Skinstick in Amber

Milani Baked Blush in Luminoso

Rituel de Fille Rare Light Luminizer in Anthelion

L’Oreal Voluminous Lash Boosting Conditioning Primer Mascara

L’Oreal Voluminous Voluminous Original Carbon Black Mascara

L’Oreal Lipstick in 008 Fairly Nude (Apparently they don’t make this anymore…sorry!)

Hope you enjoyed this video and have the best weekend,

Andrea

Disclosure: Amazon links are Amazon Affiliate links meaning that I make a commission off the purchase of the product through my link. I would never recommend a product that I didn't love and all opinions are my own. I am thankful for you choosing to purchase through my links, as it helps me create more content for Andrea Fontana Beauty.

Kim Kardashian Met Gala Makeup Tutorial Video

I'm back with another YouTube video! This time it's a tutorial showing how to create this stunning look that Kim wore to the Met Gala last week. I love the shape of the eye shadow and how dramatic it is! Remember you can use brown or other colors to make it not as dramatic if you want. 

Comment below if you want me to recreate a specific look for you! I had fun making this for you guys. 

My birthday is tomorrow and I would really love for you to Subscribe to my Youtube Channel if you haven't already as a way to wish me happy birthday ;)

Hope you are having a beautiful week,

Andrea

Everyday Glowing Skin Makeup Tutorial Video

Welcome back to Andrea Fontana Beauty!

I have finally filmed a YouTube video on the glowing skin look I've been wearing nonstop since I got back from my Florida vacation. I love how healthy it makes my skin look, but also how quick it is!

Please be sure to LIKE and SUBSCRIBE to my channel so you can always stay updated!

INSTAGRAM: www.instagram.com/andreafontanabeauty

FACEBOOK: www.facebook.com/andreafontanabeauty

Welcome back to my channel! Today I'm sharing the glowing skin look I've been wearing all the time since my recent vacation. Please be sure to LIKE and SUBSCRIBE to my channel so you can always stay updated!

Here are the products and links I mentioned in order of appearance:
-It Cosmetics CC Cream in Light
-Becca Cosmetics Shimmering Skin Perfecter in Opal
-Urban Decay Naked Concealer in Light Warm
-RCMA Makeup No Color Powder
-Sonia Kashuk Undetectable Creme Bronzer: Video on this--> CLICK HERE
-Benefit Cosmetics Dallas Powder
-Glossier Haloscope in Moonstone
-Glossier Boy Brow in Black
****For 10% off your first Glossier order! CLICK HERE
-Loreal Voluminous Mascara in Carbon Black
-Lash Boost Growth Serum & Post --> CLICK HERE

If you'd like to support Andrea Fontana Beauty in an easy way, click this link before buying what you were already going to buy on Amazon. The price stays the same for you and I get a commission of your purchase! If you choose to use it, thank you always for your support!
***http://amzn.to/2HA8Aj5

Let me know if you have any more makeup look requests! I have really fallen in love with creating these videos so I hope you enjoy them!

Have a beautiful weekend,

Andrea
 

Romantic & Soft Valentine's Day Makeup Tutorial

I'm back with the second makeup tutorial for Valentine's Day! Over on my Instagram (link is to the right-->) I created a poll in my stories asking if you wanted to see a romantic & soft makeup look or a bold & daring one. I already created the bold & daring, so here is the second one, romantic & soft!

This time around, I created a look that is much more subtle, but still just as beautiful as the last. I used only one palette, The Jaclyn Hill Palette from Morphe, to create the whole look! It was my first time using any Morphe eyeshadows and I really fell in love with this palette. I can't wait to create some more looks with it.  Products used are listed in the description of the video on YouTube, so be sure to click on the video and visit it there if you want details!

Remember, just like the last look, you can swap out any shadows for the ones shown and make the look your own. 

Here's a better look at the shadows that I used!

IMG_1482.JPG
IMG_1483.JPG
IMG_1485.JPG

As I mentioned in the video, if you have any requests for specific looks or palettes to use to create looks, leave a comment below to let me know!

Have a beautiful start to your week,

Andrea

Bold & Daring Valentine's Day Makeup Tutorial Video

Facetune_05-02-2018-17-34-30.jpg

I'm back with a makeup tutorial! Over on my Instagram (link is to the right-->) I created a poll in my stories asking if you wanted to see a romantic & soft makeup look or a bold & daring one. Technically, romantic & soft won by one vote, but I decided I would create both looks since it was so close! 

In the YouTube video below, I show you how to take a few shadows and create the easiest smokey eye. Products used are listed in the description of the video on YouTube, so be sure to click on the video and visit it there if you want details!

Remember, you can swap out any shadow for the cranberry/burgundy tones so this look is really versatile! Look for the romantic & soft tutorial to come early next week! 

Have a beautiful night,

Andrea 

Dre Does a Maleficent Inspired Makeup Look

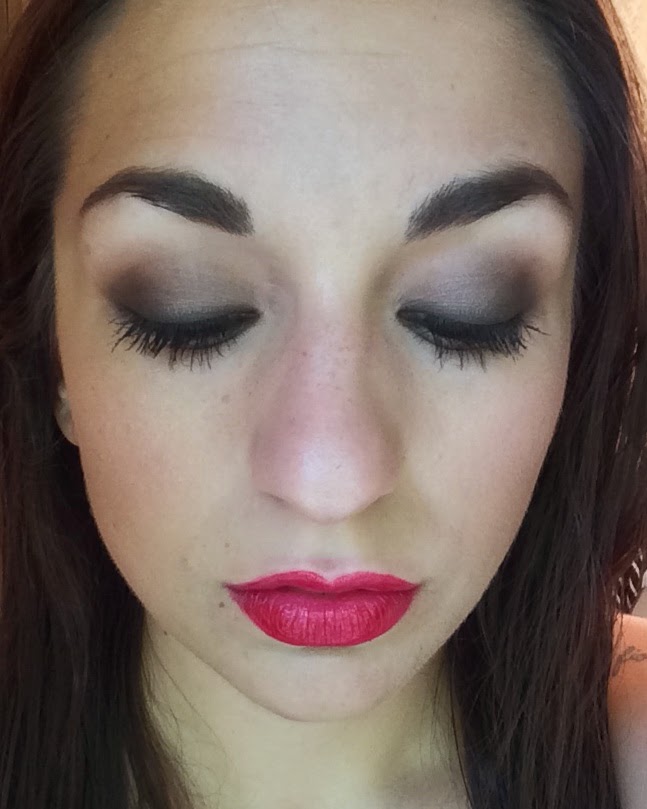
This past weekend on Saturday afternoon, I decided to go see Maleficent. I have heard so many amazing things not only about the movie but the makeup too. I was blown away by the movie and every time they showed Maleficent I was analyzing her makeup. The first thing I did when I got home was go straight to my makeup and figure out how I was going to recreate something. Since I was going to a family BBQ that night I knew I was going to do something wearable so it's a bit toned from the movie but I kept the makeup strong in the areas that were emphasized in the movie. In every look she has cool toned eye looks with really smoked out black liner. It's nothing crazy but still brings some drama. So if you'd like to know what I did to achieve the look below keep on reading.

 
(in Natural Lighting)
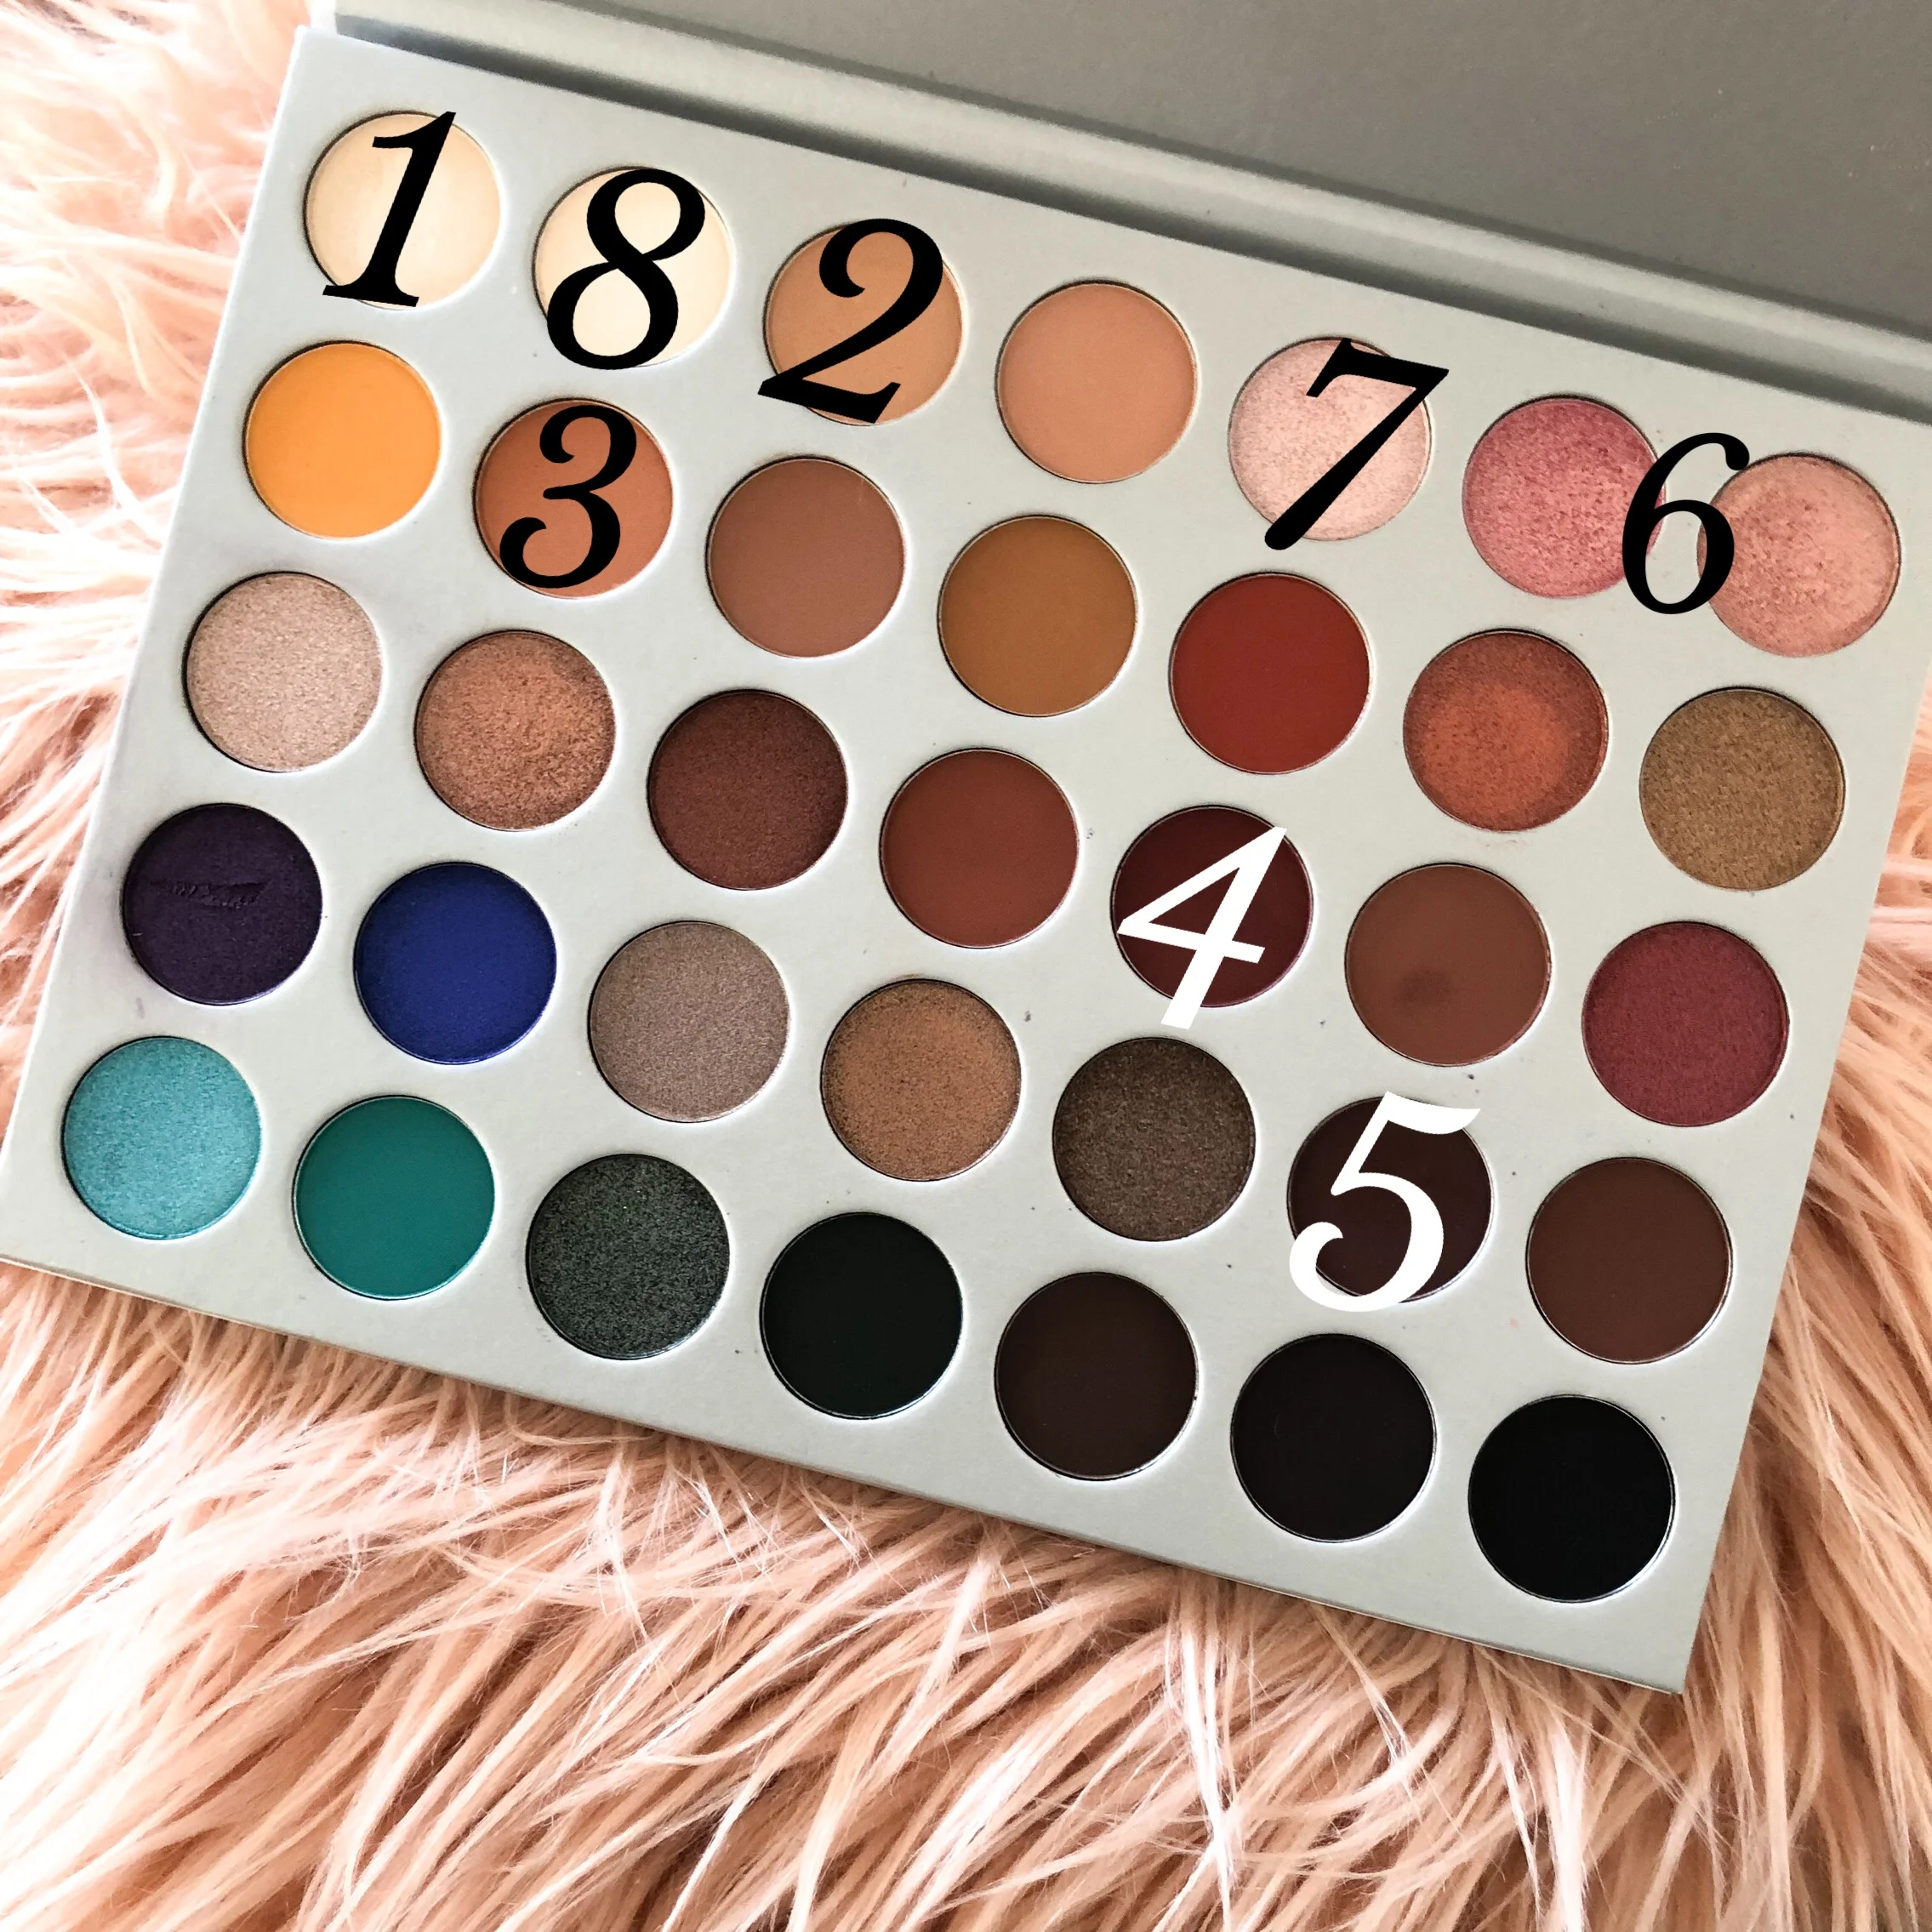
1. First off as always, I applied my Urban Decay Eyeshadow Primer and then used the Maybelline Color Tattoo in Tough as Taupe as a base. It's a nice cool-toned gray-taupe color.
2. Next I applied MAC's Espresso Eyeshadow in the crease with my Sigma E39 brush because it's a nice cool toned brown. I concentrated the color more on the outside of my crease since the eye looks in Maleficent were pretty basic on the lids and more dramatic towards the outer portion of the eye. 
3. Next I used my Real Techniques Base Shadow brush (don't be fooled by the name, I find it works amazing in the outer V because of it's pointed tip) to apply the same espresso color in the outer V of my eyelid. Make sure that with each application of color you are blending the shadows out so there are no harsh lines.
4. Now for the lid. I used MAC's Satin Taupe to apply to the lid very softly. It is a great cool taupe color which is obviously what we were going for. I applied this mostly to the inner 2/3 of my lid and blending it slowly into the darkened outer V area.
5. Next I applied a black gel liner to my eyes. I used Maybelline's Eyestudio Gel Liner in Blackest Black. After I let it dry almost all the way, I used a combination of that same Espresso shade and also Carbon from MAC, which is a matte black, to smoke out the gel liner. I used a pencil brush with a fine tip to do this. 
6. After smoking out the top eyeliner, I went back in with my Real Techniques Base Shadow brush but this time applied carbon in the outer V to blend that smoked out liner nicely into the outer V. 
7. Next I applied a black pencil eyeliner to tight line the upper and lower water lines completely from inner to outer corner because the look is so smoked out and dramatic in the lash lines. I really like the black Water-Resistant Eye Liner from Jane Cosmetics.
8. After this I used the same combo of Espresso and Carbon to smoke out the bottom lash line.
9. Next came two coats of my favorite mascara to give me dramatic but not insane lashes since they weren't the focus of the look. I use tarte's Lights, Camera, Lashes! mascara always!
10. Now for the rest of the face I kept things pretty cool toned. I did contour my cheeks but not as intensely as Maleficent because I was wearing this to a family BBQ after! I also used a cool toned natural blush (tarte's Amazonian Clay 12-hour blush in Honored) since her makeup was pretty pale and she never had much of a flush to her cheeks. Lastly, the lips. I was at home visiting so I didn't have my full makeup collection which is why I went with a more blue-toned berry lip. If I had all my products I would have definitely chosen something deeper and more dramatic to go with the look, but you can play up or play down the lips as much as you'd like!

There it is! I hope you enjoyed this makeup look. If you like posts like this where I show you a makeup look and tell you how I do it, please let me know! Also if you have any looks you'd like me to recreate comment below as well. I love doing these types of posts!

Have a beautiful day,

Dre