Dre Does 3 New Ways to Tie your Bikini

It's no secret that bathing suits with interesting backs have been a trend for awhile now. Everywhere you look they have extra straps or cool criss-crossed details. Whether you can't afford to buy a new bikini top every time there's a new trend, or (like in my case) you need to be able to adjust and tighten the sizing to support the front, I've got you covered! I'm here just in time for the 4th of July, to show you three new ways to tie your basic bikini so it can look unique in the back! 
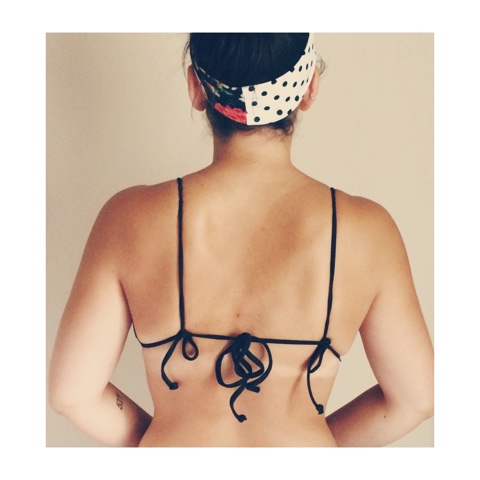
This first tie, is how my family always tied their bikinis and what inspired me to make this post. Start by tying the bottom tie how you would normally around your back. Then tie each top strap on that base tie like a bra strap. I always tie double or triple knots and make sure everything is extra tight to guarantee nothing is going anywhere! 
Next we have something similar as above except instead of tying the straps straight back, cross them and tie them to the opposite side. You will also want to tie that bottom tie around your back first like the last tie.
This is my personal favorite tie because I think it looks the coolest. However, if I'm being honest, it's best for those with a smaller chest because it doesn't really offer much support. Just criss-cross your upper straps behind your neck and tie one bottom strap with the opposite upper strap, on both sides. You may have to readjust and re-tie a few times to get the correct tightness. 

I hope you enjoyed this post and discovered a cute new way to tie your bikini this summer! Have a wonderful 4th of July weekend!! 

Dre

Dre Does a DIY: T-Shirt Dress

Here is the other DIY that I have brought over from my previous blog because of the popularity (as you will probably be able to tell, these are the original pictures...haha). I can't even tell you how many of these my friends and I made and wore throughout college for various events. You can use it to cheer on your favorite sports team, celebrate your favorite holiday (This would be a perfect 4th of July Beach cover up), or even a concert outfit!

Four years ago when I was preparing for the World Cup, I came across a T shirt with the Brazilian Flag across it and seeing as I'm a Brazilian I needed to own it. However, the problem was that the only shirt left was an XL and there was no way it was going to fit me. I bought it anyways with the idea that I would some how cut or pin it to make it work. When I got it home I thought I would just chop off the collar and wear it as an over sized, off the shoulder shirt. Then I accidentally cut too much off and realized it wasn't going to work. Too stubborn to admit defeat, I started playing with it until I came up with the design below. It works great for any basic unisex tshirts. I normally wear a small or medium size, so if I want to make a shirt I would use a Large and if I want to make a dress, an XL. Below I've shown step by step directions on how to create your own DIY dress or shirt and provided two other pictures of times I've made them, including the original Brazilian Flag Dress! I hope you enjoy this and find a new use for an oversized T shirt that you might not have ever worn!

Step 1: After laying the T shirt flat, cut it along the bottoms of the sleeves. Also make one huge cut from the top of one sleeve, across the chest (under the collar) and across the top of the other sleeve. So basically cut everywhere you see red above!

Step 2: This is what it should look like. Notice how I wasn't too neat cutting the top? No worries! If you stretch the T shirt from shoulder to shoulder, the edge will roll over, creating a smooth looking 'faux-hem'.

Step 3: That's it for cutting! All you have to do is tie it on now! To do so, step into the shirt. As you can see I'm holding the front of each sleeve in my hands and the back portion is what has fallen to the sides and is behind me.

Step 4: Twist the sleeves and bring them to the back and tie them in a double knot. (Sorry for the exposure of my bra! haha)

Step 5: Hold the back portions of the sleeves that were falling to the side before.

Step 6: Twist the sleeves towards your body.

Step 7: Once twisted, tie them in a double knot and tuck the ends into the dress

Step 8: Adjust the back so everything is covered!


This is the finished product! I hope you enjoyed this! It's quick and easy and a great way to show spirit without wearing a typical T shirt like everyone else. Below are two of the other dresses/shirts that I have made, one for a concert when I was in college and the other is the original Brazilian flag dress that inspired this whole design!


I hope you enjoyed this DIY! If you make your own to cheer on your favorite sports team, celebrate the 4th of July, or something else just as fun, be sure to tag me on Instragram with #dredoes! 

Have a beautiful day,

Dre

Dre Does a DIY: Dip-Dyed Shorts

The fourth of July is almost here and to celebrate I'm bringing one of my most popular DIY's from my old college blog, to Dre Does! I can't believe it's been two years since I made these shorts but I absolutely loved them. I know with the World Cup currently underway and the 4th around the corner, many of you might like to learn how to make these ridiculously festive shorts! If you make them please be sure to take a picture and tag them on Instagram or Twitter with the #dredoes! Here's a finished shot of the shorts I made and tutorial on how to make your own. The whole project cost me less than $9!


I started with an over sized pair of shorts from a thrift store that I picked up for $2. I tried them on and marked them with a sharpie about a half inch lower than I wanted them to hit when finished. I cut them with sharp fabric scissors and tried them on to check for the length. You might have to take them on and off and make adjustments until they are the right length and straight. Then I took a fork and using the tines, I distressed the edges to give them a better 'cut-off' look. When you put them in the dryer later they will fluff up more and look better so keep that in mind when distressing! Make sure you leave that extra length for distressing so that they aren't too short in the end. I also snipped a little bit out on the front to look like there was a rip. I distressed the 'rip' also with a fork. Here's a picture of what they looked like after this step:

Now it's time to bleach! I bought a bottle of bleach at my local dollar store (total cost so far is $3). It's really important when using bleach that you are in a well ventilated room so make sure you're doing this either outside or all the windows are opened! There was nothing too specific about this step besides adding bleach to a container and adding some cold water too. Since I was trying to make stripes I dipped my shorts 2/3 of the way up from the bottom and hung them on the side of my bucket for about an hour. Depending on the denim quality your shorts might bleach really quickly or take a long time. Whatever the case may be, make sure you don't leave them overnight because the bleach can eat away and destroy the fabric. Once the shorts are white enough for your liking, wash them on cold in the washing machine. I noticed that the bleaching process continued a little bit into the washing and they came out a little whiter. Next I dried them in the dryer until completely dry. Now it's time to stud! I bought my silver pyramid studs at my local craft/hobby store for $1.50 a pouch and used 2 pouches for my shorts (total cost so far is $6). Depending on your denim it might be a little tricky to pop your studs through, but basically all you do is push the two sharp prongs through your fabric and push them towards each other until flat. I used the wooden handle of a kitchen knife after a few because it was starting to hurt my fingers. Be very careful with this part if you decide to use a knife! I studded the front pocket of my shorts and the back pockets. Here's a picture of what the shorts looked like this far:


Now it was time to add some red and it couldn't have been any easier. Going into this project I thought I was going to have to deal with the traditional tie-dye process including mixing powders and putting in squeeze bottles, etc. However I was pleasantly surprised when I found spray tie-dye bottles, already mixed, at my local craft/hobby store for only $2.50! (final cost of project is $8.50) They had a good amount of colors too so I definitely recommend it. All I did was have a friend hold them over the lawn outside and I sprayed red dye on the bottom third of the shorts. Then I just laid them out on the grass to dry in the sun for about half an hour. The back of the bottle said to then dry them in the dryer until completely dry to set the dye but this is going to be dependent on whatever dye you choose. I haven't washed mine since so I'm not sure how much they will fade but make sure you wash them alone if you decide to. And that's it! You now have your very own pair of dip-dyed, ombre shorts! Have fun experimenting with different colors and patterns! After all it's only going to set you back about $9 a pair!
I hope you enjoyed this DIY and are inspired to rock some festive shorts this holiday! Look for one more DIY on Friday from my old blog that you can use for celebrating!

Have a beautiful day,

Dre


Dre Does a DIY: Recycling Candle Jars


If you're like me, you're probably stuck in this never ending winter cold. To keep your spirits up, you're probably burning a million candles in all sorts of spring related scents to help you remember that things such as flowers and fruits that require the sun do in fact still exist despite the desolate tundra outside. 

So what do you do with the plethora of used up candle jars once the yumminess of peach, lemon, and lilac is burned away? Find a new use for them of course! I'm going to explain how to remove the left over wax and such, and give you some ideas for using them in beauty related ways!

So what do you need? Used up candles, a sharp pointy knife, a freezer, soap and warm water, and whatever you're going to fill your new jars with!

1. First you have to freeze the old candles. At least an hour works, but I honestly just throw a bunch in and leave them over night, so they're good and frozen!
2. Once frozen, take a sharp knife and just press the pointy tip into the wax trying the crack it all the way to the bottom. Then you should be able to shake out all the broken pieces. 
3. If there's any leftover pieces you can pull them out with your fingers. Then pull out the little wicks that are glued to the bottom of the jars. If you can't get them out don't worry. Just move on to the next step of soaking.
4. Depending on the candle, you might be able to get away with running the glass jar under some hot water and the label could peel right off. If not, soaking it in hot soapy water for a little bit should loosen the glue. Now use the soap and water to wash the glass really well and remove all sticky residues.
5. That's it! Time to fill 'er up! 

Here's some ideas for you on how I like to fill mine up: 

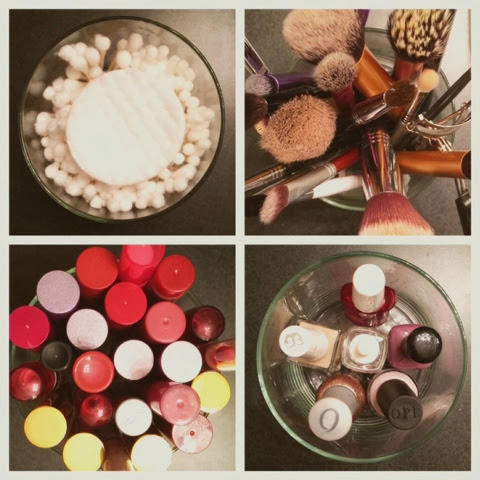
Cotton rounds and Q-Tips by my bathroom sink

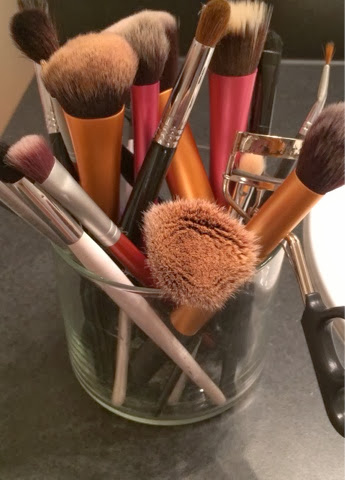
Makeup brushes on my vanity (it's good to have multiples for clean and dirty brushes or separating eye and face brushes)

Any makeup products that are better stored standing upright (should I be embarrassed to say these are just my lip stains and lip crayons...?)

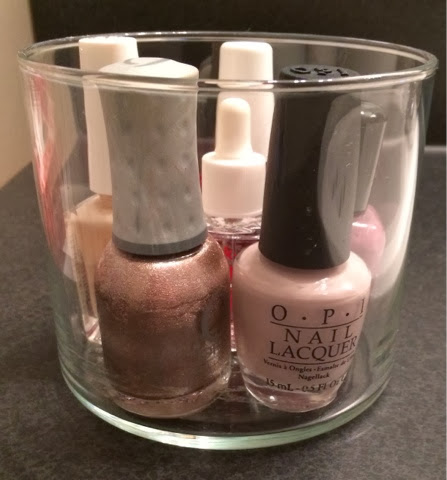
Current favorite nail polishes or colors that inspire you for the current season

While these are just some of my favorites you can also use them to store bobby pins, hair ties, jewelry, tea bags, pens or other writing things, post it notes, random do-dads like safety pins or extra buttons, important little trinkets, beauty and perfume samples, etc...the list goes on and on!

The jars you get don't have to be plain either. Sometimes I find clearances candles that are in beautiful decorative jars. Even if I don't really love the scent, I'll still buy them with the intent of burning them up and using them later on for decorative purposes! 

As much as I love my candles, here's to hoping that we experience the scent of real flowers and plants soon!! :) If you do this let me know what you plan on using your old candle jars for! 

Have a beautiful day,

Dre