Lash Boost Review
/I think I might be the last one on the block to try a lash growth serum, but my review is going to be a little different than most. Let's get a little personal. Here's the back story as to how I ended up using Lash Boost in a nontraditional way.
In November I was washing my face one night and looked up and the way my hair happened to fall, I spotted a completely bald spot right in the center of my head about the size of a dime. I immediately inspected it and stood in shock wondering what I was looking at. Changes in your body externally can often be a sign of something going on internally and my mind went in 15 directions. I immediately Facetimed my sister, because what else are sisters for...haha and probably repeated 18 times, "ARE YOU SEEING WHAT I'M SEEING?! "
I'm lucky enough to have an uncle who is a PA and immediately called him to discuss. His instinct told him it was Alopecia Areata just based on the fact that I had recently quit a high stress job, but he wanted me to go to my doctor to rule out any thyroid or other health issues. Turns out he's the world's smartest PA (haha) and my doctor also thought it was Alopecia Areata and said not to worry about it. It's really hard not to worry about something that is caused by worrying, if that makes sense. The most frustrating thing about Alopecia Areata is that there is no guarantee the hair will grow back, so I was really bummed when I saw growth throughout the next month, and one morning in December, it all fell out again.
This then prompted a conversation with one of the amazing mom's I nanny for who sells Rodan & Fields. I asked her if anyone had tried the lash boost on their scalp and if she thought it would work. She had never heard of anyone trying it and obviously couldn't recommend doing it since R&F had never tested it, but I was pleasantly surprised to receive it for Christmas from her! Let me repeat, R&F DOES NOT ENDORSE PUTTING LASH BOOST ON YOUR HEAD, but I was self conscious at this point and wanted to try a more natural route before going to my doctor for steroid shots to stimulate growth. If the bald spot had been anywhere other than the center of my head where I part my hair I probably wouldn't have cared as much, but it was something I was having to cover and hide on a regular basis which is annoying.
As far as my routine goes for Lash Boost, I started off the first few weeks by applying it every night to my lashes and whatever was leftover I would apply to my scalp. I never got more product from the tube. After the first few weeks, I started using it every other night to stretch the product and I don't feel like my results were affected. With these types of growth serums, you will always need to keep applying them in an area like your lashes that naturally shed and regrow every 6-8 weeks. So if you stop using it, the results will go away. I had so many brow clients that would use it to regrow areas of their brows when reshaping so that's something to think of too!
Now for some pictures of what my scalp and lashes looked like when I started using Lash Boost on them right before Christmas and what they look like today, 10 weeks later. I stopped using the Lash Boost on my scalp about a month ago probably because I just wanted to get the hair growing, and I'm happy to say that a lot of the hair has grown back, so much so that I can't really see the bald spot anymore! (Sorry if close ups of my scalp are weird...haha) I learned through this process that I know quite a few women who have experienced this type of hair loss due to stress so I'm happy to share my story if you happen to be going through the same thing and it makes you feel more at ease with what you're going through!


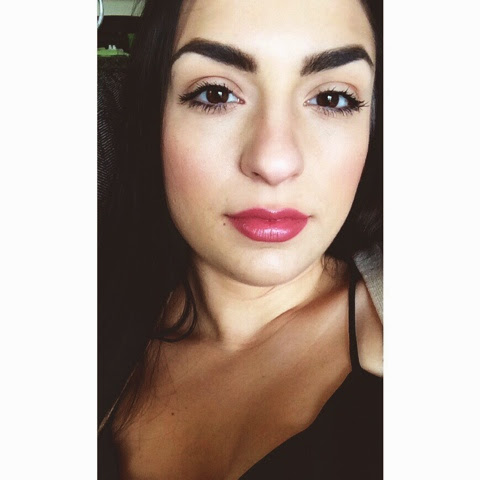
As far as my lashes go, they have always been long and thick, they just won't curl and always stay super straight. I have since found that they hold a curl much better and are significantly longer and fuller. I never felt like you could see my lashes in any pictures but now I feel like you can.
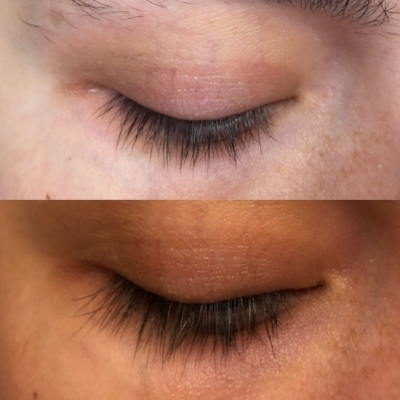
Top Image: Before, Bottom Image: After
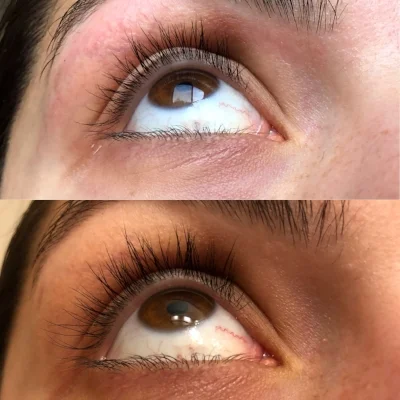
Top Image: Before, Bottom Image: After
You can really tell in the lash pictures how much longer and fuller my lashes look. I didn't take any pictures with mascara on because you didn't come to the post for a mascara recommendation. haha I wanted to show you my actual lashes.
Overall I am extremely happy with my Lash Boost experience. If you are looking to purchase please reach out to Kristen HERE! She is so wonderful and deserving of your business! I know she has a Lash Boost special going on right now! I cannot thank her enough for gifting me this Lash Boost and helping me get rid of my bald spot!
Let me know in a comment below if you have tried a lash or brow serum before and if you liked it! I totally think it's worth the money, do you?
Have a great rest of your week,
Andrea Fontana