Dre Does a Summer Face Routine
/
I hope you enjoyed my Tips for Summer Makeup from earlier in the week! Here is my requested foundation and face routine for this time of year. Let me know if you have any other summer related requests and I will keep them coming!
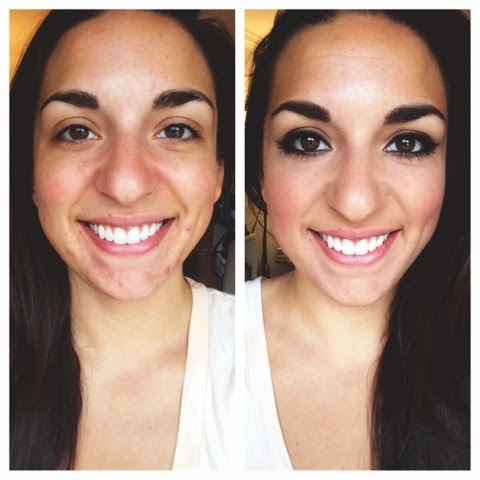
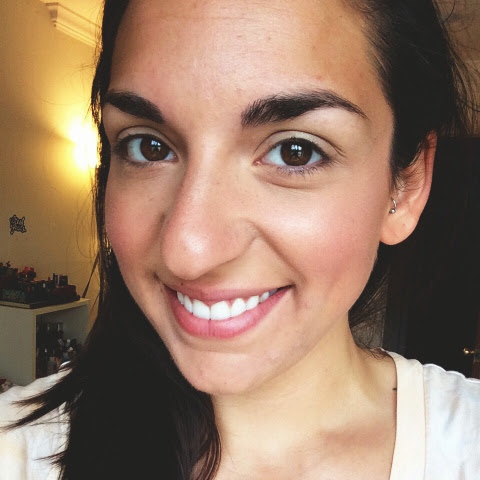
Here is a before and after of no makeup to makeup but I've included a picture below that is just my makeup after my face routine (no brows, eyes or lips).
1. Always start with a clean face. A skincare routine is the key starting point to any makeup application. You'll see I have plenty of imperfections in that before photo but we all do so embrace yours!
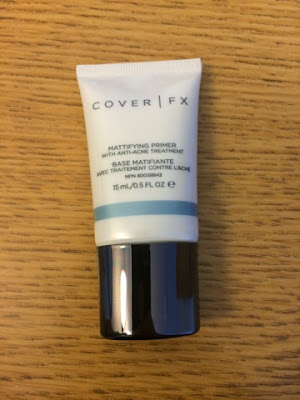
2. Next I go in with a primer. On Monday I posted about the Cover-FX Mattifying Primer with Anti-Acne Treatment. Click here for that post. Make sure you don't apply too much primer or else your makeup will not go on smoothly. This will depend on the type and texture of the primer you are using. If I'm using a silicone textured primer I use a small pea sized amount for my whole face. Let this absorb before you move on.
3. Next I spray my face with a setting spray to create a barrier between oil and foundation and give my foundation something more to grab onto. I love the Urban Decay Deslick Makeup Setting Spray, but in the past I also loved MAC Fix+. It's also VERY crucial that you let this layer completely dry and set so you have a smooth and dry work surface for your foundation.
4. Next I mix two foundations. I love the Revlon Colorstay Makeup for Combo/Oily Skin because it has great staying power and a nice satin finish. However, it is a little thicker than I like for the summer so I've been mixing it with MAC Face & Body Foundation, which is a lighter foundation. It has light to medium coverage so this is why I like mixing it with a heavier foundation. It's water resistant and long wearing so it's the perfect match for the Colorstay Makeup. I apply a very thin layer of this foundation combo all over my skin using my Real Techniques Expert Face Brush. One reason I like mixing foundations in the summer is that one is lighter and the other is darker. This allows me to customize my foundation shade every time I apply my makeup, depending on how tan I am.
5. Next I use my MAC Pro Longwear Concealer under my eyes. I prefer to apply this with my ring finger and strong tapping motions until it is blended. I use a more yellow toned concealer (NC30) to counteract the purple tones of my dark circles. I'm obsessed with this product and I have multiple in my kit because it works wonders and doesn't crease throughout the day. I then go over it with Maybelline's Instant Age Rewind Dark Circle Eraser in the shade Brightener because it is slightly pink toned and does a great job of brightening the under eye area. Then I set all of this with a very finely milled HD translucent powder. I love using the HD Studio Photogenic Finishing Powder in 01 by NYX Cosmetics. (This is the one I was talking about in my last post though, to avoid if you are going photographed a lot...i.e. your wedding).
6. Next since I have applied a thin layer of foundation I generally need to spot conceal my hyperpigmentation and blemishes on my chin with a small concealer brush. In the winter I would typically wear a heavier foundation all over that would cover most of these but I prefer not to wear that heavy of makeup due to humidity and heat in the summer, so I prefer to spot conceal. I swear by the Sonia Kashuk Hidden Agenda Concealer Palette. It's the bomb dot com at covering blemishes and staying put.
7. After spot concealing I will generally set my entire face with that same NYX HD Finishing Powder using a big fluffy powder brush.
8. Now for contouring. I use a small fluffy blending brush to apply Benefit's Hoola Bronzer to the hollows of my cheeks and then use a larger brush, the Contour Brush by Real Techniques, to blend out the color really well. I also use the contour brush to blend Hoola around the temples of my face and my hairline.
9. Next I apply a long-wearing powder blush to the apples of my cheeks and blend toward my hairline. My favorite blushes of all time for this are tarte's Amazonian Clay 12-hour blushes because they are all beautiful and seriously last forever! I own a lot of them...haha
10. Next I like to apply a subtle highlight to my cheeks to give me a subtle glow. My favorite of the moment is MAC's Mineralize Skinfinish in Perfect Topping.
11. Finally, I spray my face one last time with the setting spray to set everything and keep it in place for the whole day! I like to fan my face with a makeup palette to speed up this process and make sure nothing drips or moves!
There it is! I know it may seem like a lot for some of you, but as a makeup artist I'm used to using a lot of products! I hope you enjoyed and can apply some of these techniques to your summer makeup routine. Keep the requests coming!
Have a beautiful day,
Dre
