Ten Eye Looks. One Palette: Jaclyn Hill Edition

I am so excited to introduce to you my newest series on Andrea Fontana Beauty!! "Ten Eye Looks. One Palette." is going to be a series where I (or you guys) pick a palette and I create 10 eye looks out of it. This idea came to me when I realized how many women come to me and say, "I bought this palette but I don't know what to do with it". I wanted to create some natural and some more bold, but wearable for everyone no matter your skill!

I'm excited to share the first in this series which is obviously the Jaclyn Hill for Morphe palette. I love the warmth of this palette and there's so many amazing shades that I felt really inspired. Over the past month and a half I have been using this palette for all of my eye looks and below is what I have come up with. 

Through creating these looks I've realized a few things. Some of the shades are similar, but overall they are extremely creamy and blendable with great pigment and texture. My biggest con to this palette is still that they don't have a matte brow bone highlight for light skin tones like myself, but I tried my best to make it work without it!

I put a lot of time and work into this one, so I really hope you enjoy it! When you're done looking, comment which look is your favorite and which palette you want me to try next!

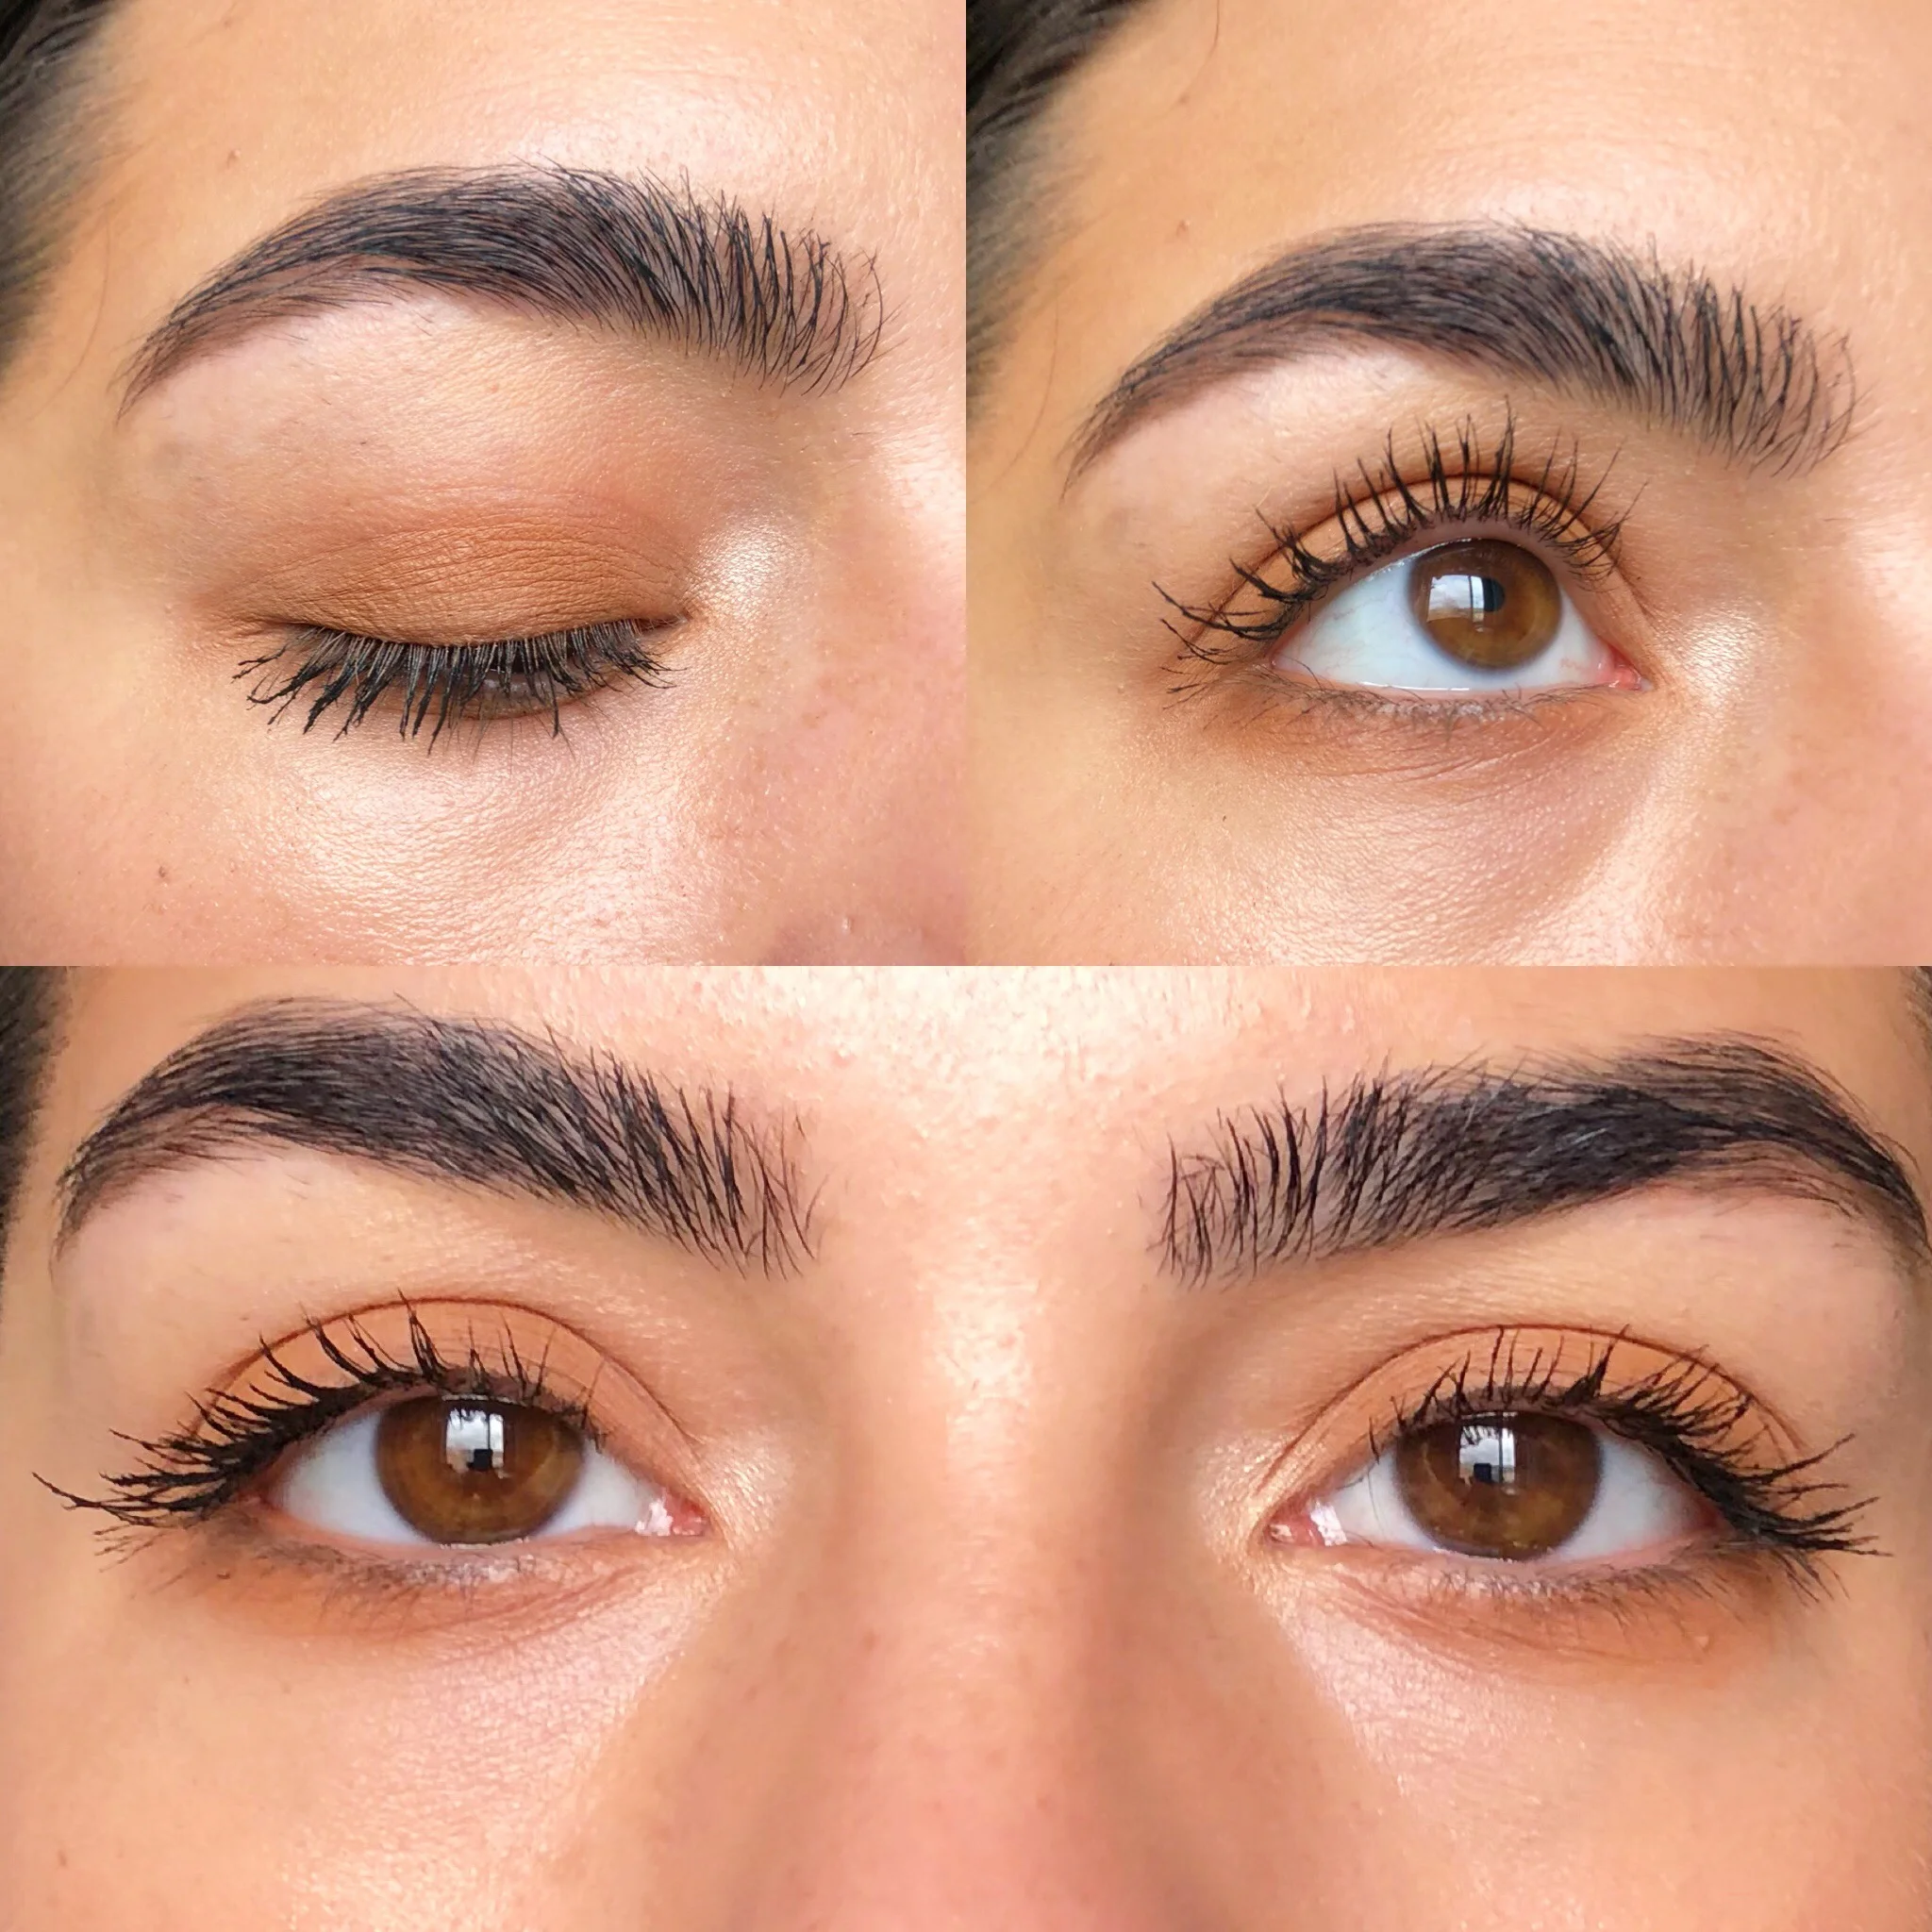
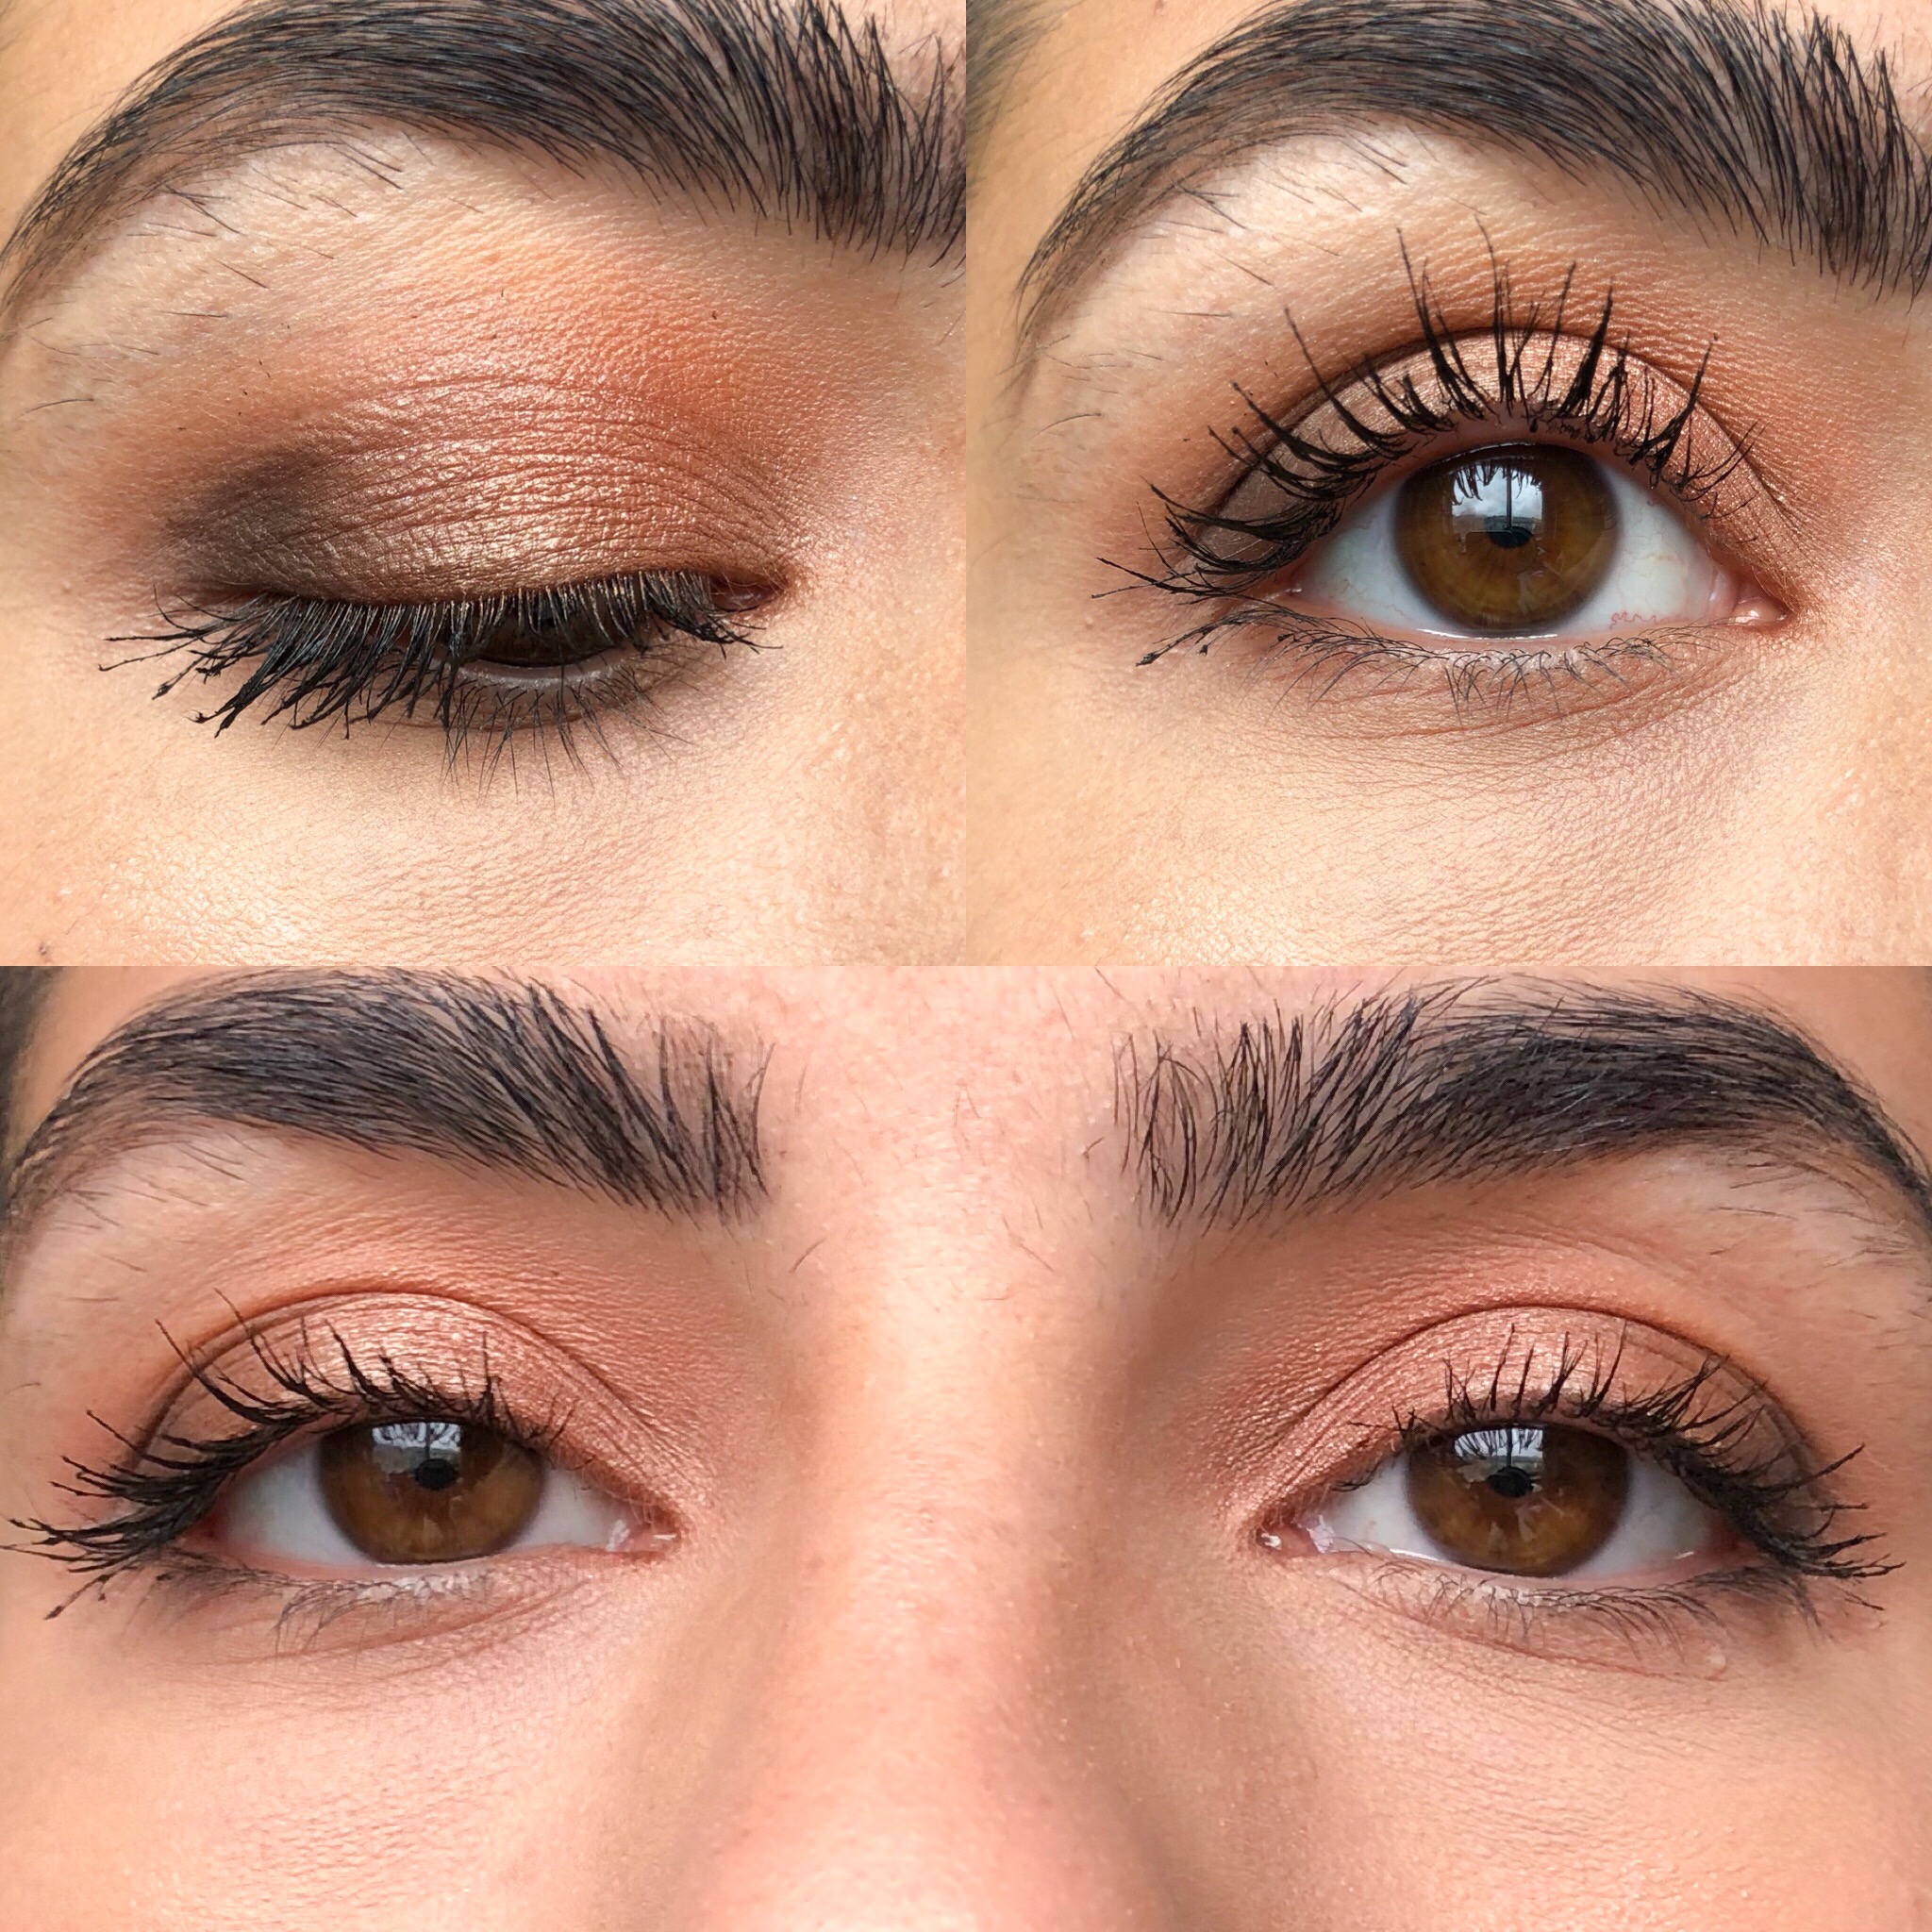
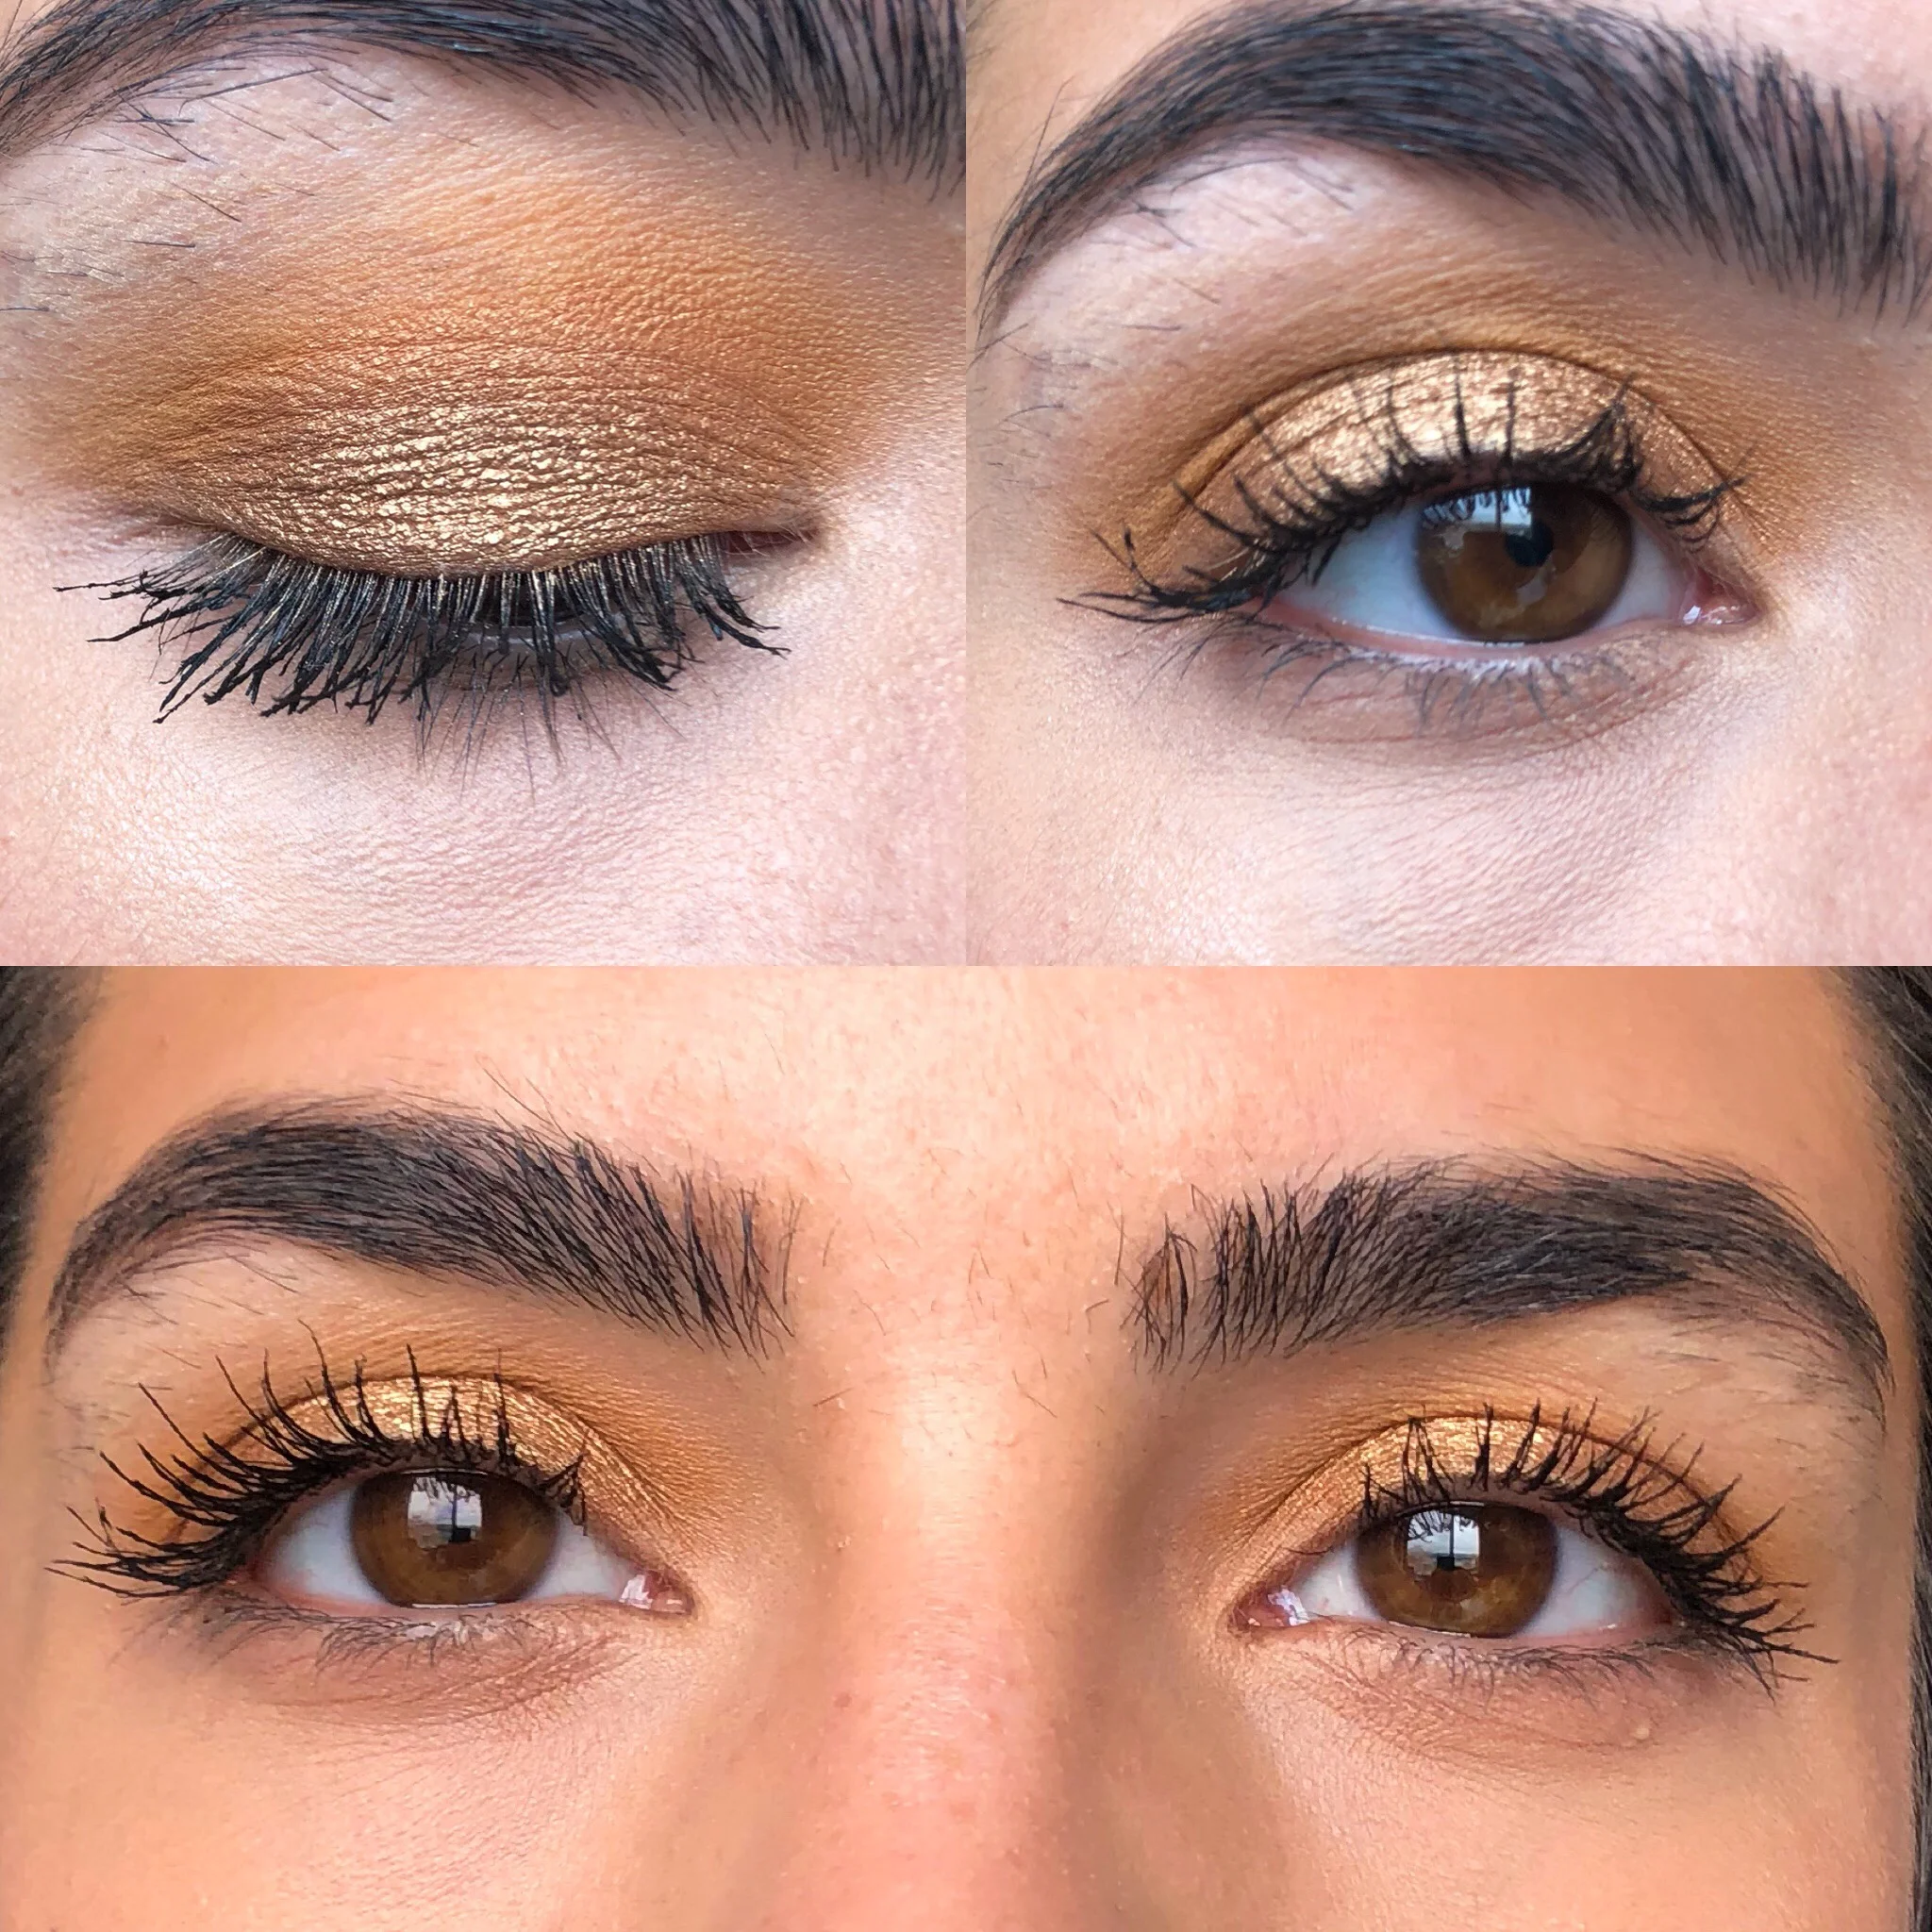
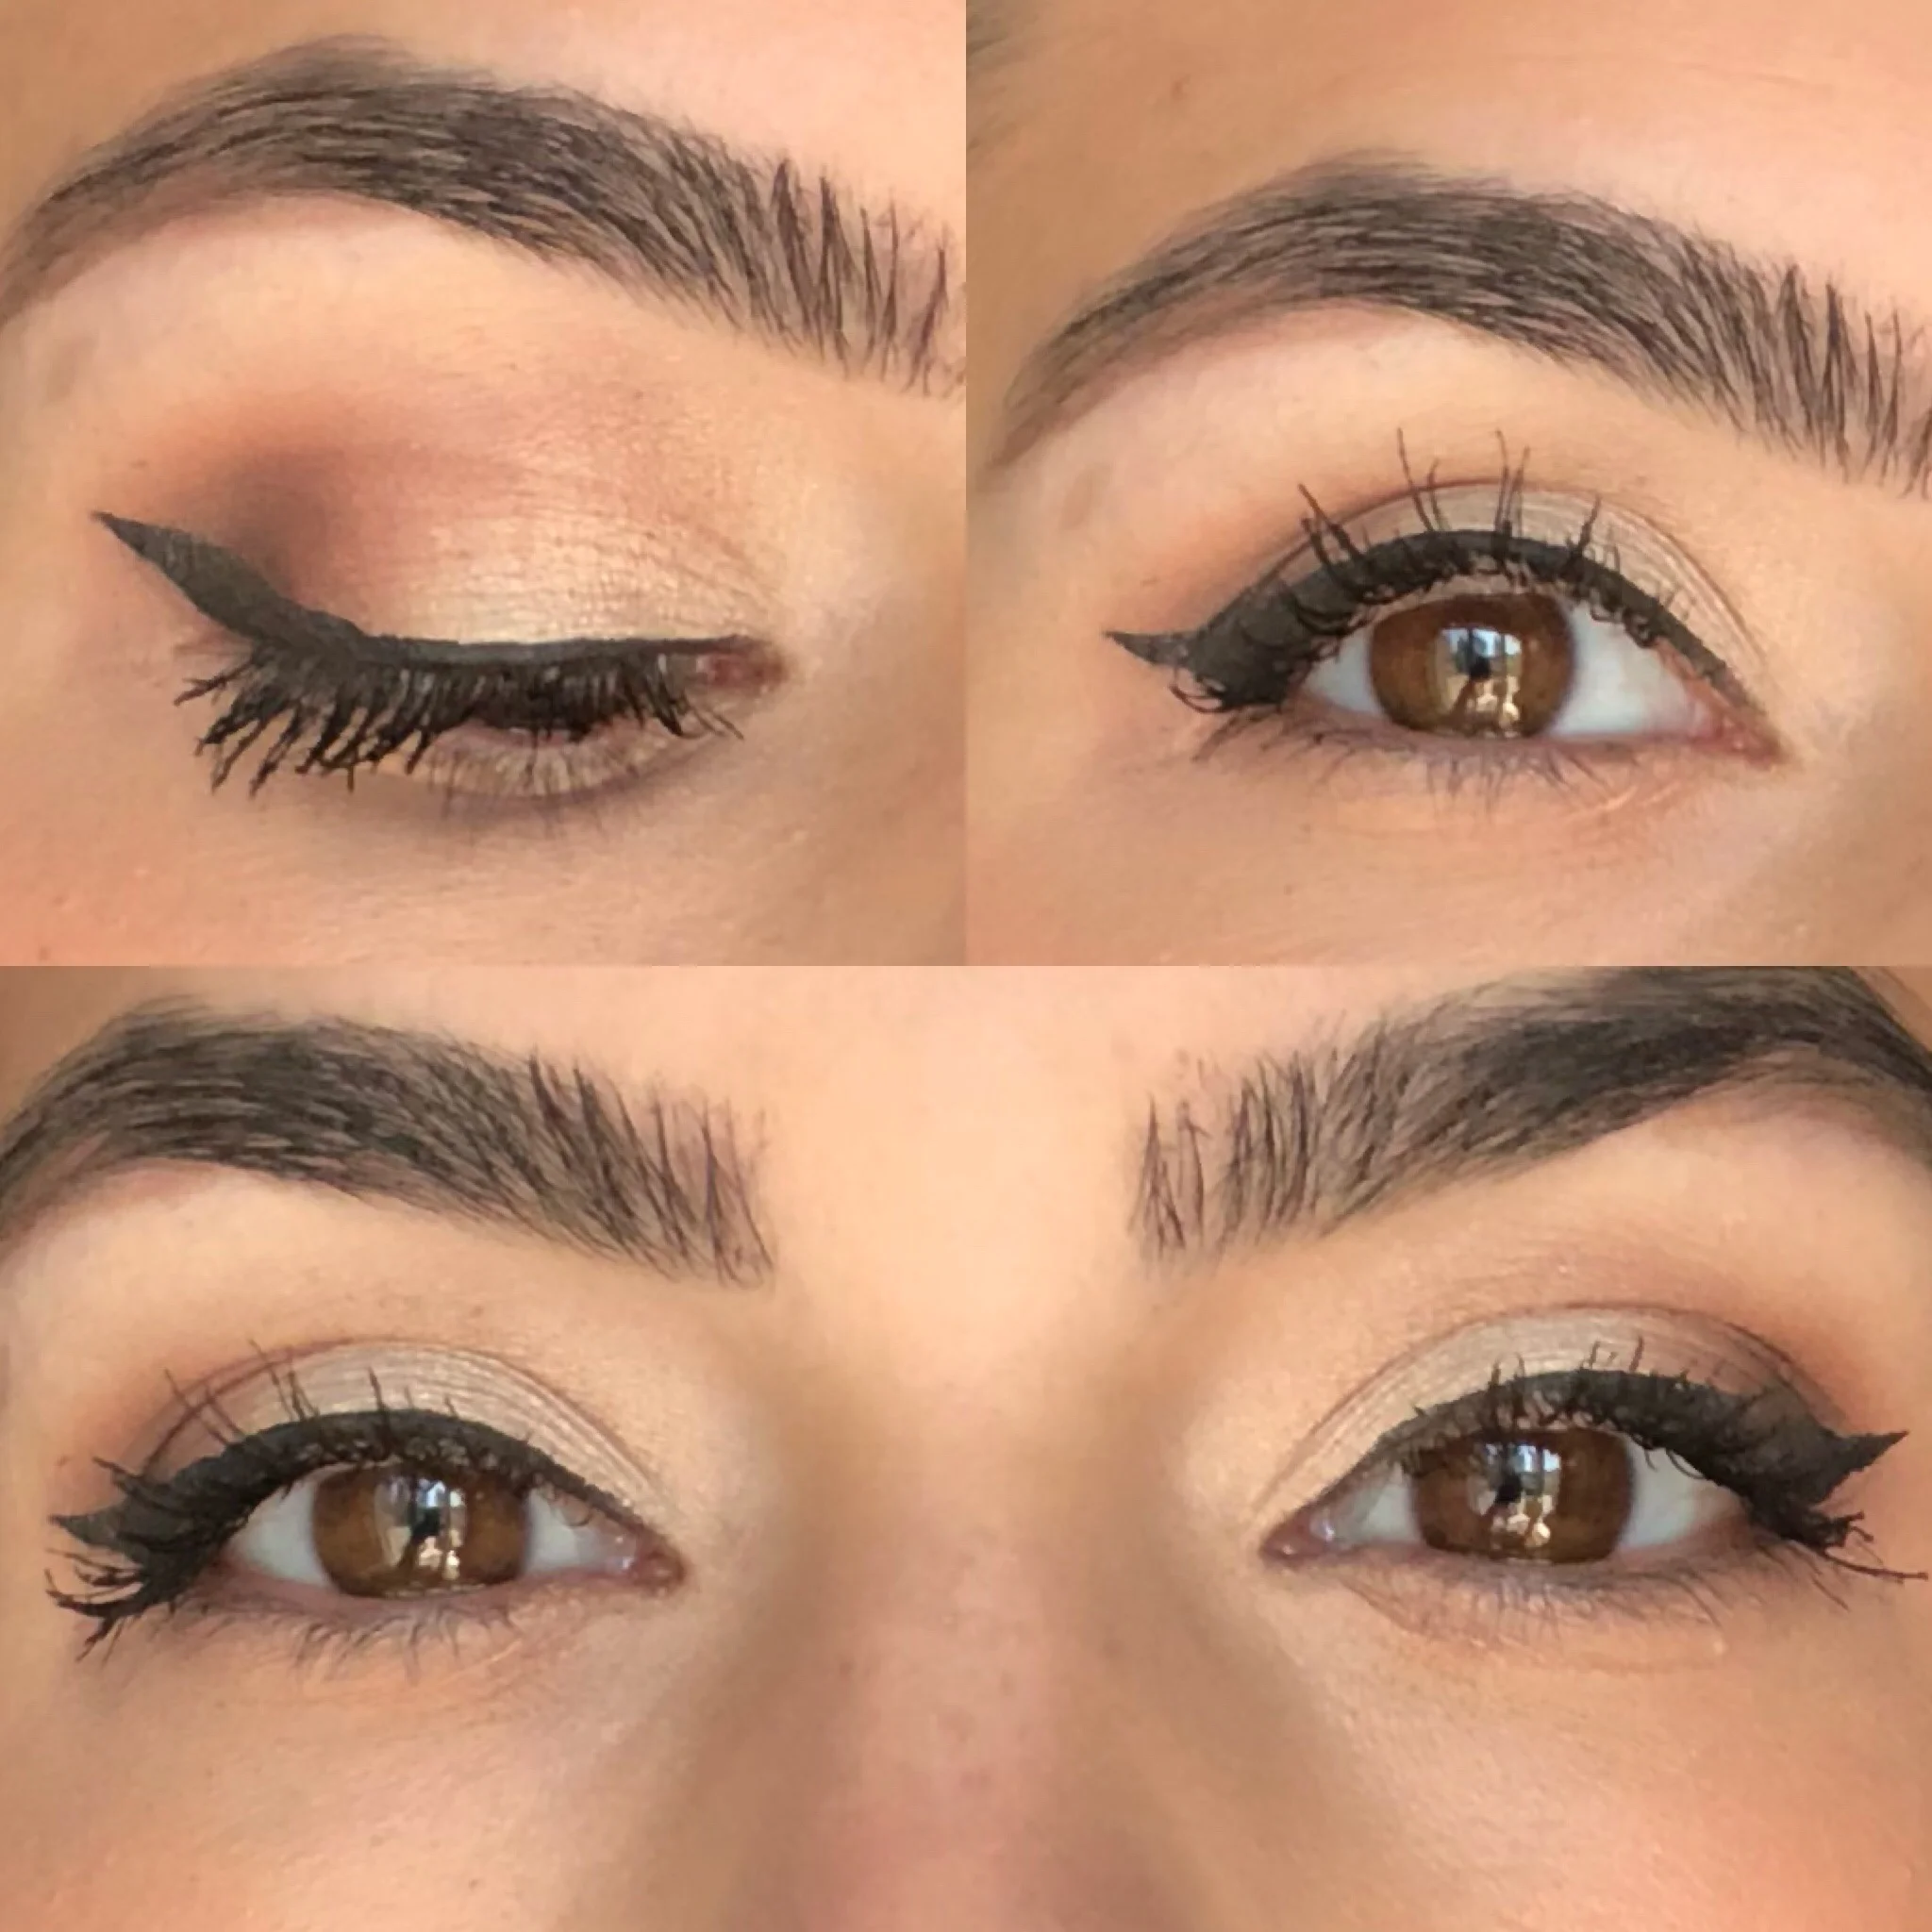
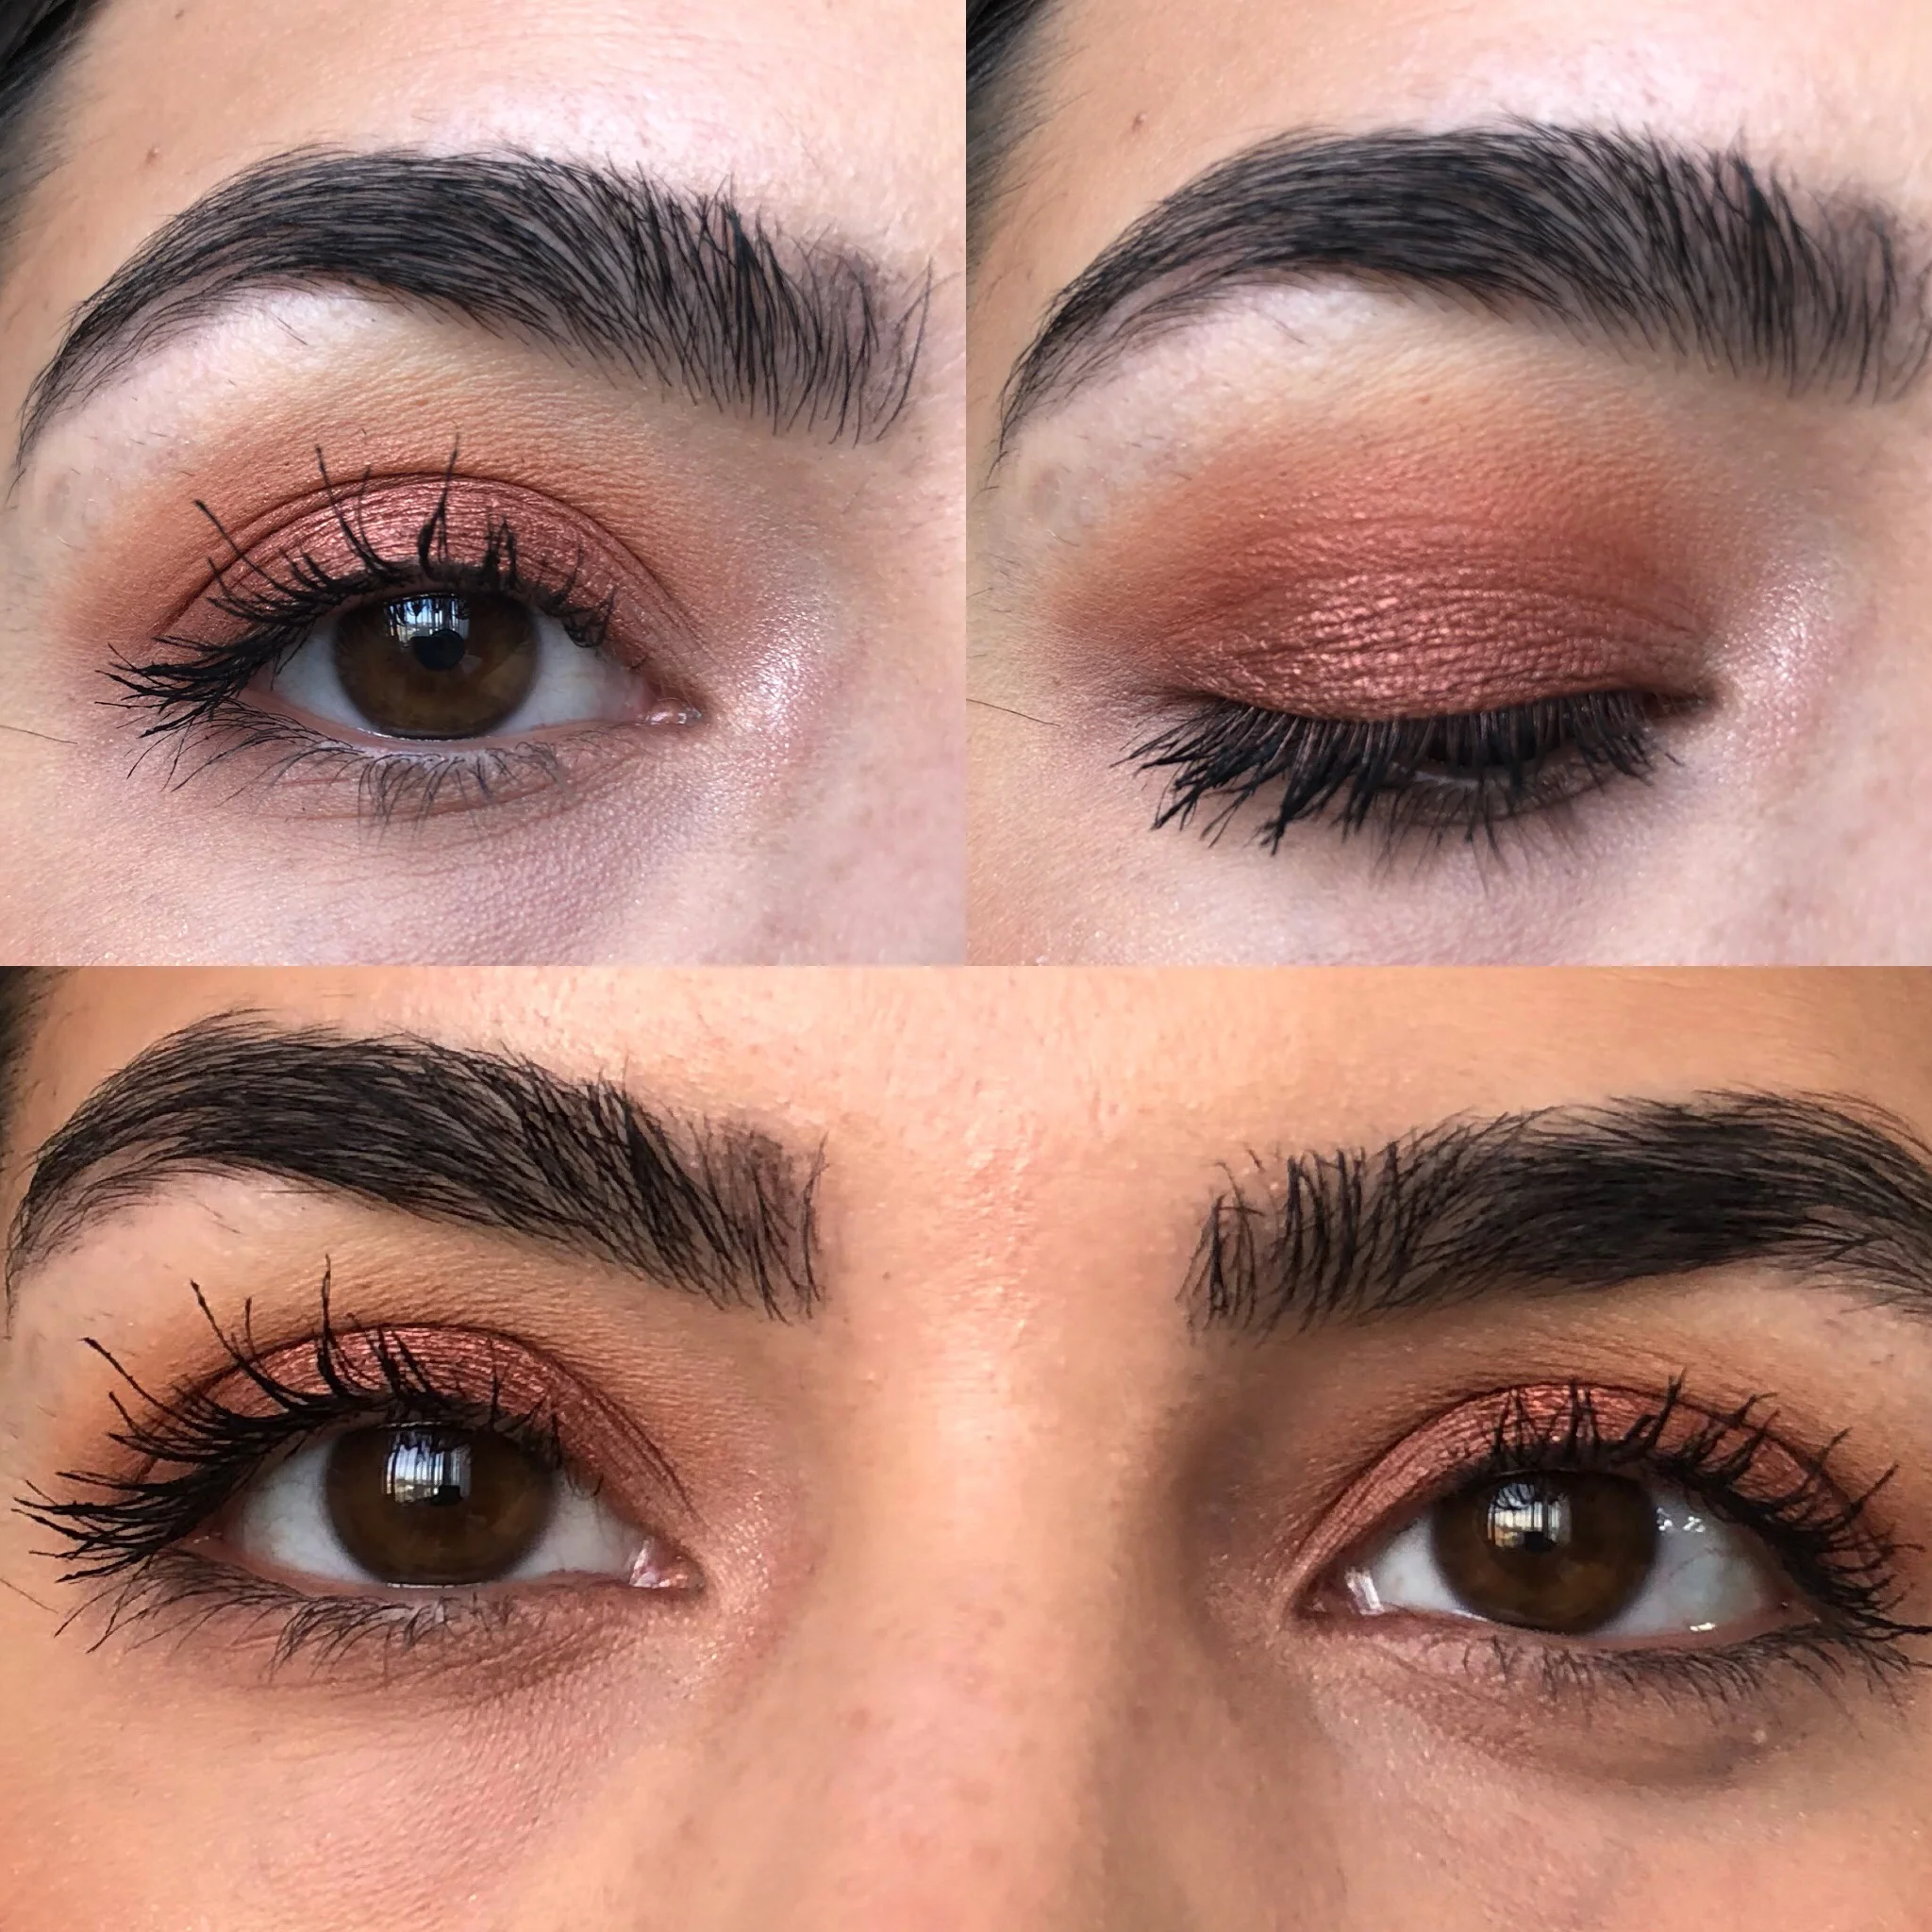
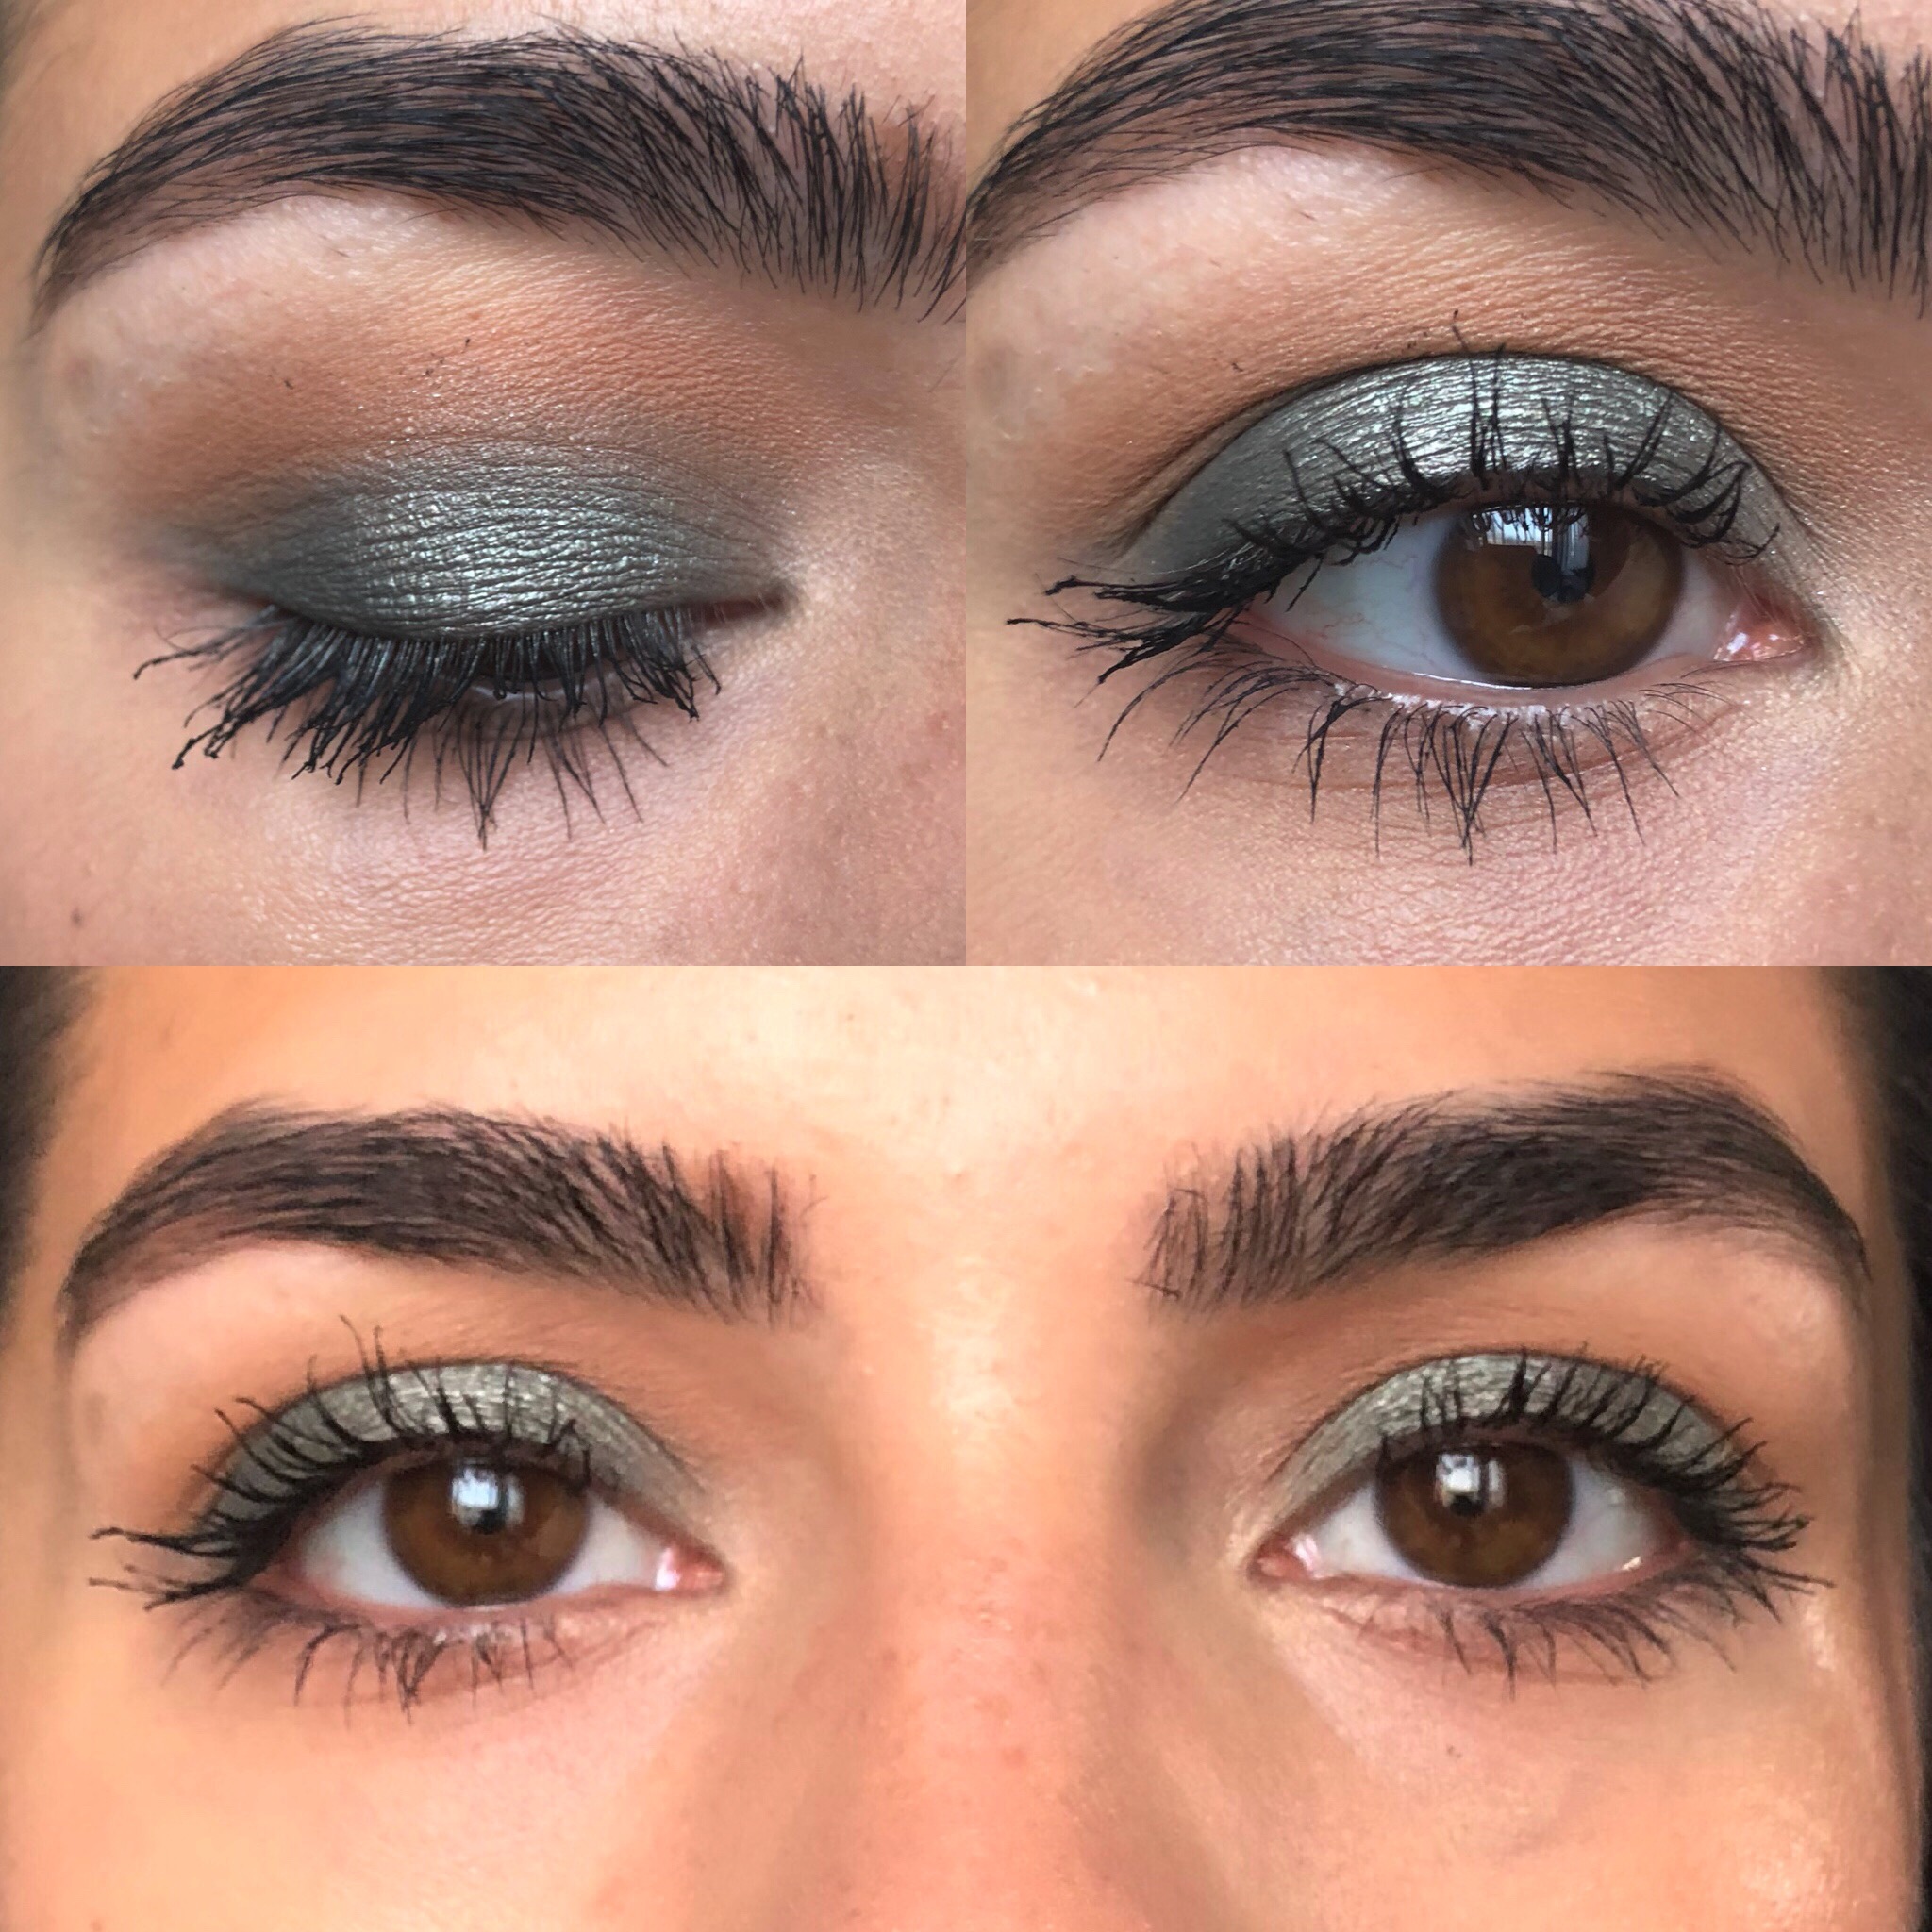
Look # 1: SILK CREME all over the lid and buffed out into the crease; HUNTS & JACZ in just the outer corner and blended out to soften; ENLIGHT in the inner corner to brighten; SILK CREME & BUTTER buffed out on whole bottom las…

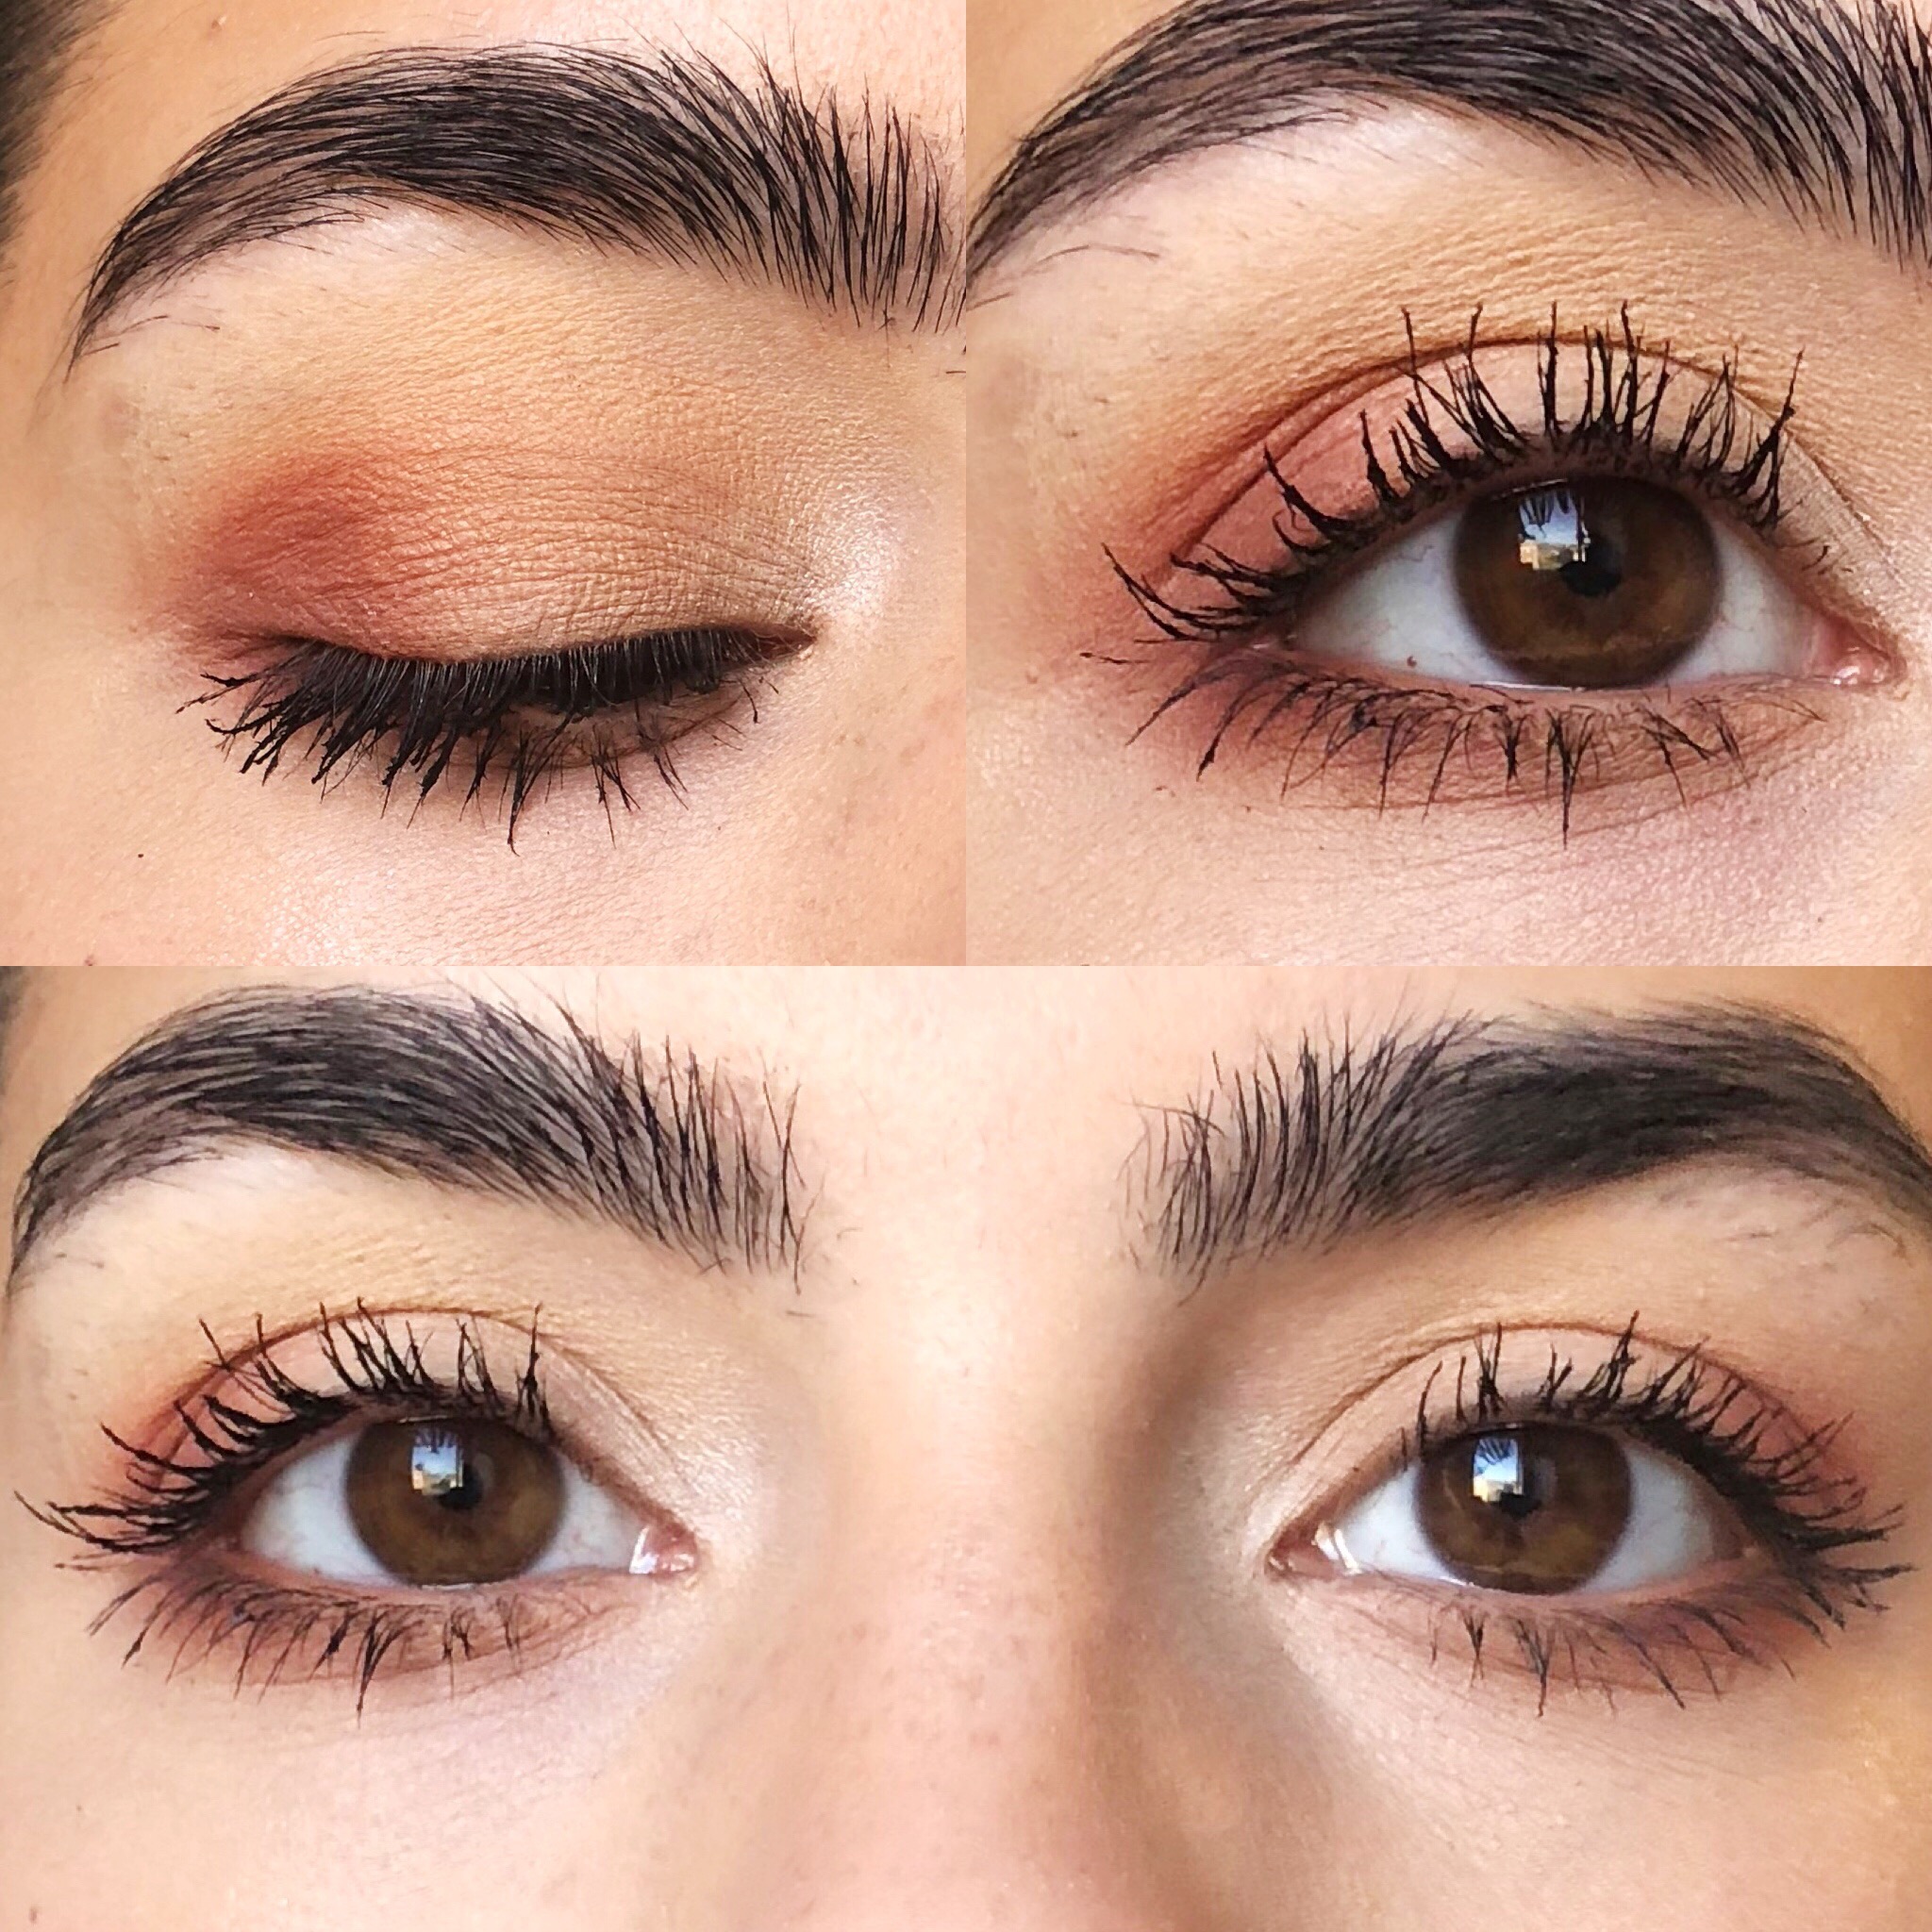
Look # 1: SILK CREME all over the lid and buffed out into the crease; HUNTS & JACZ in just the outer corner and blended out to soften; ENLIGHT in the inner corner to brighten; SILK CREME & BUTTER buffed out on whole bottom lash line; JACZ outer bottom half of lash line. 

Look #2: SILK CREME in the crease; JACZ & CHIP in outer & inner corners; ENLIGHT in inner corner; OBSESSED on wet brush in center of lid for impact.

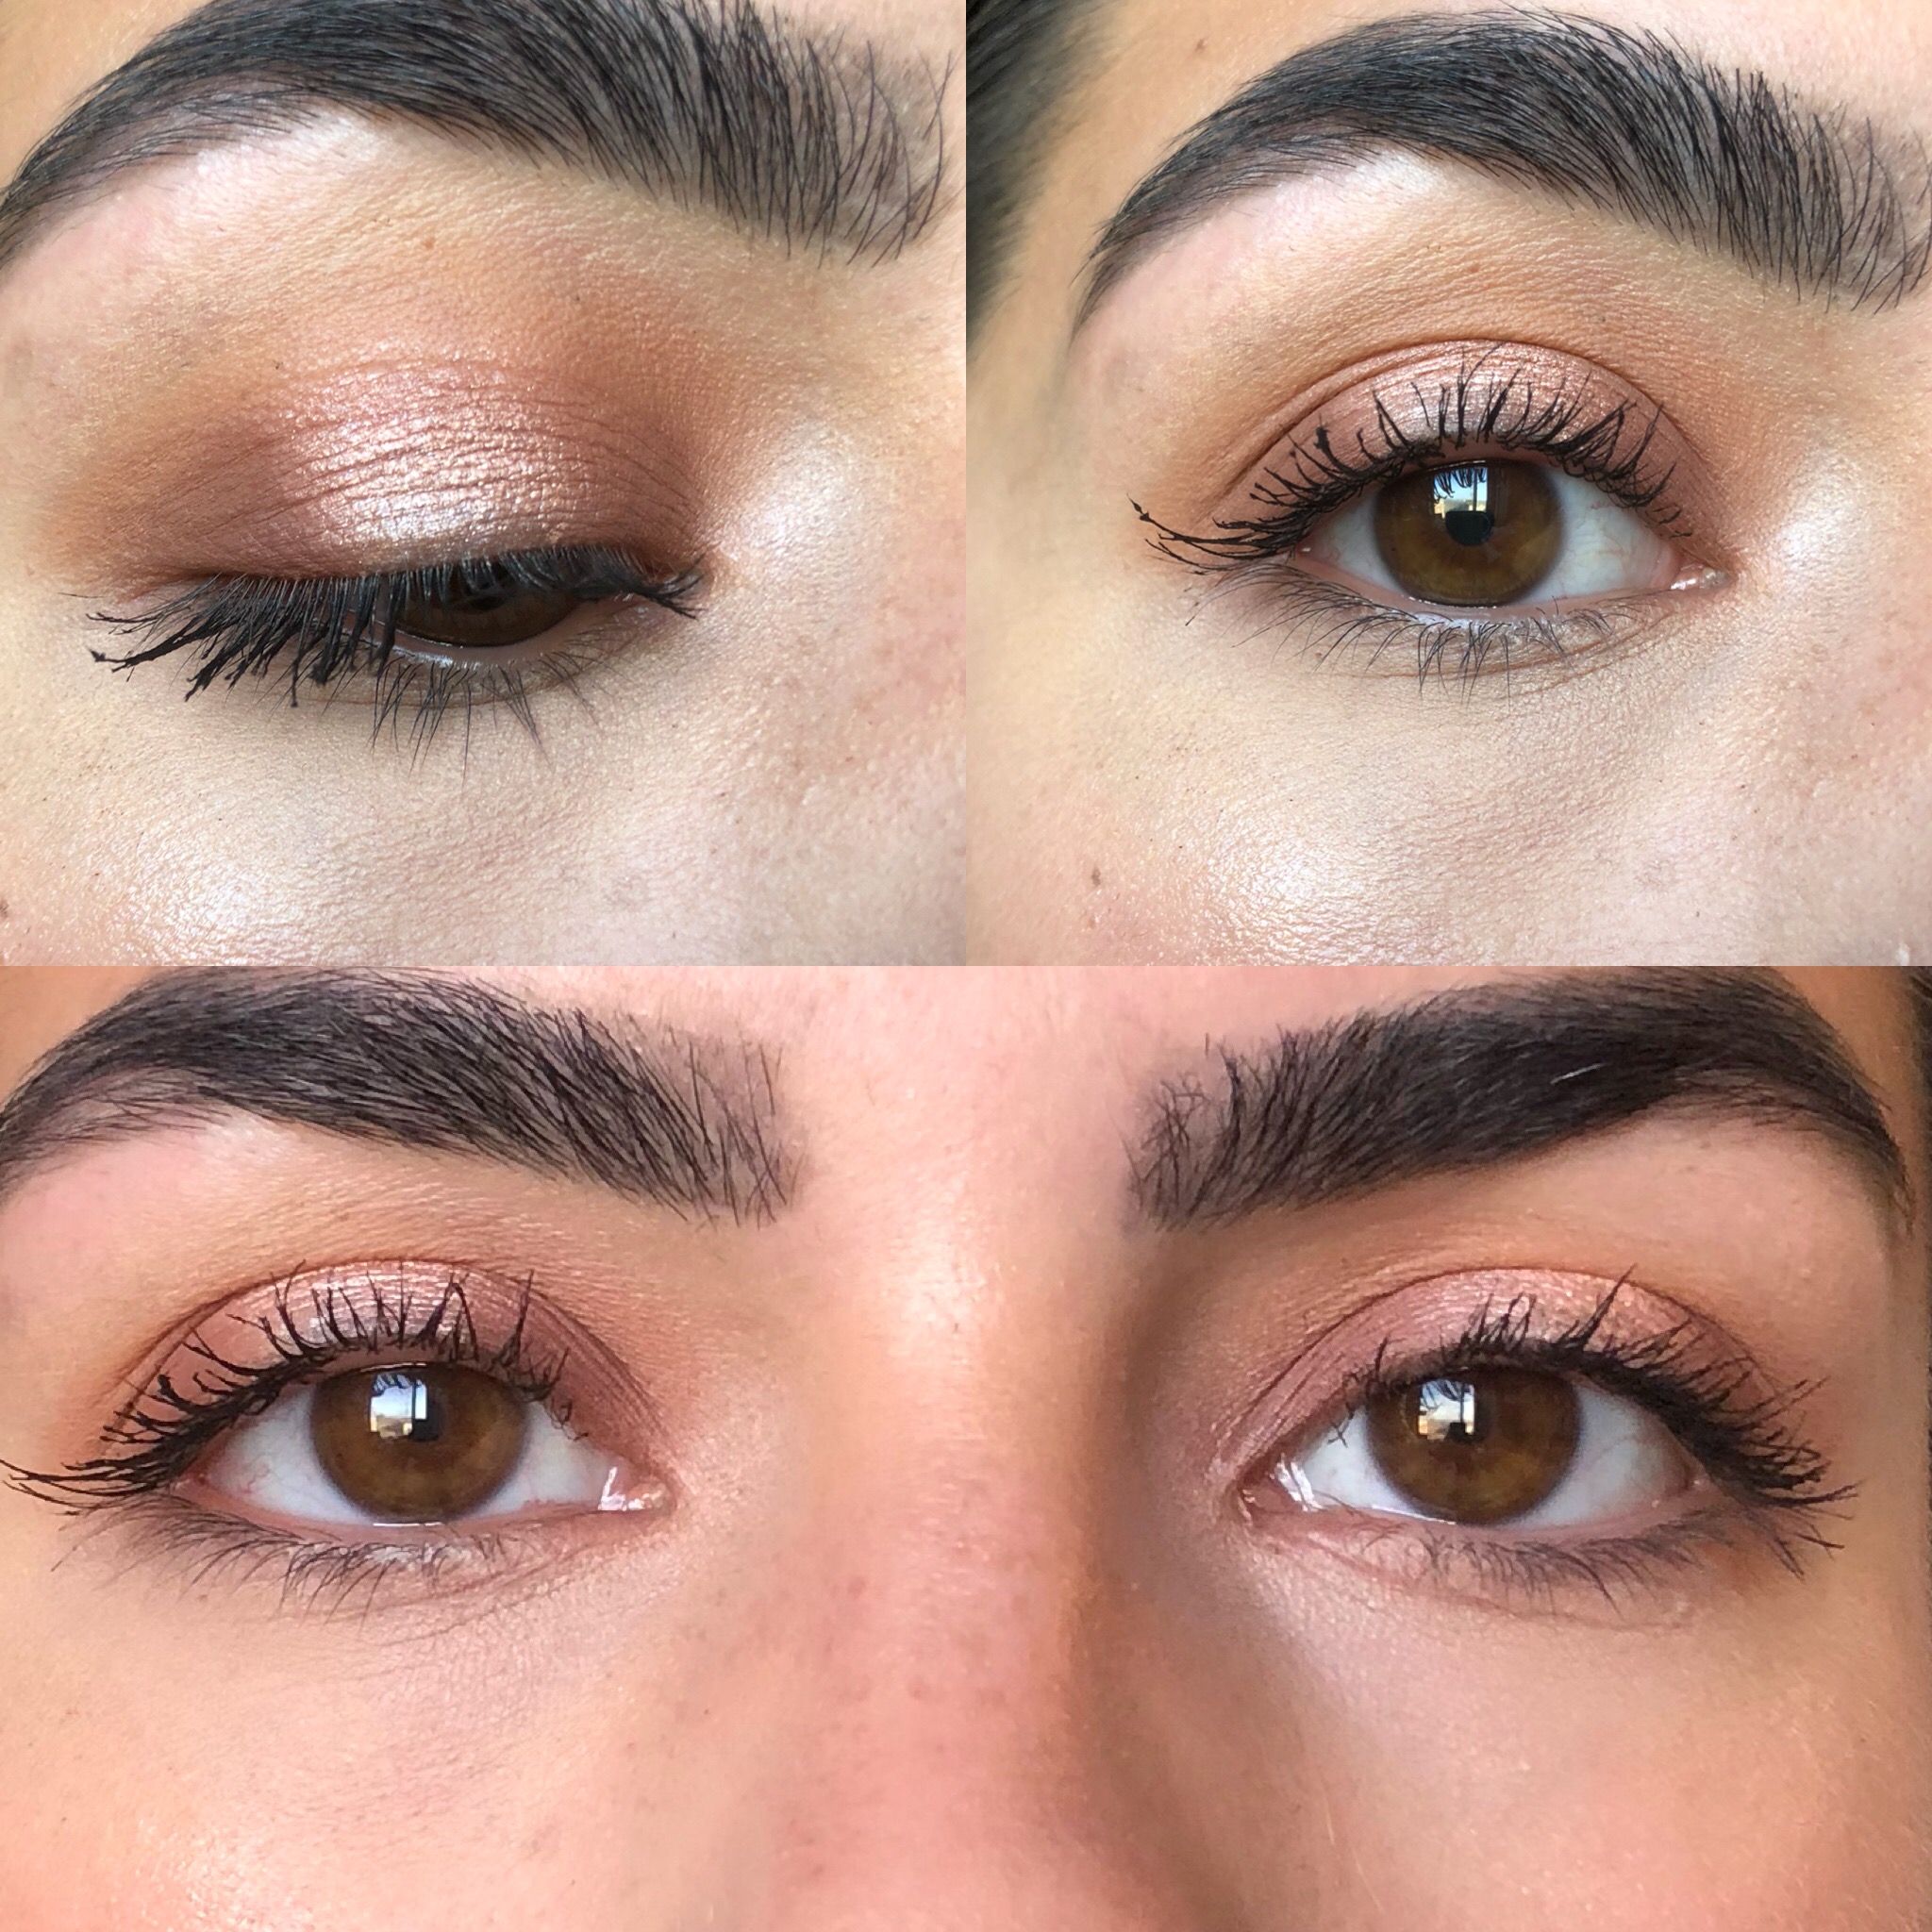
Look #2: SILK CREME in the crease; JACZ & CHIP in outer & inner corners; ENLIGHT in inner corner; OBSESSED on wet brush in center of lid for impact.

Look #3: SILK CREME blended into the whole crease; ROXANNE blended into the whole crease; MOCHA all over the lid; SILK CREME  & ROXANNE buffed into whole bottom lash line; MOCHA blended into outer 2/3 of bottom…

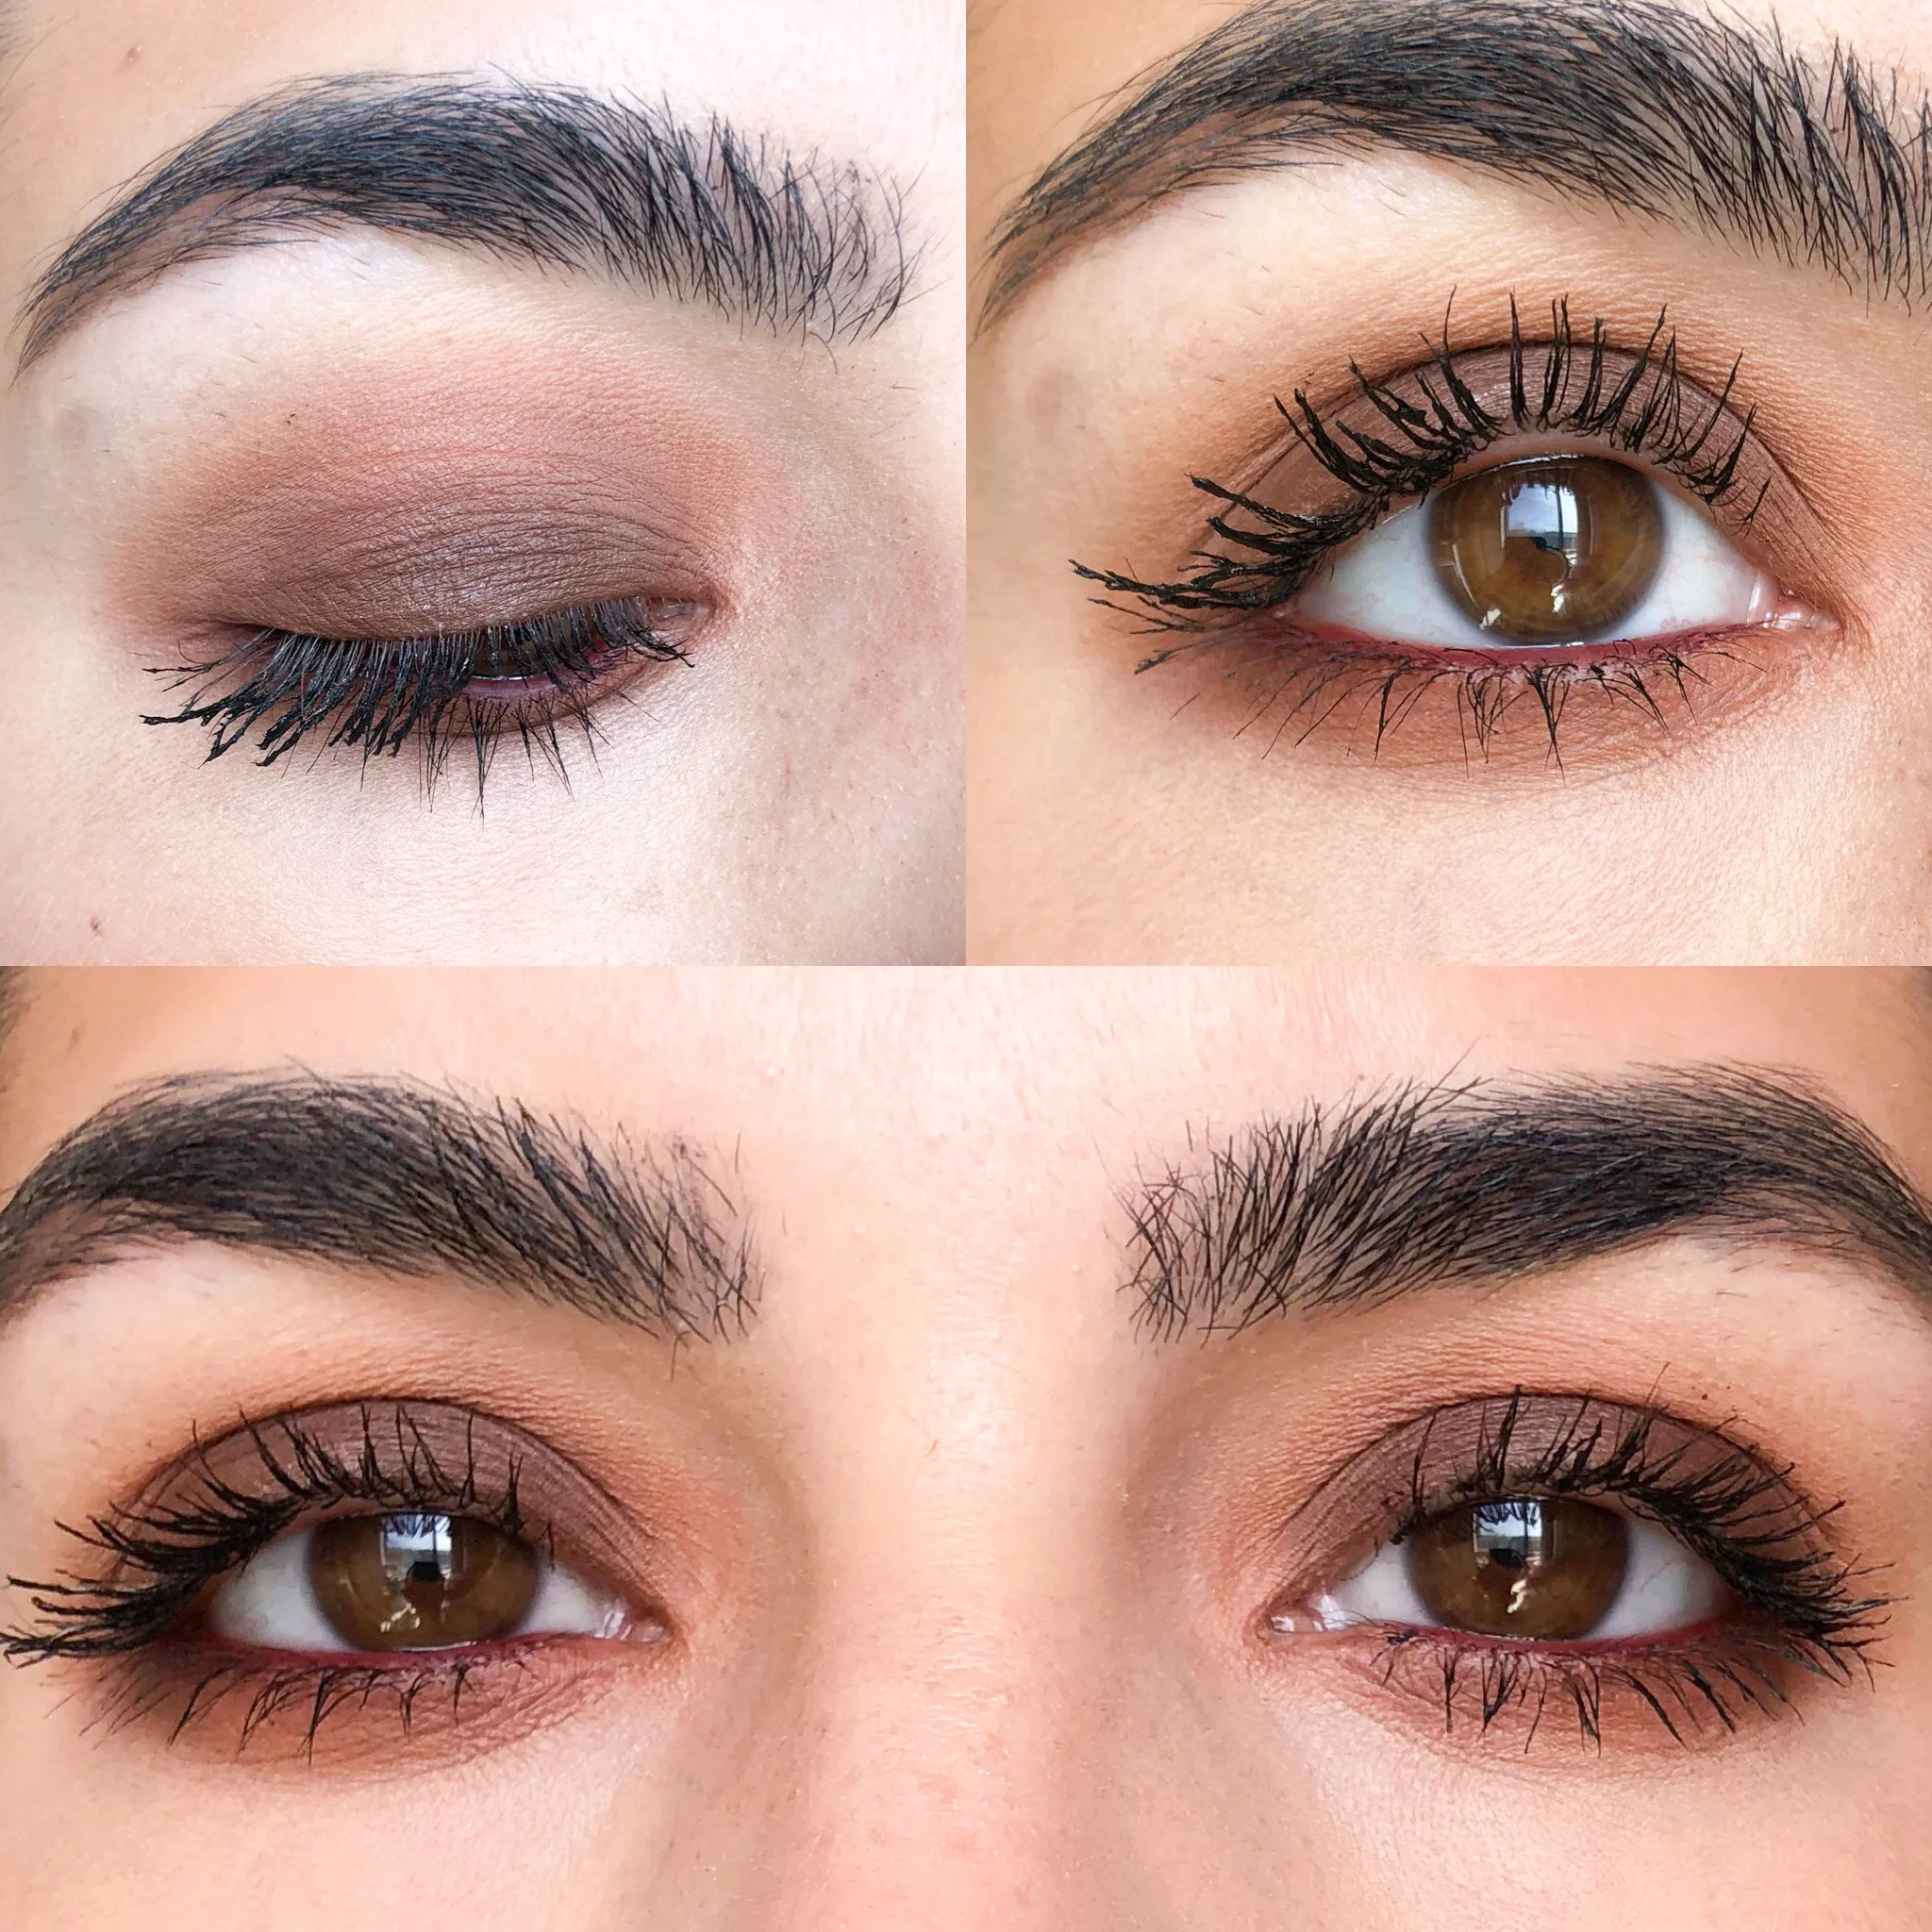
Look #3: SILK CREME blended into the whole crease; ROXANNE blended into the whole crease; MOCHA all over the lid; SILK CREME  & ROXANNE buffed into whole bottom lash line; MOCHA blended into outer 2/3 of bottom lash line. 

Look #4: SILK CREME & M.F.E.O. all over lid and blended out towards the crease; ENLIGHT in inner corner.

Look #4: SILK CREME & M.F.E.O. all over lid and blended out towards the crease; ENLIGHT in inner corner.

Look #5: ROXANNE blended into the crease but very concentrated in the outer corner; S.B.N. outer half of the lid; 24/7 inner half of the lid; SODA POP & CENTRAL PARK concentrated in the outer corner; OBSESSED in the…

Look #5: ROXANNE blended into the crease but very concentrated in the outer corner; S.B.N. outer half of the lid; 24/7 inner half of the lid; SODA POP & CENTRAL PARK concentrated in the outer corner; OBSESSED in the inner corner. 

Look #6: CREAMSICLE blended into the whole crease really well; QUEEN all over the lid and blended out to meet CREAMSICLE.

Look #6: CREAMSICLE blended into the whole crease really well; QUEEN all over the lid and blended out to meet CREAMSICLE.

Look #7: BEAM all over the lid; BUTTER & POOTER mixed and concentrated in the outer corner; BUNS blended on top of that still in the outer corner; Next layer CHIP on top of that; Add winged eyeliner and then go in with smaller bru…

Look #7: BEAM all over the lid; BUTTER & POOTER mixed and concentrated in the outer corner; BUNS blended on top of that still in the outer corner; Next layer CHIP on top of that; Add winged eyeliner and then go in with smaller brush to concentrate a little bit of CENTRAL PARK in the outer corner.

Look #8: SILK CREME blended into the whole crease; DIVA all over the lid and blended to meet SILK CREME; ENLIGHT in the inner corner.

Look #8: SILK CREME blended into the whole crease; DIVA all over the lid and blended to meet SILK CREME; ENLIGHT in the inner corner.

Look #9: CREAMSICLE blended into whole crease; ENCHANTED placed in inner and corner corners only and blended out slightly; HUSTLE added to center of lid; Darken inner and outer corners of lid as needed to create Halo shadow effect.&nb…

Look #9: CREAMSICLE blended into whole crease; ENCHANTED placed in inner and corner corners only and blended out slightly; HUSTLE added to center of lid; Darken inner and outer corners of lid as needed to create Halo shadow effect. 

Look #10: M.F.E.O. blended into the whole crease; HUNTS added a little to deepen the crease slightly; FIREWORK all over the lid.

Look #10: M.F.E.O. blended into the whole crease; HUNTS added a little to deepen the crease slightly; FIREWORK all over the lid.

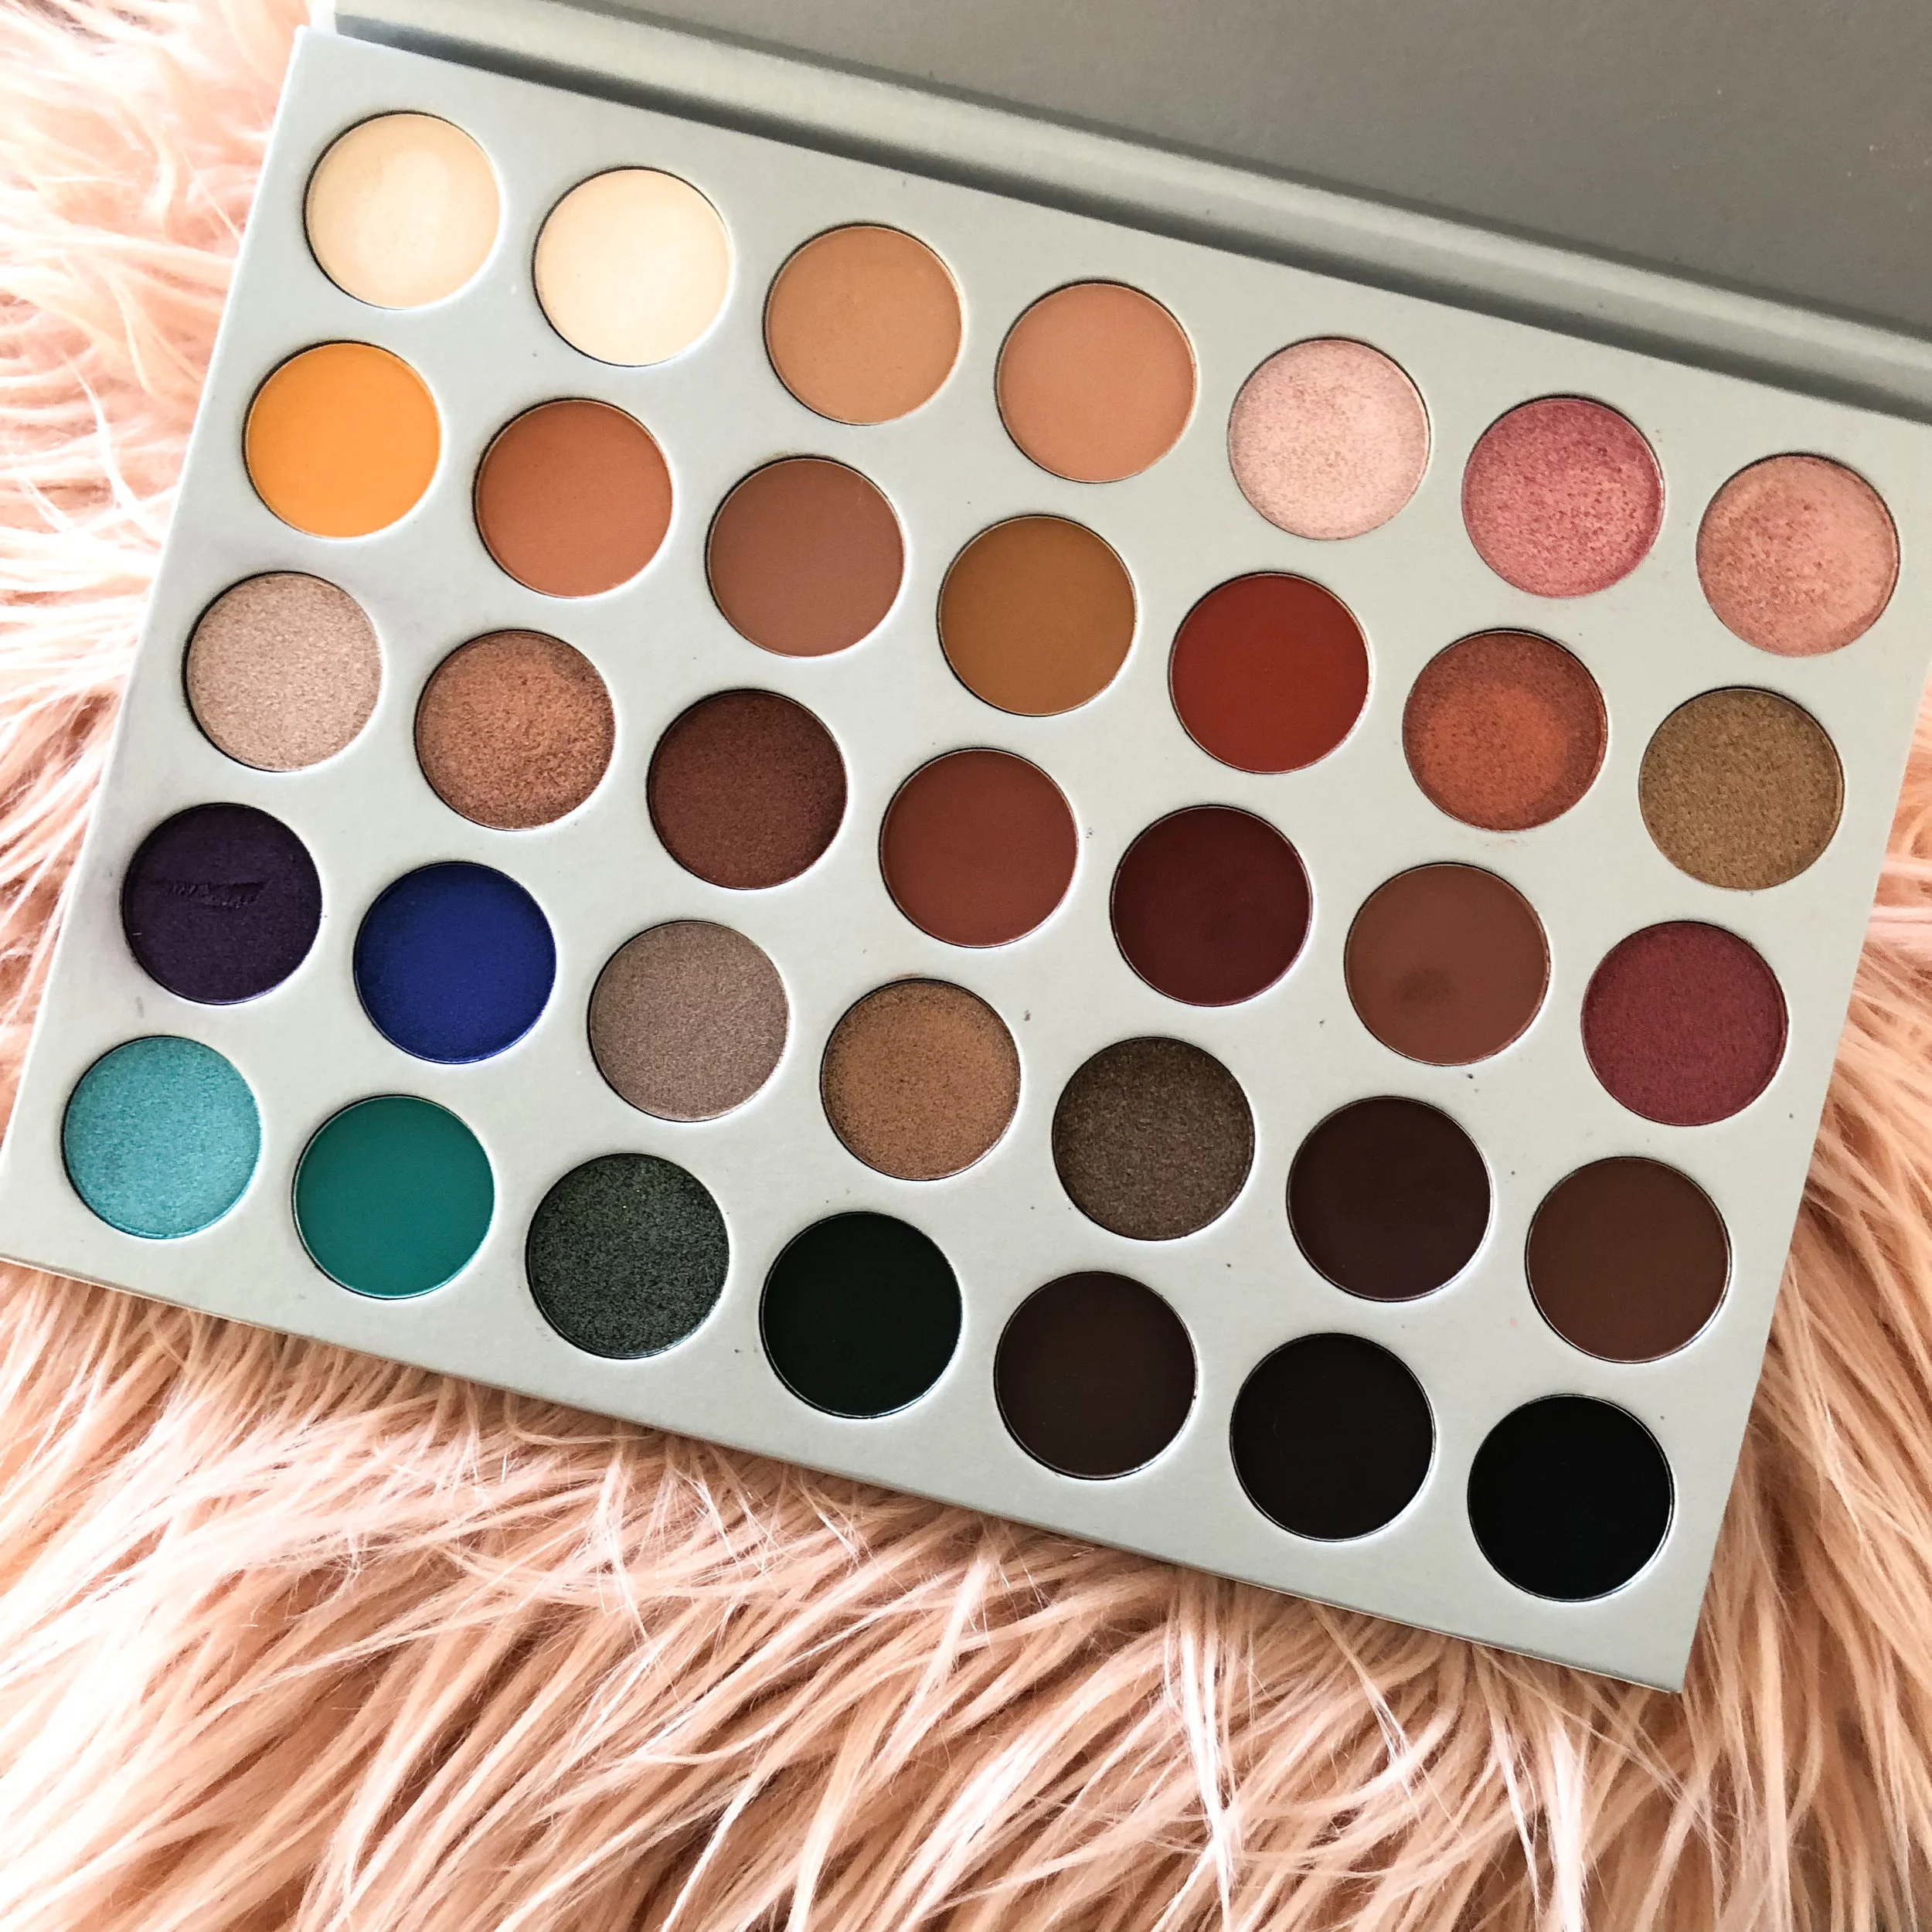
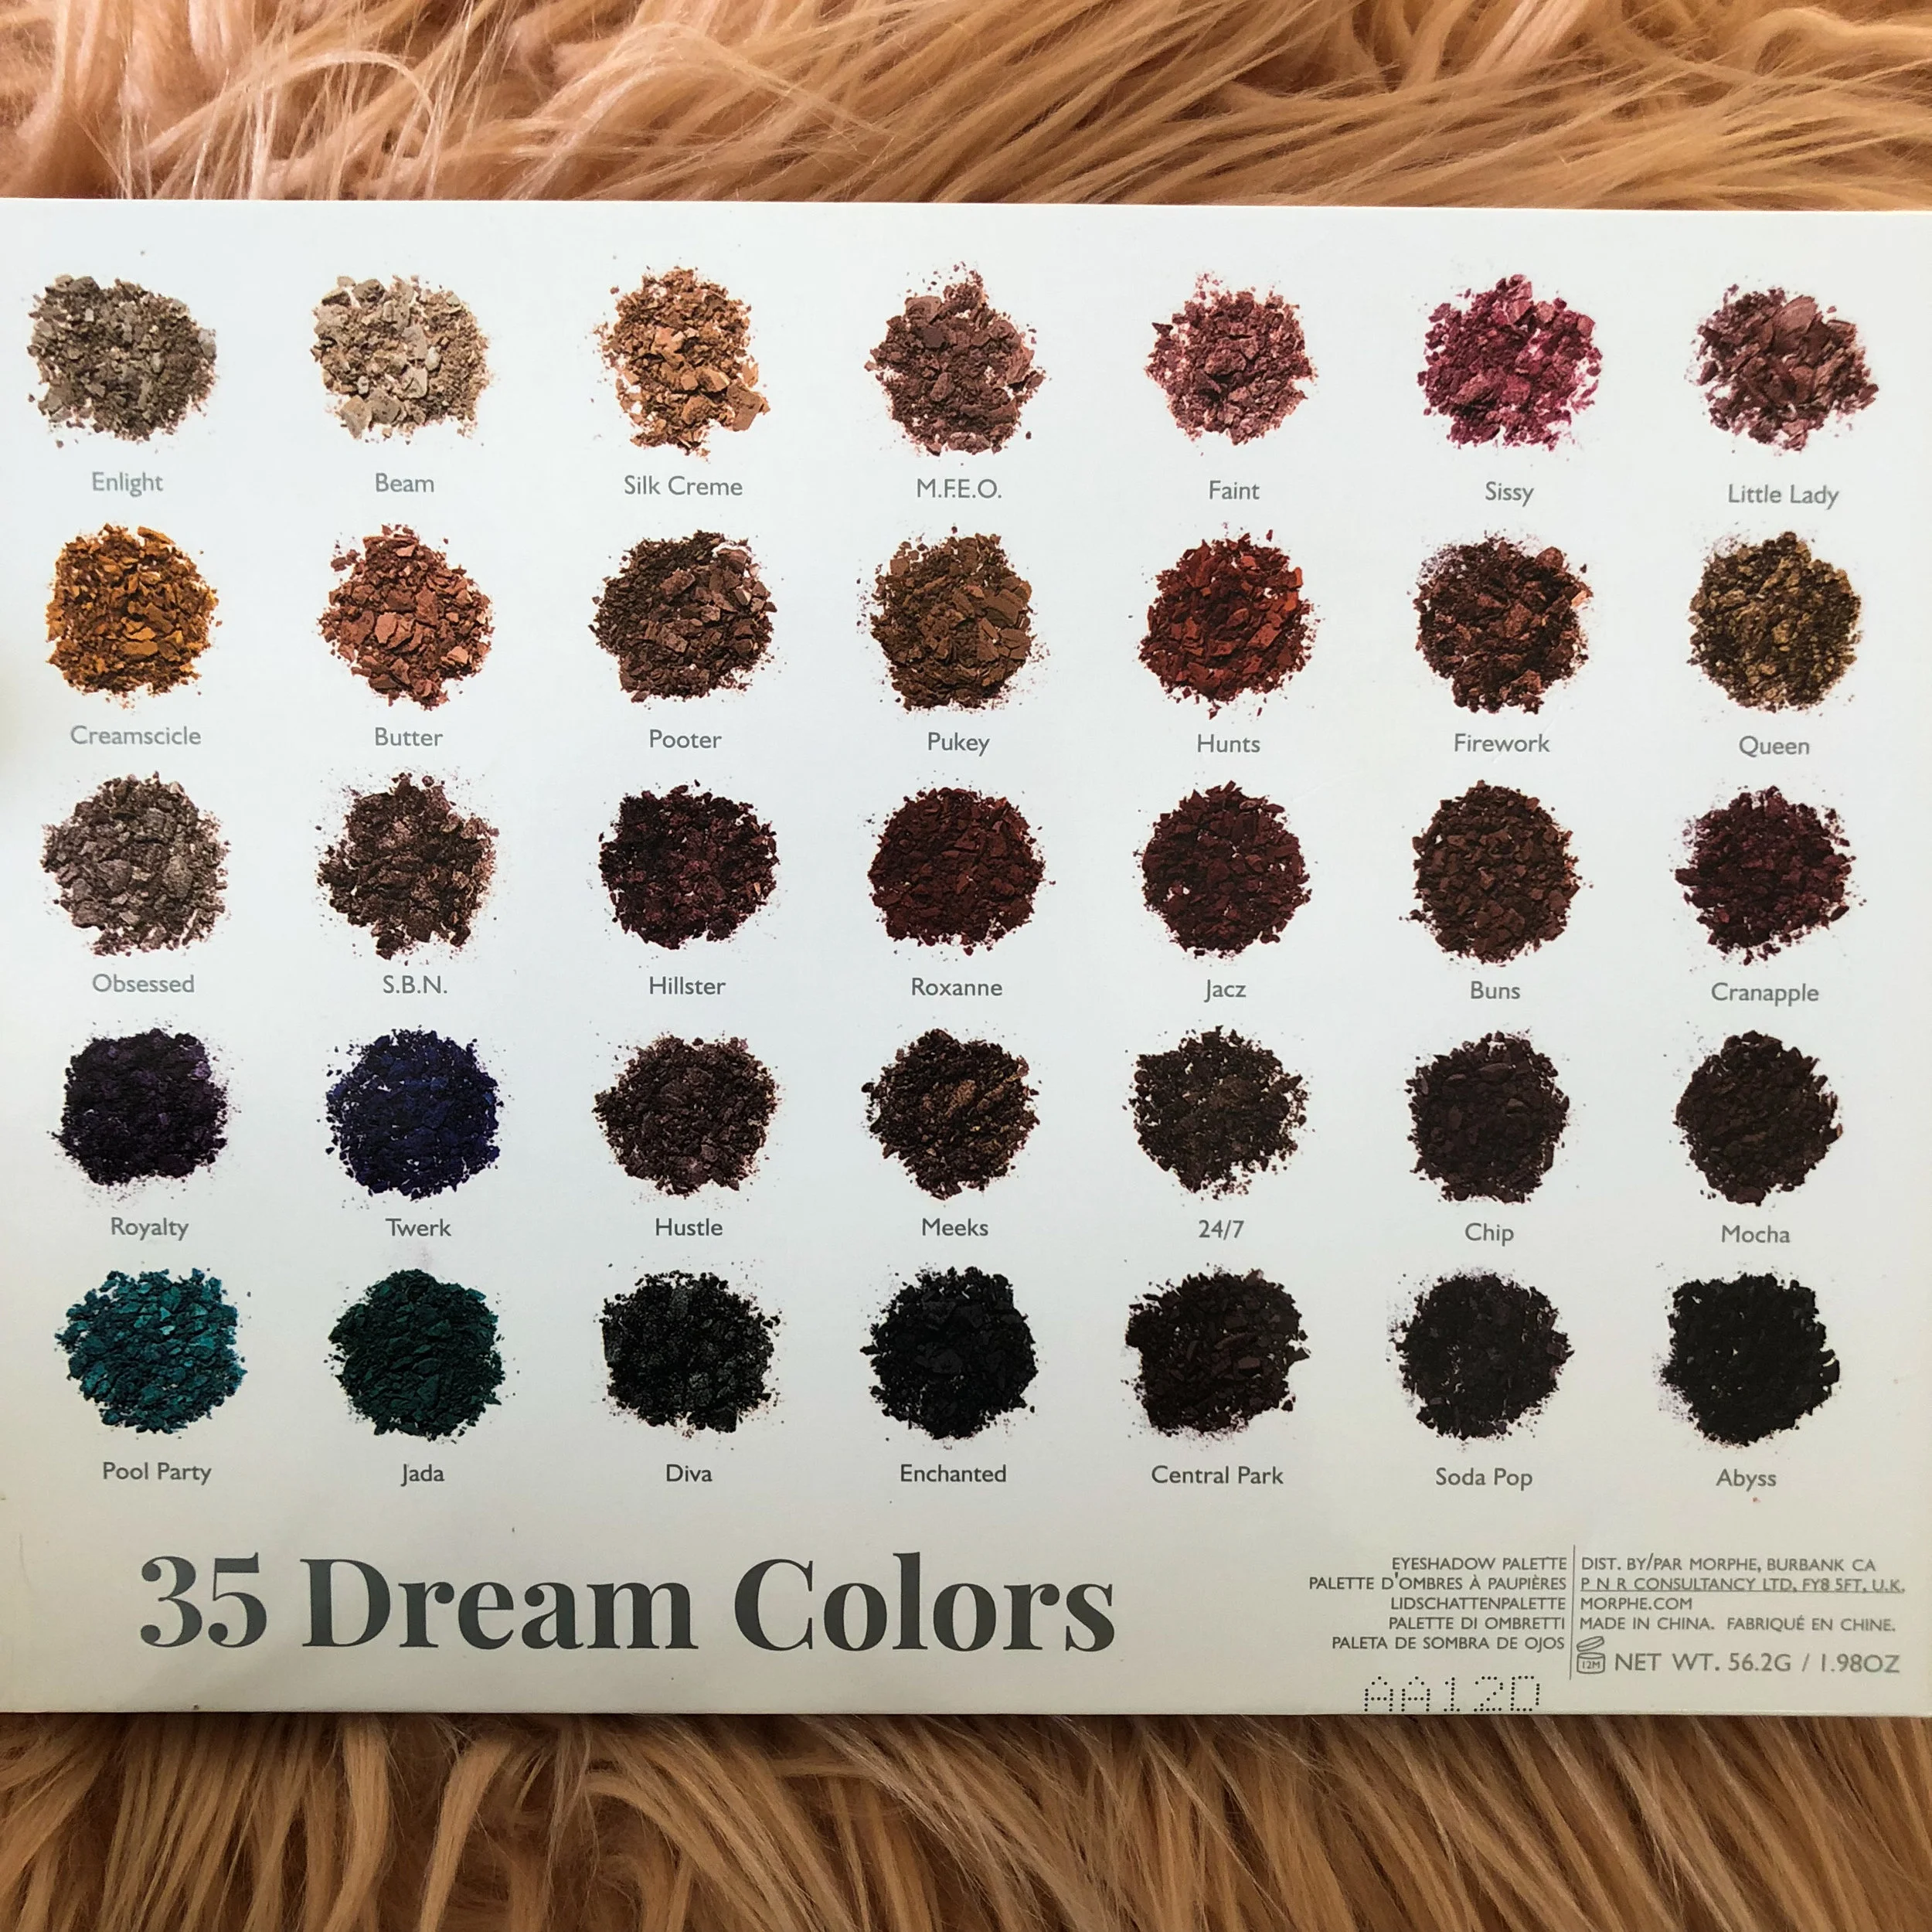
Below I've shared close ups of the shadows so you can see the whole palette and decide if you want to snag this one! I recommend it. I was actually surprised how many different types of looks I could create because when you look at the palette as a whole, there are many similar colors!

Some of the shadows towards the bottom look similar here, but up close and in natural light you can see that Enchanted is a deep forest green, central park is brown; and soda pop has some burgundy/ deep purple to it. Abyss is black. 

Some of the shadows towards the bottom look similar here, but up close and in natural light you can see that Enchanted is a deep forest green, central park is brown; and soda pop has some burgundy/ deep purple to it. Abyss is black. 

IMG_1485.JPG

Again, PLEASE comment below sharing which palette you want me to create 10 looks for next! I really loved doing this because it challenges me to create new looks all the time which is really fun as a makeup artist!

Have a beautiful day,

Andrea

What Did I Buy at the Sephora & Ulta Spring Sales?

Am I the only one who hoards an Ulta or Sephora gift card waiting for the 20% off or VIB sale email to come through so I can finally spend it? Haha hopefully some of you beauty addicts understand the happiness of having both! I luckily had an Ulta GC this weekend when it was time for the sale and headed to both stores with two of my also beauty obsessed friends which resulted in this haul. I asked on Instagram if you wanted to see this post and got a 100% response of YESSS so here we are! I will be filming a first impression on a lot of these and posting that this week so look for that if you're curious about my thoughts on these!

First up was Ulta. I often take the opportunity to stock up on some things for my kit when I have discounts, so you'll see some of the purchases below are for that. If it's for my kit I'll denote that in case you want to know!

IMG_3018.JPG

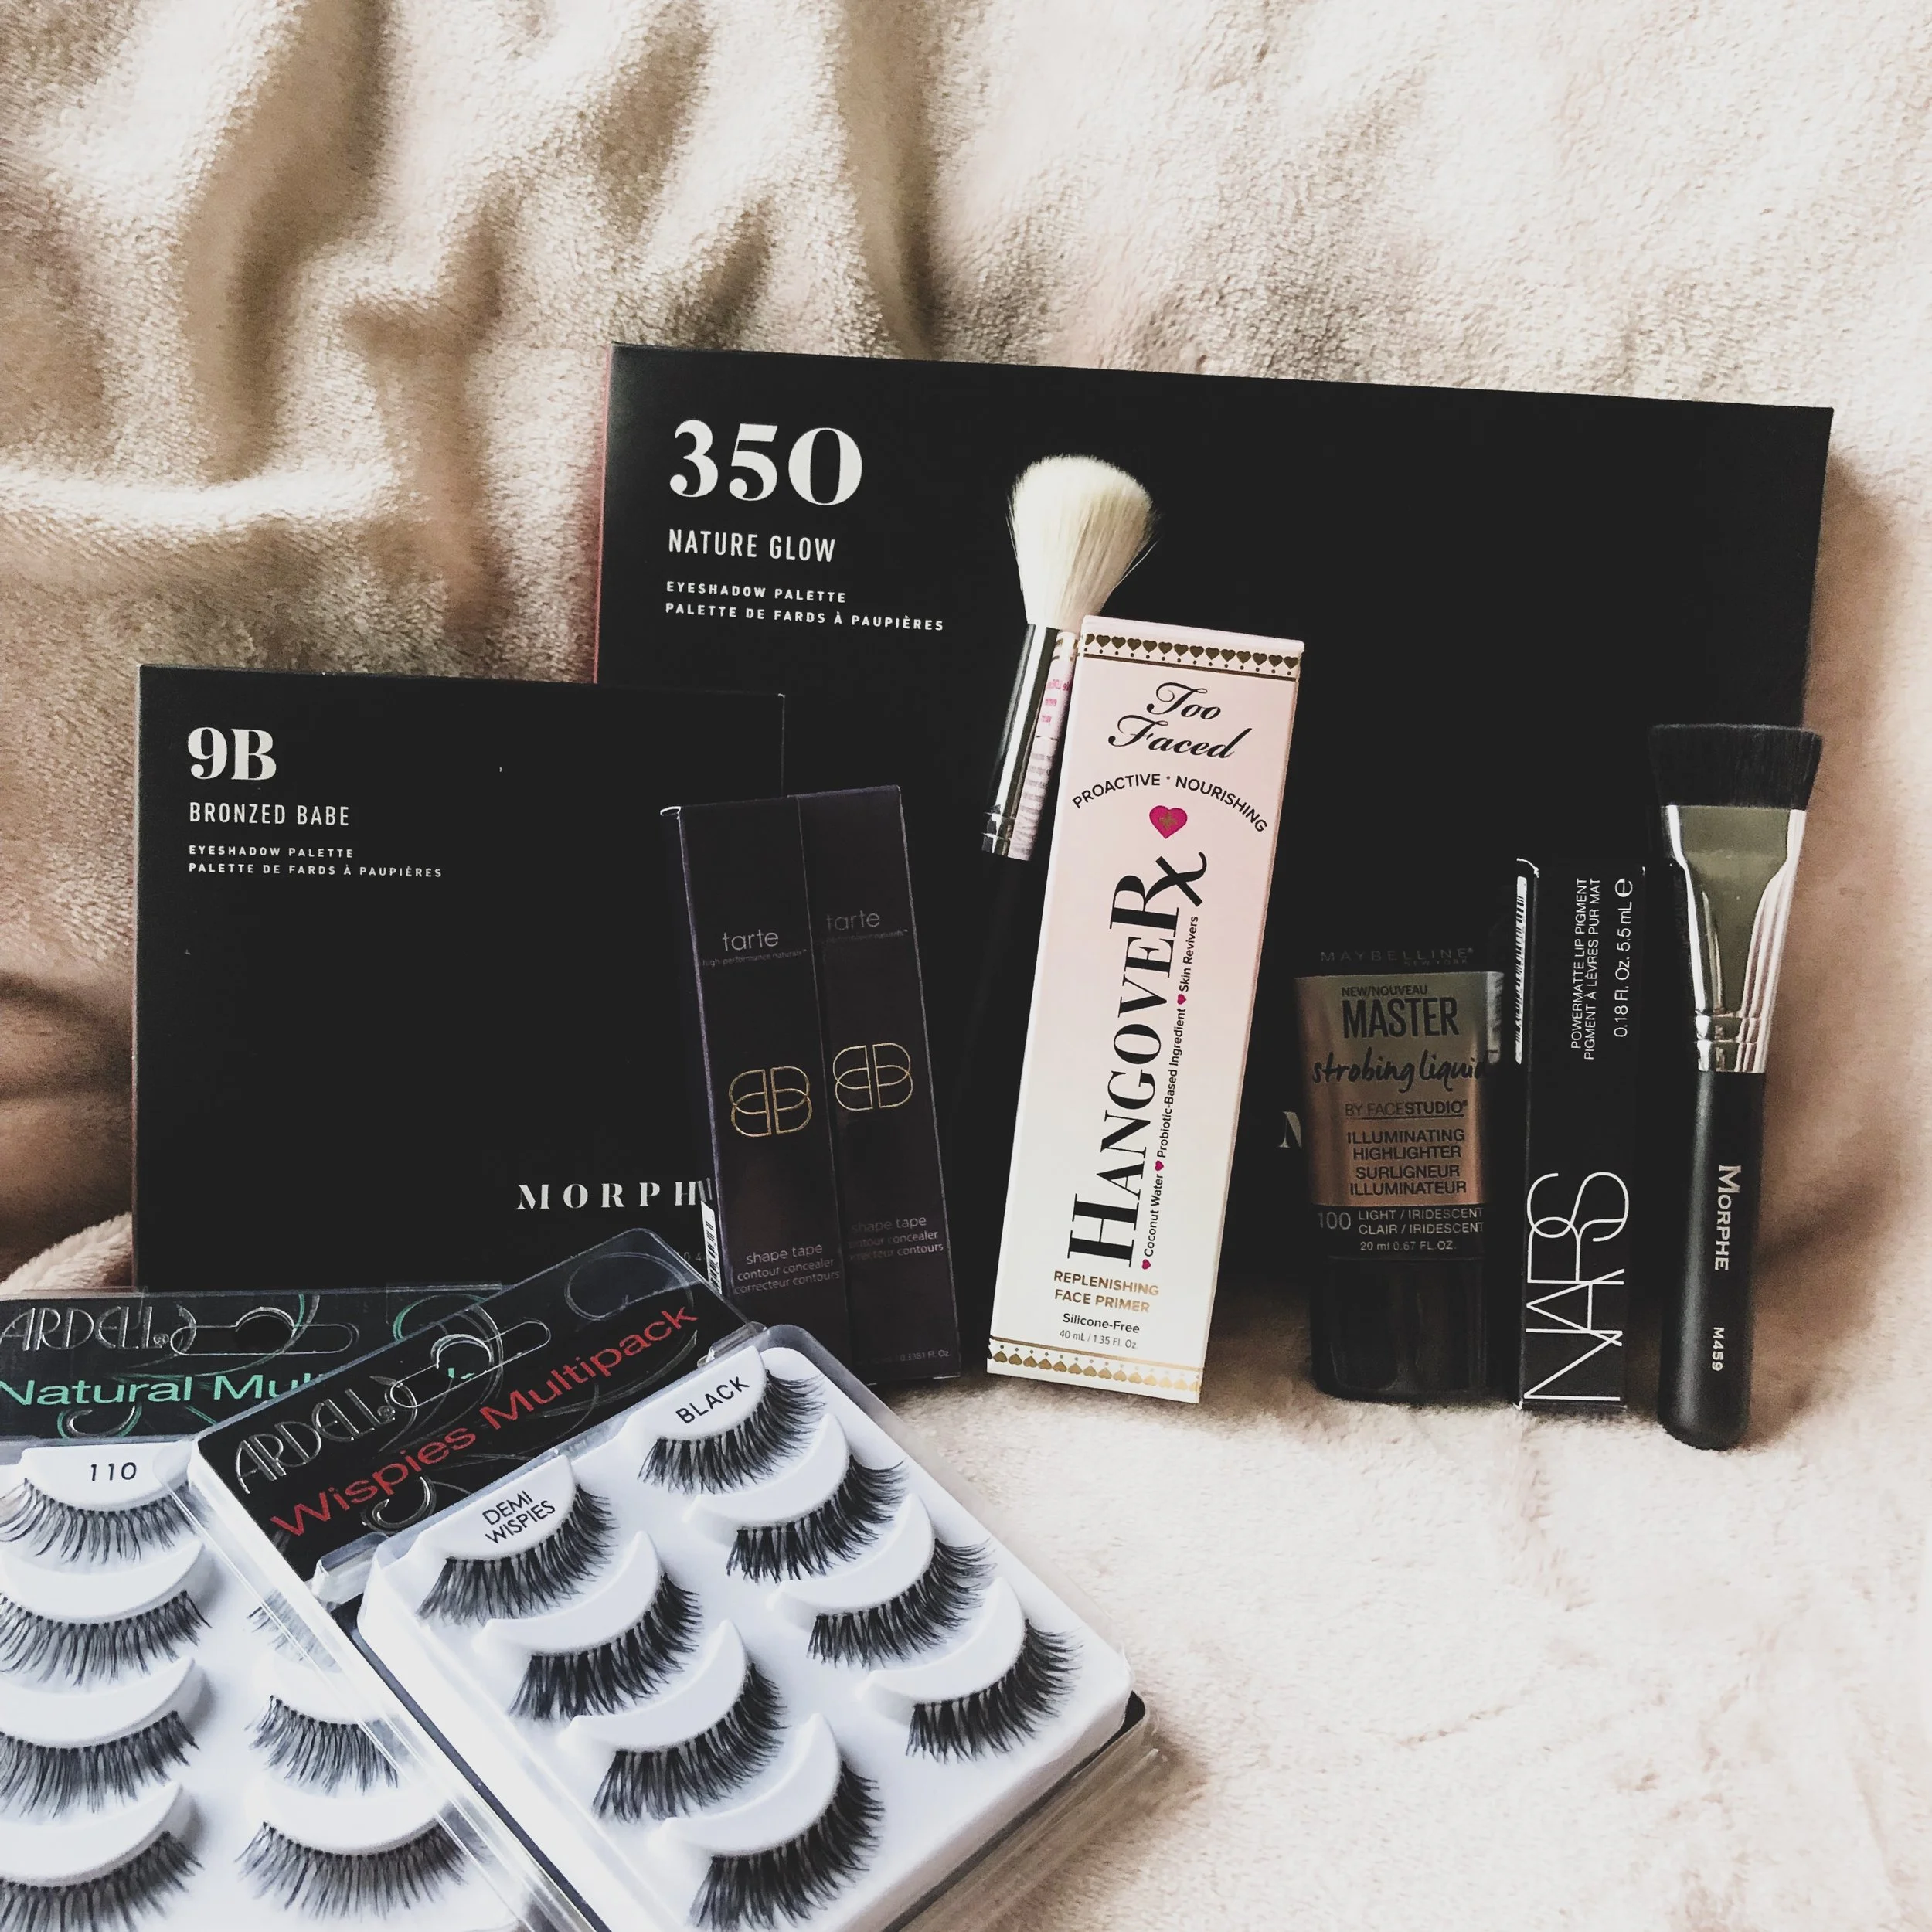
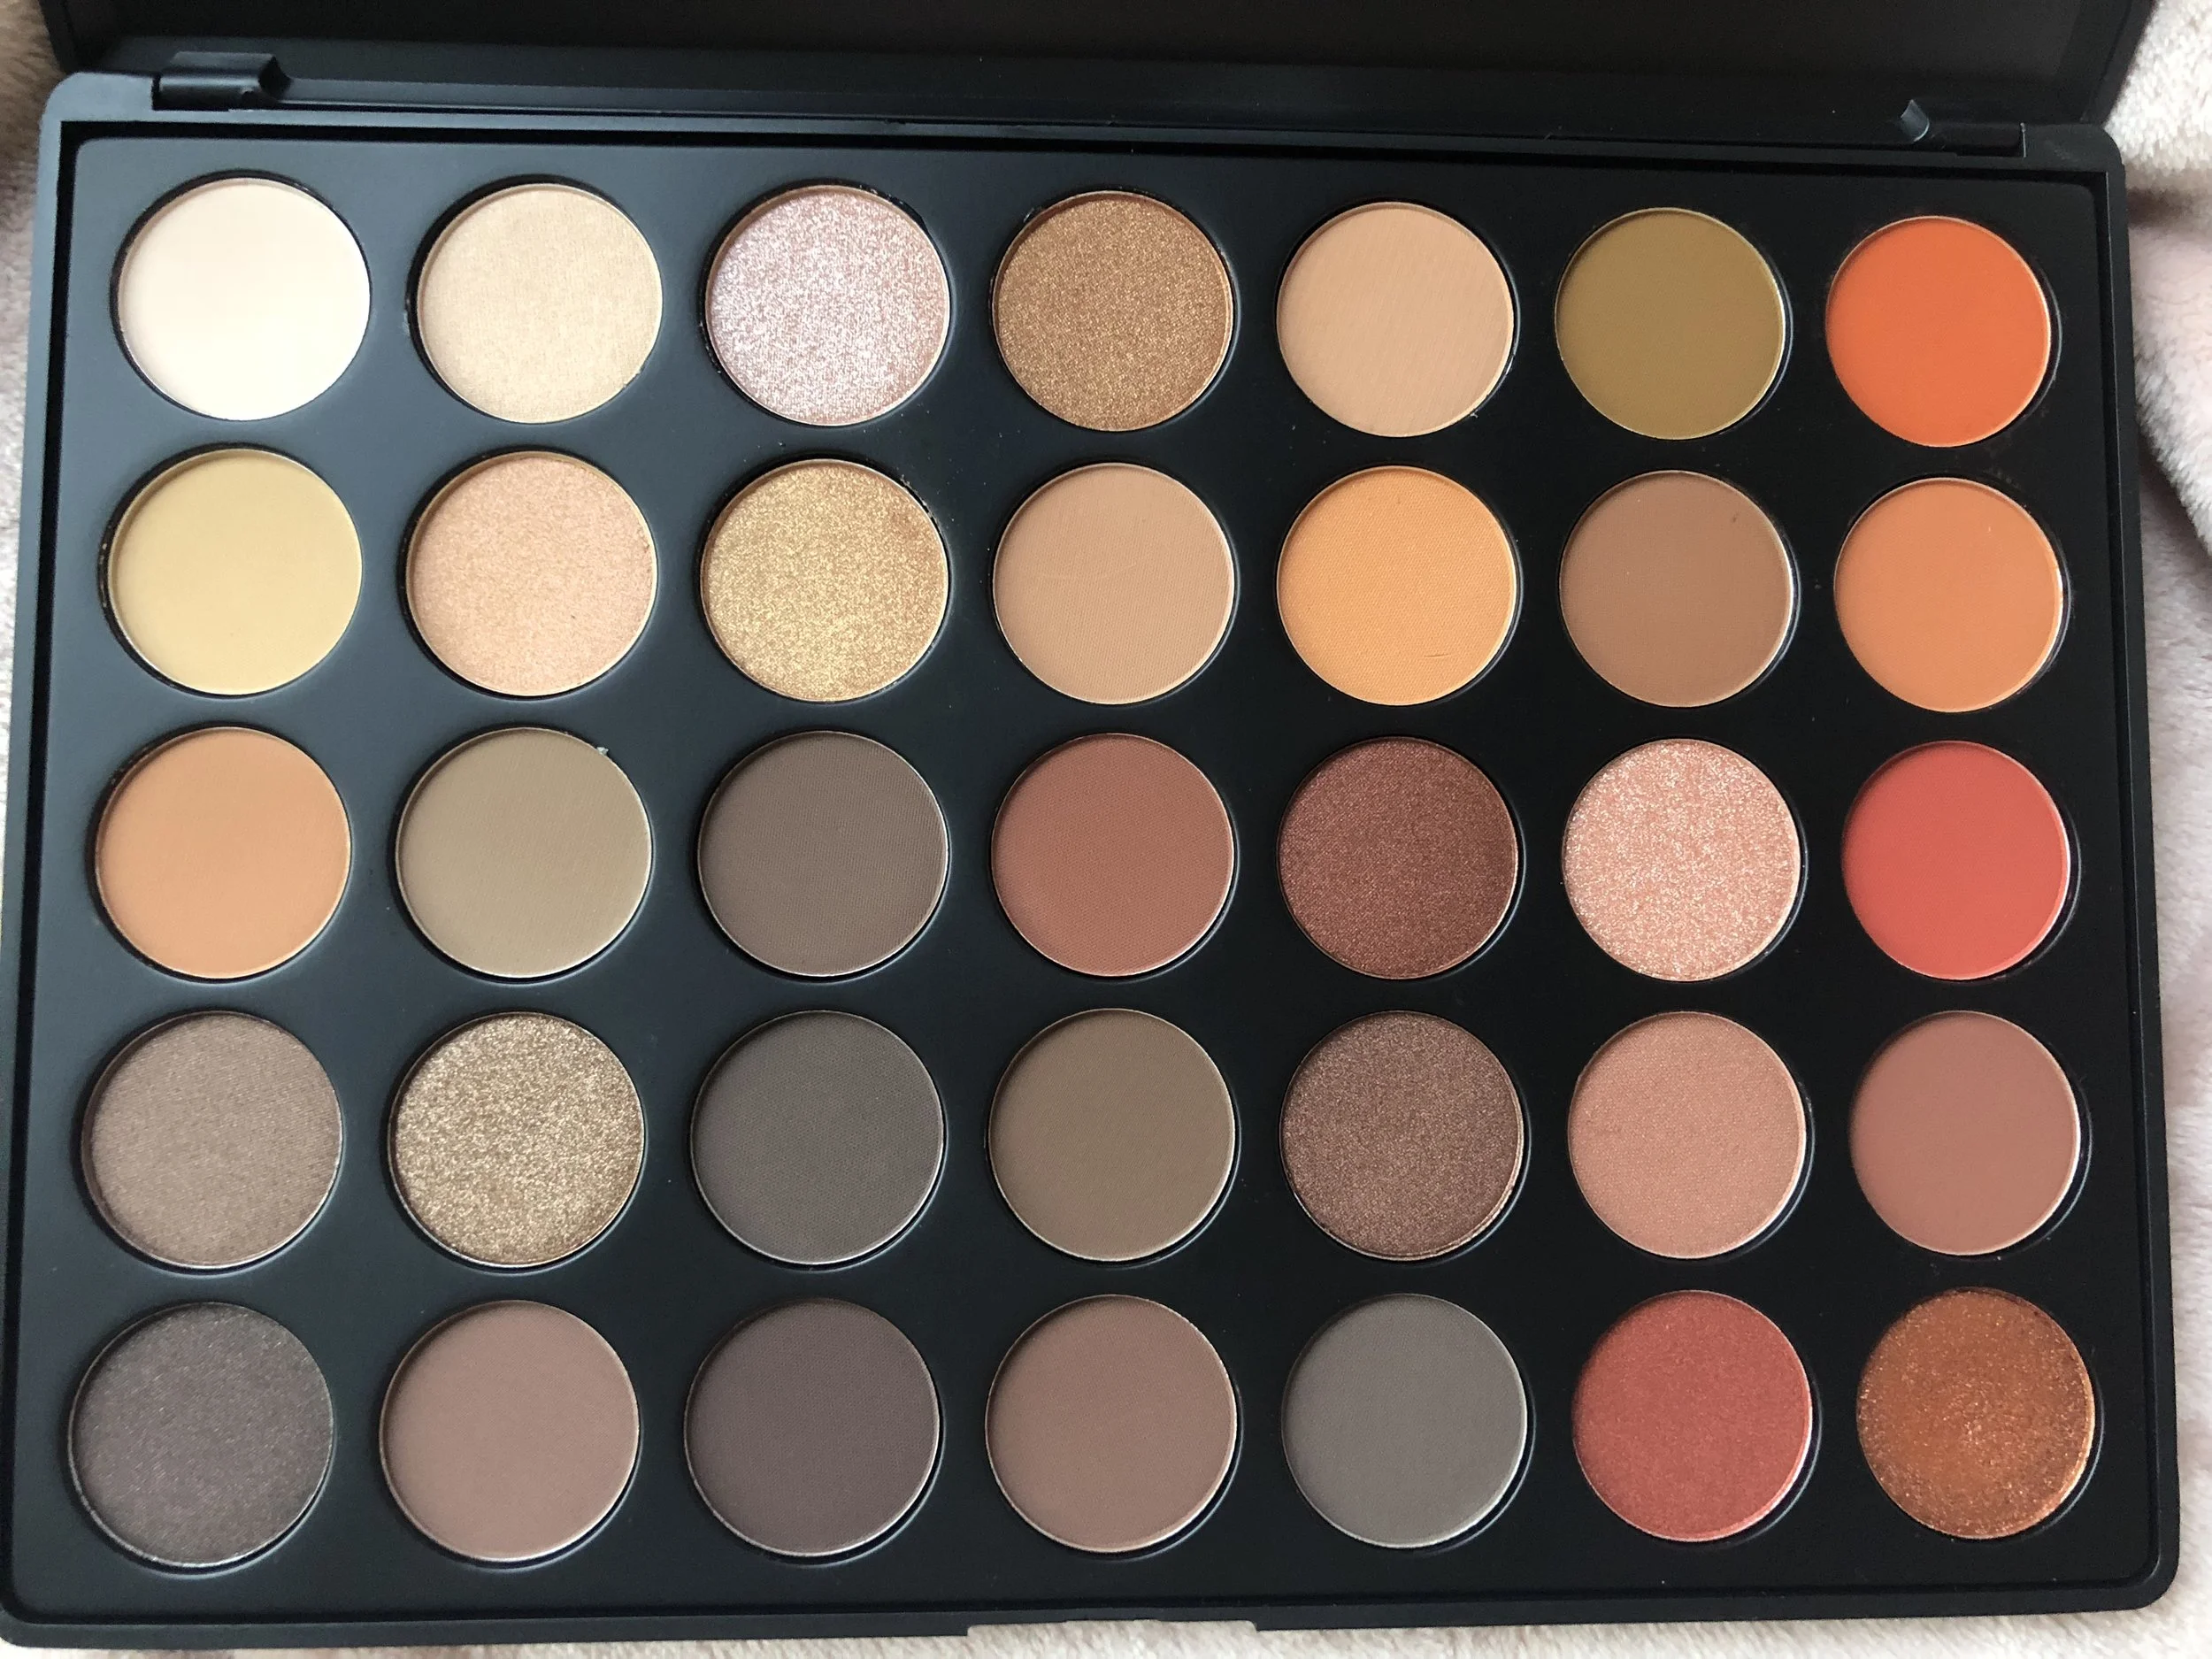
In the back row (from L to R) you'll see I bought the Morphe 9B Palette, the Morphe 35O Palette (kit) , two shades of Tarte Shape Tape Concealer (kit), Morphe M530 Contour Brush (kit), TooFaced Hangover RX Primer (kit), The Maybelline by Face Studio Master Strobe Liquid in Light, NARS Power Matte Pigment in Walk This Way, the Morphe M459 Flat Contour Brush, a multipack of Ardell Demi Wispies (kit), and a multipack of Ardell 110's (kit). 

Close up of the 35O Palette!

Close up of the 35O Palette!

Close up of the 9B Palette!

Close up of the 9B Palette!

At Sephora I got the Fenty Beauty Lil Match Stix Duo, Fenty Beauty Match Stix Matte Skinstick in Amber, Milk Holographic Stick in Mars, and the Sephora Collection Colorful Blush in Too Hot! No. 7. 

IMG_3017.JPG

Did you guys shop the sales? If you did, what did you get? If you want specific reviews on some of these products let me know! I'll be sure to Instagram story the exact products I'll be using in the First Impressions video, so be sure to follow me over there @andreafontanabeauty. 

Have a beautiful week,

Andrea
10 Random Skincare Tips

You guys really seem to like when I compile lists of tips or recommendations so I thought I'd compile a little list of 10 tips relating to skincare. Look for one on makeup coming next! 

1. Stand away from the shower head. If you don't already face away from it, get into the habit of letting the water hit your backside, not your front side because hot water hitting your face increases dryness. 

2. Multi-Mask. Rarely does our entire face need the exact same treatments. You can be breaking out in one area, but super dry another! Don't be afraid to use different masks on different areas to achieve what all of your skin needs. 

3. Frozen spoons. If you deal with puffy under eyes due to allergies (hello spring) keep 2 metal spoons at all times in your freezer. Then when you wake up with swollen eyes, you can use the curve of the spoon to fit nicely into the curve of your eye socket to de-puff! This is one of my faves.

4. KEEP THESE ON HAND ALWAYS. I've talked about these before in a favorites video, but you never know when you're going to wake up with a blemish. Once it starts coming to a head, pop of these babies on it before bed (and before you put your moisturizer on so it sticks better) and it will help draw out the impurities and infection while you are sleeping. I cannot tell you enough how quickly these help me heal big blemishes.

5. Press don't pull. When it comes to applying your products, like serums & moisturizer, don't rub it into your skin. Instead, warm up the product in your fingers and press it into your skin all over. This allows you to apply your products without tugging on your skin and doing damage over time.

6. Pay attention to expiration times and write it on your product. Beauty products don't usually have an exact expiration date, but they often have a 12M, 24M, etc, logo on the bottom or back that shows in how many months you should stop using the product. It's too hard to remember dates for every product, so I recommend getting a sharpie and either dating when you opened it, or when it's time to pitch it. 

7. Before you take product recommendations from someone, ask what their skin type is. It is pointless to buy your best friend's FAVORITE new moisturizer if they have dry skin and you are really oily. It's important to know what their skin is like before buying skincare or facial makeup products that work for them. Unfortunately not everything works for everyone so be sure that the product is ideal for your skin type first!

8. Give your skin a break. If you wear makeup on a regular basis, give your skin a break by going makeup free one or two days a week! I cannot tell you how nice it will feel to let your skin breathe. While makeup is fun, it's important to embrace the natural beauty of your naked face.

9. Keep a variety of products on hand. While it's good to have a set routine for your skin, it's important to know and accept that your skin won't need the same thing every single day. Having products (like different moisturizers for different levels of hydration for example) on hand, will allow you to always be ready to treat your skin with what it needs that day. 

10. Invest in good quality. I cannot recommend this enough. It's probably something you've heard a million times but I cannot stress enough how important it is to spend your money first on your skincare, before makeup. Quality products usually last longer as well because you use less product. However, not all products have a justified price tag, so be sure to ask a professional (like me!) before purchasing if a product seems really expensive. 

I hope you enjoyed this fun little list of tips! If you have any good skincare tips be sure to comment below and leave your favorites! Tips are always fun to learn.

Have a beautiful day,

Andrea

Make Your Own Chemical-Free Body Scrub

IMG_2812.JPG

I have a really great body scrub currently in my bathroom that I love and while reading the ingredients I realized I could very easily make a similar type of body scrub with ingredients from my pantry. This got me to thinking that I might as well make it for you guys and share with you how I made it. 

The ingredients you'll need are few and you can edit this recipe as much as you want and create your own unique scrub.

You will need:
- Coffee grounds (I used organic french vanilla from TJ's because I love how they smell)
- Coconut oil (Again I used organic unrefined so it still has the coconut smell)
- Brown sugar (you could use granulated white sugar but I like how soft brown sugar is)
- Essential Oils (I used peppermint to make my scrub SMELL LIKE A THIN MINT!)
- Some sort of container (I used a mason jar with a screw top lid)

Now the exact amounts you use will be completely dependent on how big your container is and the consistency that you like. I personally like my scrubs to be wet but really crumbly so that I get a good exfoliation (REMEMBER use these scrubs on wet skin only and NEVER on your face). 

FullSizeRender.jpg

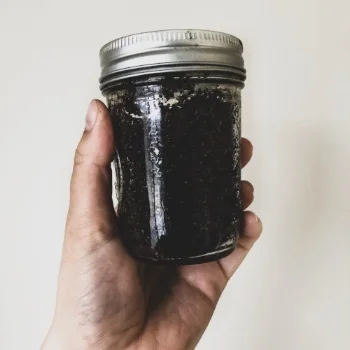
In my jar I mixed 5 tablespoons of coffee grounds with 5 tablespoons of brown sugar. I mashed them together to make sure that they were evenly mixed and then added 1 tablespoon of melted coconut oil. Next, I added about 10 drops of peppermint essential oil and when I smelled it I WAS IN HEAVEN. Thin mint in ajar. I cannot wait to smear this all over my body tomorrow when I shower.

If you are looking for a chemical free body scrub, this is a great way to make your own! The coffee is stimulating due to the caffeine and will help with circulation. The brown sugar will exfoliate all of your dead winter skin cells off, and the coconut oil is great for moisturizing your skin!

If you make a scrub and use different oils or measurements be sure to leave a comment below and let me know what concoctions you create!! I honestly don't think I'll ever buy body scrubs again!

FullSizeRender.jpg

Have a beautiful night,

Andrea

Skincare Tips for the Active Woman

As I was going about my shower routine the other day after hitting the gym, I realized that there are very specific things I do either before, during or after my workouts for the sake of keeping my skin clear and healthy. I figured I'd share them all with you as a quick reminder of how to keep things clean when you're an active woman. There are tips for for both face and body. Enjoy!

1. Wash your face immediately after your workout. If you sweat at all during a workout you should wash your face as soon as you are done, even if you don't have makeup on. I keep a pack of cleansing wipes in my gym bag (these are a great option) to wipe my face down quickly when I'm done because I personally never workout with makeup on. If you do wear makeup, I would definitely suggest cleansing your face with an actual cleanser afterwards. It's really important to not let the sweat sit on the surface of your skin for too long after you're done. 

2. Wash your body with a Charcoal body soap. I love to use a charcoal body soap to cleanse after the gym to lessen the likelihood of back or chest breakouts. Sometimes I can't take a shower right after the gym because I have other things to do, and doing this allows me to still get a deep clean and prevent any breakouts. This one by "Yes To" is a great option. 

3. Change your towel every day. If you shower at your gym after your workout, make sure you swap out for a clean towel every single day. More than likely, your towel gets put in a gym bag and doesn't get proper ventilation to dry quickly. If this is the case, it's really easy for bacteria to harbor and grow. I recommend tossing it in the hamper and getting a new one every time so that you avoid touching your face or body with it. I know that may seem excessive, but if you are prone to acne it's little changes like this that limit your exposure to acne causing bacteria which can lessen the likelihoods of breakouts. 

4. Stop touching your face. I know this seems obvious but think about how many things you touch that carry germs when you're at the gym. Touching your face only spreads the bacteria and it's always good to have another reminder not to touch your face. I do it without even realizing it sometimes so don't worry, I need this one too. Try bringing a fresh towel to the gym every time you go to wipe the sweat, instead of using your hands!

5. Use headbands. Headbands are a great way to keep sweaty hair off your face during a workout so definitely get some if you have bangs or baby hairs. I prefer to get ones that are able to be washed with my clothes so that I can clean them easily.

Let me know what your clean skin tips are for the gym but leaving a comment below!

Have a beautiful day,

Andrea 

How to make the only Kale Chips I'll ever eat.

Snapseed.jpg

It's no secret that kale is an extremely nutrient dense food that we should be consuming. Did you know that it can help tremendously with your skin? Full of Vitamin K, kale helps strengthen blood vessels, boost circulation and protect your liver. Since it's anti-inflammatory, it helps reduce puffiness and redness in the face and is great for conditions like rosacea. It's also rich in lutein and zeaxanthin (cartenoids that absorb UV light) which help protect us from free radical damage. Loaded with other vitamins and minerals, kale also has Omega-3 fatty acids and helps your skin stay nourished. Overall eating more kale will help with cell turnover, reducing dryness, and restore radiance to your skin. (Source: Eat Beautiful by Wendy Rowe, 2016)

If you want all of the above but don't know how to incorporate more kale into your diet, look no further! This is my sister's "recipe". The reason I say that in quotations is because I asked her how she made them and all I got was "250 until crisper". So let's just say I made it up from there. 

I have never liked kale chips. I have bought them from the store I don't even know how many times, and each time they taste like what I would imagine dirty leaves to taste like. They have no flavor and the texture is weird. Then last week my sister was talking about making kale chips and my nieces got so excited because they love when she makes them. I was shocked because I like healthy food and eating my greens but couldn't imagine trying kale chips one more time. 

After texting my sister and getting the 250 degrees response, I decided it was time to attempt making them. 

You will need:

A couple stalks of Kale
1 TB Coconut Oil
Salt & Pepper
Garlic Powder or whatever you want to season with

You will need to do the following:

1. Preheat the oven to 250.
2. Rip Kale leaves off of the stems and tear into smaller pieces. Wash in a salad spinner and dry really well; add to a big bowl.
3. Melt the coconut in the microwave for 30 seconds and pour over kale and massage into kale to make sure it's distributed evenly. 
4. Season with S&P to taste and garlic powder (or your choice of seasoning) and mix with hands to make sure it's incorporated well.
5. Spread out on 1 or 2 baking sheets to make sure most of kale isn't touching and has plenty of space. This allows it to properly dry out.
6. Bake 20-30 min until it's your preferred texture checking frequently to make sure you don't burn them. 
7. Try not to eat them all at once.

Note: I baked mine for 20 min and I found that this was absolutely perfect. I think the reason I've never liked kale chips before is because they are so dried out. 20 min was the perfect amount to dry the kale out so it was crunchy, but still have a little bite to them. If you prefer a super crispy and dried out kale chip, try 30 min instead.

If you make these let me know what you think and how you season yours!

Enjoy,

Andrea


March Must Haves

It's the time of the month where I share everything I've been obsessing over. I get so excited to write these posts for you because you guys seem to love them! As usual, if there is an Amazon link I trust I will share it and it will be an Amazon Affiliate link (feel free to scroll to the bottom to read my disclosure on that). If it's not an Amazon link then it is not an affiliate link. Now let's get to the good stuff! This month will be short, but sweet. 

Let's start with the best healthy cookie recipe you will ever make. I don't know if it's a good or bad thing that I can eat them all in 2 days, but let's be glass half full people and say it's a good thing. Laura in the Kitchen is my go to when I need a good recipe because she has so many and they never disappoint. I have shown these a few times on my Instastories and was waiting to share them with you in a favorites post. So go make them NOW. I would be shocked if someone could tell they were healthier without knowing before hand. 

Dr. Jart Cicapair CC TreatmentThis has become an everyday must have for me. I have seen Michele1218 RAVE about this product for about a year and finally bit the bullet and decided to try it. I am obsessed. It is a physical SPF, gives me moisture and has pigment to color correct your skin. It doesn't look like makeup at all but makes your skin look so much smoother, healthier, and even toned. It's my last step everyday when I'm not wearing makeup and need SPF. Don't let the green color scare you, it quickly color corrects the redness in your skin, while being completely undetectable. 

Herbivore Blue Tansy Resurfacing Clarity Mask: If you read my post about Curate + Co (I'll link it here in case you didn't) I was gifted this amazing mask by the wonderful owner Christina. This one has also found its way into a permanent position in my skincare routine because it's amazing. It's completely clean and effective for keeping my skin smooth and blemish free. I love how the Blue Tansy has Azulene which reduces inflammation, so if I have breakouts it calms them while getting rid of them at the same time.  If you can, please use the link in the title to purchase it and support Curate + Co, an amazing small business that I love! If you are only a die-hard Amazon shopper, here is the link for that as well.

Pacifica Rose Flower Hydro Mist : Yes, this one made it two months in a row. I debated not mentioning it but the reality is that I am still obsessed and I used it almost every day in March. It feels so good on the skin and I cannot get enough of it. I love how refreshed I feel every time I spray my face with it and it smells so good. If you're looking for a good refresher try this one out!

Lancome Matte Shaker in Beige Vintage (270): I have been loving this lip product, mainly because it is so light (literally feels like water on your lips) and gives the right flush of color. The staying power isn't great, but that doesn't really bother me. I'm excited to try more shades. 

As you guys know, I recently cleaned out my skincare products and the best part is that all of the skincare listed above is clean and passes my chemical-free test! My every day makeup clean out is still on the horizon so remember that when I recommend any makeup from now on. 

What were your favorites this month? Did you discover anything good? Leave me a comment below and let me know!

Have a beautiful day,

Andrea

Disclosure: Amazon links are Amazon Affiliate links meaning that I make a commission off the purchase of the product through my link. I would never recommend a product that I didn't love and all opinions are my own. I am thankful for you choosing to purchase through my links, as it helps me create more content for Andrea Fontana Beauty. 

How do I love Glossier? Let me count the ways.

Did I already spoil this post with the title? 

Facetune_30-03-2018-13-15-12.JPG

I have known about Glossier for years, but had never purchased anything due to the abundance of products I already had. Once I quit my job and trying new things became fun again, I knew that Glossier was next on my list to try. The main reason I love Glossier is that their skincare and makeup ideas resonate closely with mine; healthy and effective skincare that gives you a glowing look, and makeup products that simply accentuate this natural and healthy vibe. All of their products are easy to use and many are multi-use which allows the modern woman to easily incorporate them into her fast paced and busy life. 

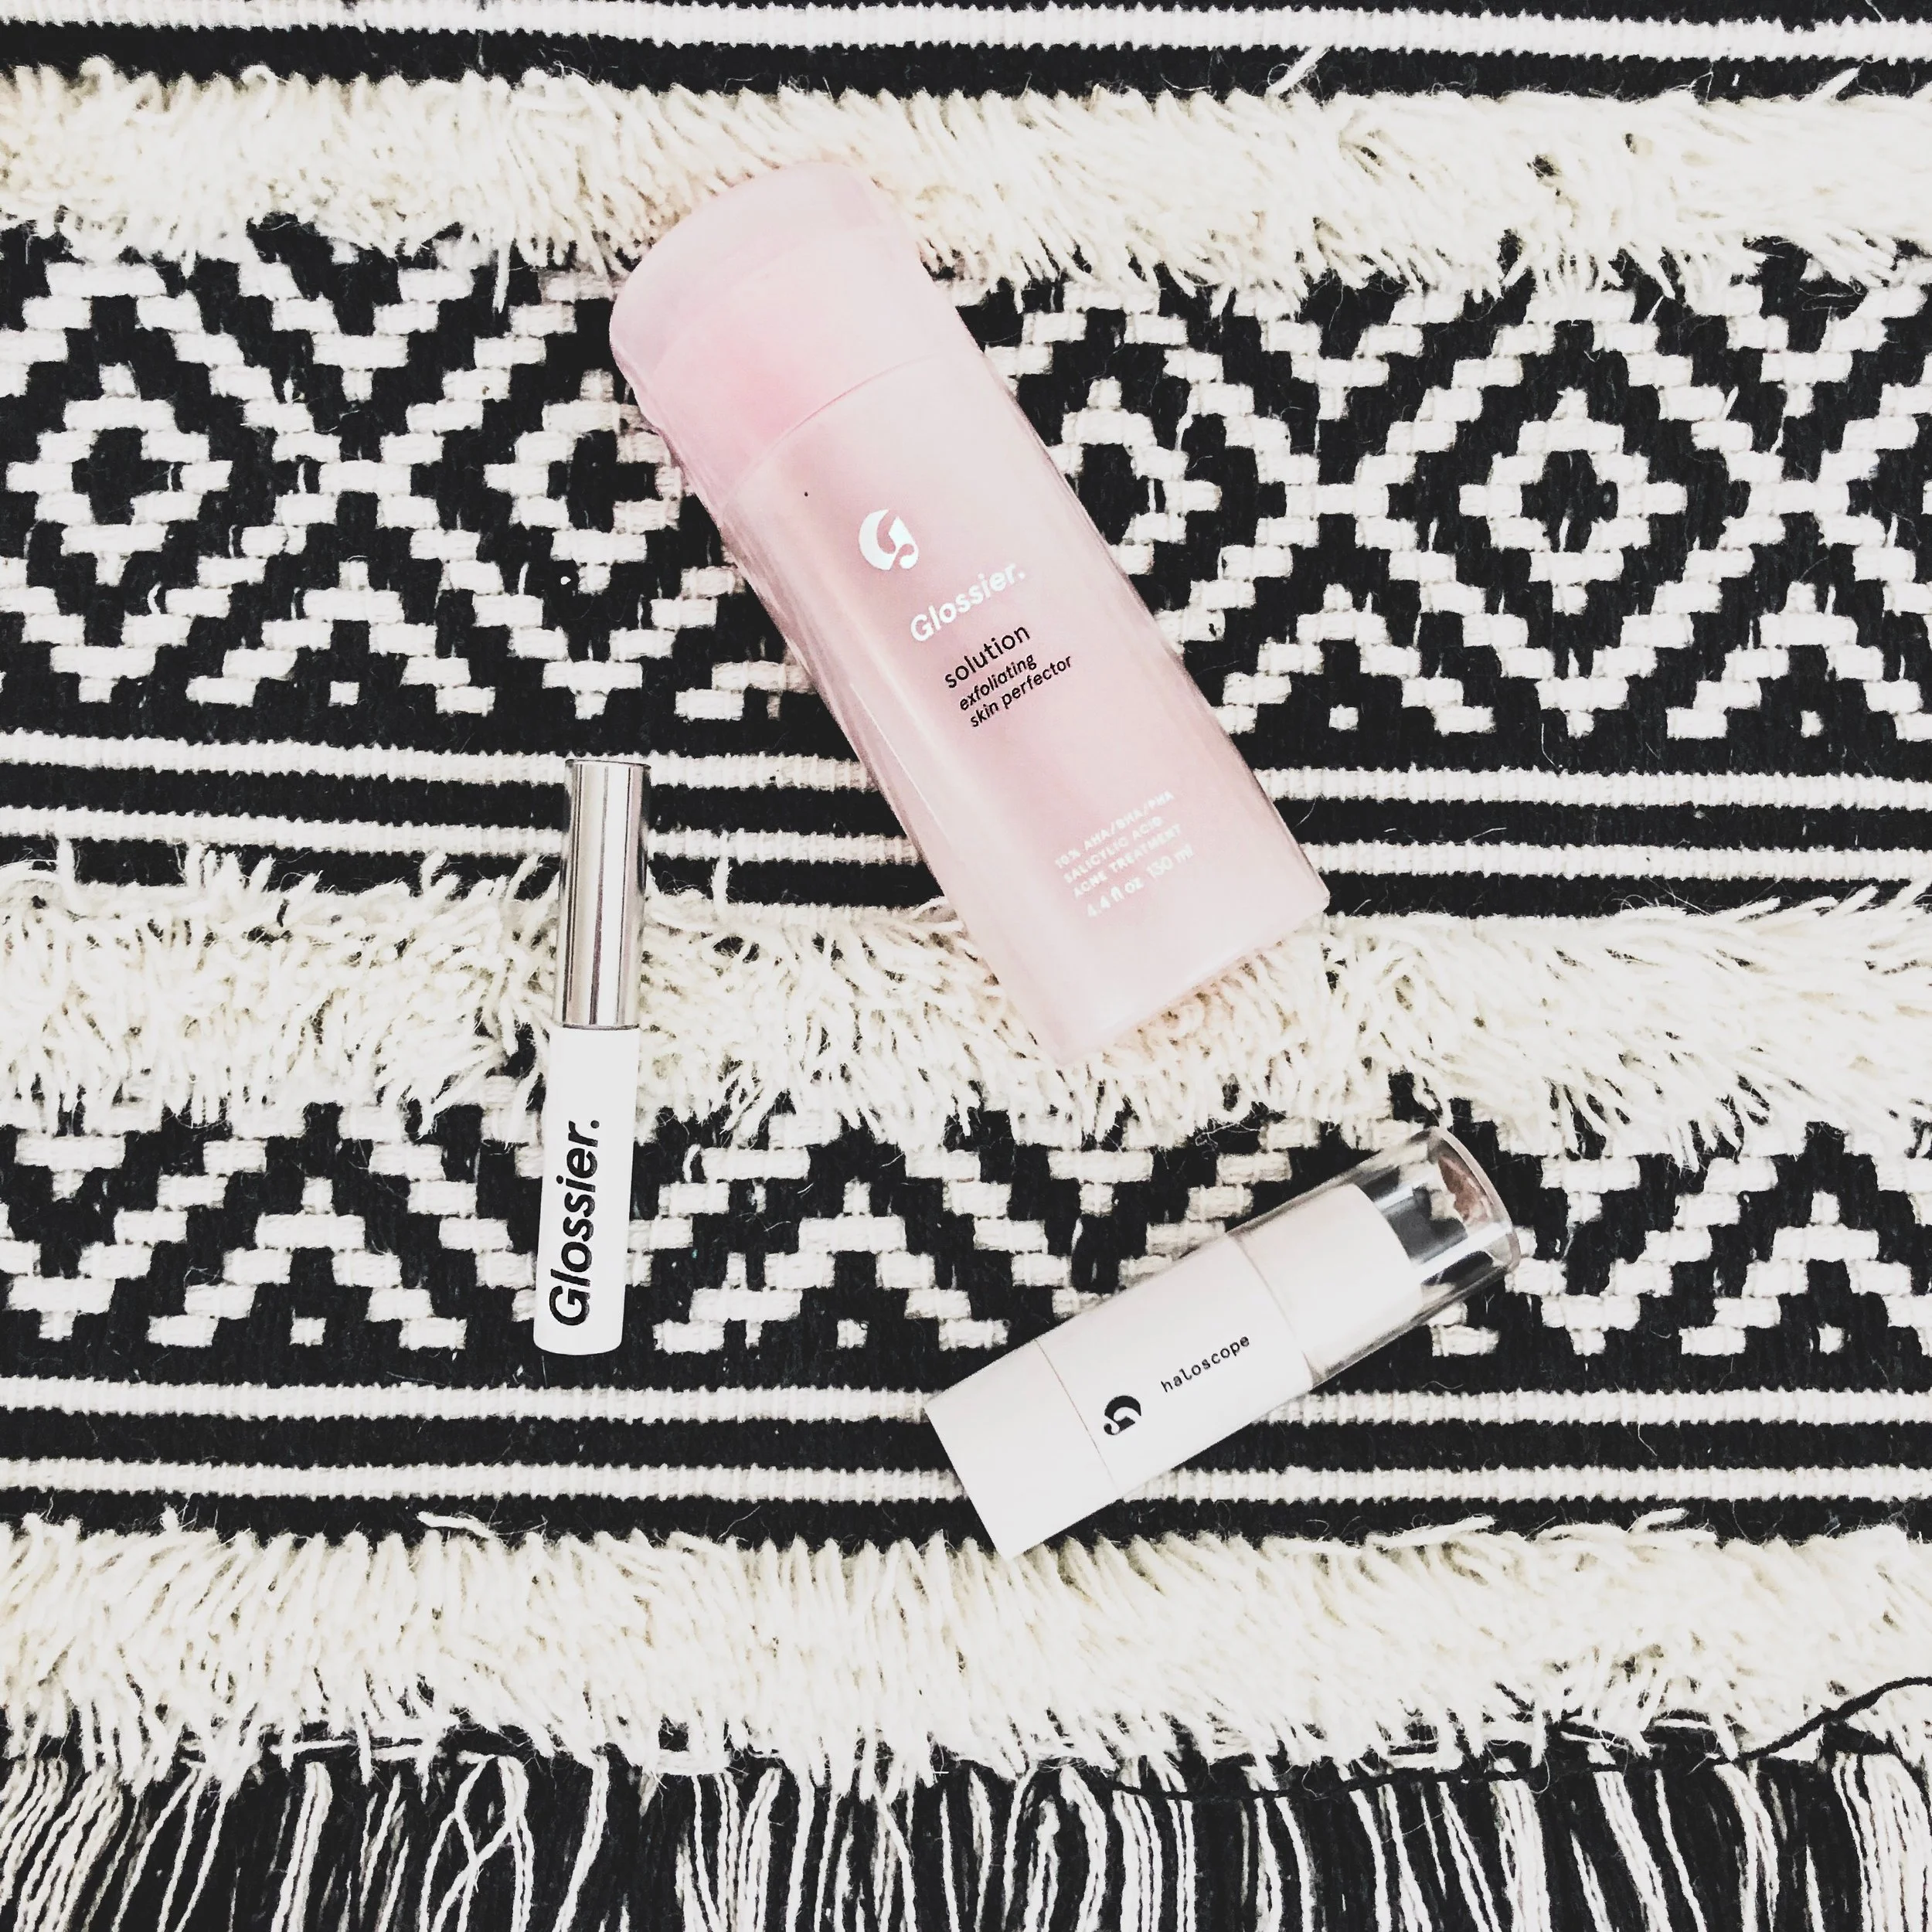
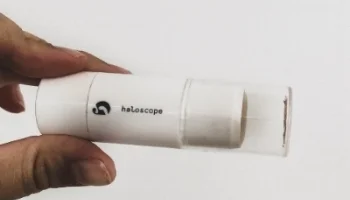
With the release of Solution, a exfoliating toner, I knew the time had come for me to place my first order. We all know how much I love a good exfoliating toner.  I didn't want to go too crazy, so I only purchased 3 things with my first order. If you are new to my blog or videos, these three items are very reflective of my favorite types of products. I ordered Boy Brow (a tinted brow gel) in Black, Haloscope (a stick highlighter) in Moonstone, and Solution (the exfoliating toner). 

I wanted to use the products for a little while, especially the toner in order to give you honest feedback and I'm obsessed with all three. If you want to see how I use the two makeup products be sure to click this link and watch my Everyday Glowing Skin Tutorial Video because I show how I use both of those items in it. 

Snapseed - Copy (2).JPG

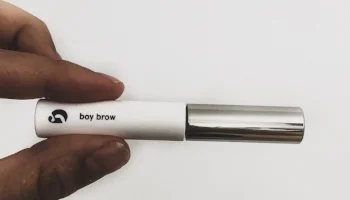
Boy Brow: I freaking love brows. That is no secret. So I am extremely picky when it comes to new brow products. Boy Brow is naturally what I think of when I think of Glossier because they are known for this product, so this was an obvious place for me to start when deciding what to order. I got the shade black because I knew it would be very cool-toned (I cannot stand a warm brow with my coloring)  and it is a perfect match for me. As you know I have a history with Benefit Cosmetics and used to live for Gimme Brow for it's ease and ability to thicken the appearance of brows quickly. I can honestly say I love Boy Brow more (Plus it's cheaper...just sayin' haha). I feel like it never makes my brows look wet and my hairs still look very much like brow hairs, just thicker and darker. For me it's extremely undetectable and not opaque, so it gives me a very natural and full brow appearance. If you do not have very full brows, I would still recommend this product for you, I would just use a pencil afterwards to fill in the areas that you are lacking a little hair.

Snapseed - Copy.JPG

Haloscope: I heard about this product from Katie Hughes, a makeup artist, and she said that she loved it, specifically in the shade Moonstone, because it made the skin look wet and I cannot agree with her more. It's not sparkly, it's a sheen that gives your skin such a healthy and dewy look. I love to swirl my middle and ring fingers together around it in and dab it on my cheekbones and it's just heaven. Some people apply it straight from the stick, but I feel like this moves my makeup around too much and requires me to need to blend it out more. 

Snapseed.JPG

Solution: I was nervous to swap out my old exfoliating toner (The Dermadoctor Ain't Misbehavin' one) for this one, because I was nervous for breakouts to come back, but I can say that I feel like the transition was an easy one. I knew my old toner wasn't clean and that I would have to get rid of it (click here to read my post on cleaning out the chemicals in my skincare). Solution has Glycolic and Lactic acids in it (the AHA's and the stars of my old toner) but also has salicylic acid (BHA) and Gluconolactone (PHA), which I think is key for my acne staying at bay; I like the combo of different acids working together. I love the packaging because it keeps things sanitary, but my only critique is that I feel like one pump is not enough toner for my face, but 2 pumps is too many. Am I the only one who feels this way? Comment below if you agree or disagree. Solution is also much cheaper than my old toner, so this change is great! If you have regular breakouts, dry skin, little white heads from oil buildup, or other texture issues, I highly recommend this product. 

Have you tried anything from Glossier before? If you want 10% off your first order be sure to click this link! Up next on my list to try are the new Lidstar Eye Glows, the Stretch Concealer, the Cloud Paint Cheek Colors and the Skin Tint! I will be sure to keep you guys updated as I try more stuff from this brand because so far, I'm LOVING it!

Have a beautiful weekend,

Andrea


Books I've Read in 2018 #1

Welcome back! 

I used to share my favorite books in my monthly favorites post, but you guys requested that I save them for a quarterly book post instead. Seeing as one of my goals of 2018 was to read more, I think this is a great idea because I actually have a good sized list of recommendations. I will always include my favorite cookbooks as well, because those are a huge part of my life. #extremecookbookaddict

ACS_0066.jpg

Each title will be a link to the book for you to purchase to make things easier for you! These links will be amazon associate links that allow you to purchase the book at the same price but support Andrea Fontana Beauty at the same time! (Mega thanks to all who use these links as you keep my wallet ready to support my love for testing new products and recipes). But to the books we go!

"The Heart's Invisible Furies" by John Boyne This was the first book I devoured in 2018. I say devoured because I was sucked in from the first 5 pages and barely came up for air until I reached the last of over 500 pages. I was captivated by the story of Cyril Avery and I hope you will be too. I mentioned it a few times in January, but am sharing again because they recently released a more inexpensive paperback copy and I highly recommend you go get it! 

"Better than Before: Mastering the Habits of Our Everyday Lives" by Gretchen Rubin:  Gretchen Rubin wrote "The Happiness Project" which I remember being super popular but I never read it. I liked the overall message of this book about the wrong and right ways to develop new habits for yourself, but I don't know if I would follow the specifics. It sometimes felt a little repetitive. Overall, I recommend it if you struggle with creating new habits and would like to gain some perspective on how to be better at it. 

"You are a Badass" by Jen Sincero: I feel like this book was super popular last year and it lived on my 'To Read' list on my phone but never made it further than that. I came across it when I was scanning my dad's home library (we're talking like thousands of books to read...aka heaven), picking out new reads for my trip to Florida in February. I loved this one and see why it was so popular. It was quick and easy to get through (I only deem books this if I can read them in a week) and I found myself needing to take notes because there were so many quotes I needed to remember. I feel like this is one that I will want to have a copy of on hand for future reference.

"Platform: Get Noticed in a Noisy World" by Michael Hyatt:  I already have a permanent copy coming in the mail of this one because I checked it out from the library and know that I will want this one for future reference. If you are trying to sell a product, business, anything you NEED this one. Especially bloggers! I cannot recommend it enough. A very wise woman who I met when I joined a Women's Entrepreneurship group recommended it and I cannot put it down. It's full of important info from 'How to write your bio' to 'How to Keep Conversations Civil'. I just love it. 

And now for the cookbooks....(TOP 3)

"250 True Italian Pasta Dishes: Easy and Authentic Recipes" by John Colette & Nancy Ryan: If you love pasta you need this one. There's a section on quick 30 minute dishes, recipes for fresh pasta, and more. I use it most when I have a few specific veggies or protein that I need to use up and want to create a quick and delicious pasta dish. I just look up my ingredient in the index and I usually have a few recipes to choose from. It was inspired by one of my favorite Italian restaurants in Chicago called Quartino. 

"Eat Beautiful: Food and Recipes to Nourish Your Skin From Inside Out" by Wendy Rowe: This one was written by one of my favorite makeup artists and highly recommend it for those of you who are into skincare and makeup. I firmly believe in nutrition being a huge part of your skincare routine so this is a must have for me. It's divided into seasons and the beginning of each sections highlights ingredients of the season and how they benefit the skin and body. Wendy eats according to what is in season, so I love this one for those of us who try to do the same! Thank you always to my best friend Emily for gifting me a cookbook last year on my birthday that is so ME!

"Bobby Flay Fit: 200 Recipes for a Healthy Lifestyle" by Bobby Flay: I know this one probably doesn't come as a shock, but I'm still cooking from it all the time. I have so many favorite recipes from this one and while it's only a few months old, based on the wear and tear it looks like I've had it for years. If you don't want to sacrifice flavor for health and want to get more into using different types of spices I highly recommend this one.

What have you read so far in 2018? Comment below and let me know! I'm always looking for more book recommendations!

Have a beautiful weekend,

Andrea

The Launch of The Beauty Bar at Curate + Co.

Imagine a cozy little space that from the moment you walk in and see what's inside you can't help but smile. Every step and turn you make, you notice another thing you want and you find yourself saying "awww look" 1,000 times in a row. That's Curate + Co. in Kalamazoo, MI. 

I was lucky enough to have Christina, the owner, reach out to me and ask me to be a part of a very special project to launch The Beauty Bar, a collection of expertly curated face and body products that would make any woman's conscience scream, YOU NEED THIS! Christina and her husband Marco, wanted to create a launch video and needed a makeup artist to create the three looks showcasing the products, which is where I came in. 

Not only did we all come together to create an amazing video (Click here to head to my Instagram to watch all 3 looks!), but everyone involved was so talented and fun to work with. I loved this project. 

Now I want to share some of the products I used in the shoot and some that I took home with me and have been testing out. 

French Girl Organics Facial Scrub in Rose du Jardin: I am not normally a physical exfoliation girl but I had to get this one when I saw all the ways that you could use it! You can use it as a regular scrub by mixing it with water or toner, mixing it into your cleanser, or even using it as a mask, as it has pink and white clay in it! There are also plant antioxidants that brighten and soothe your skin. 

Rituel de Fille Rare Light Luminizers: I used the three shades of these luminizers in the video shoot and I fell in love. You can use them in so many different ways; brow bone, inner corner of your eyes, cupids bow, cheek bones, collar bones, etc. I have been way more into liquid highlighters recently and these definitely make the cut. 

Rituel de Fille Inner Glow Creme Pigment: I am normally not a huge cream blush fan, but these really changed my opinion. They were so easy to blend and had great color payoff. Even if you've never tried a cream blush before I highly recommend picking one of these shades up because they give such a healthy looking flush to the skin; plus they are great to keep in your purse for on the go moments when you need both lipstick and blush!

Herbivore Botanicals Blue Tansy Mask: To say that I'm obsessed with this mask would be an understatement. I can honestly say I will always keep this as a part of my regular skincare routine. This mask contains fruit enzymes and willow bark (natural source of salicylic acid) to gently exfoliate your skin but also clarify it. I highly recommend it for those who deal with acne, oiliness or texture. I love how Herbivore recommends you do it every night for 3-4 nights in a row to get started and then use it 1-2 times per week for upkeep. I noticed huge improvements with my skin within the first use and it just got better with each use. I never felt too dry or sensitive afterwards. I love the smell of it (it's surprisingly very candy like) and you don't need much product to get a successful treatment. I like to rub a dime sized amount between my fingers and then apply to my face for a thin layer. It will tingle for a little bit, but that is totally normal!

Sassy Lips Make The Moment Lipsticks: If you watched my last video (CLICK HERE TO WATCH) I mentioned that my favorite lip look is currently the 'popsicle lips' where you look like your lips are stained from just eating a popsicle. If you love this look too, I highly recommend these awesome pH changing lipsticks because they look different on everyone depending on the pH of your lips. They give the perfect amount of stain and can be layered to create a brighter and more intense look. We used one in the 'Fresh' look created in the video and I loved it. I cannot wait to get my hands on my own. I think they will be perfect for fresh summer makeup looks!

There are many other great products and pieces at Curate + Co to check out. If you like home decor, kids clothing/ toys, greeting cards, and more, or even just want a little inspiration, I highly recommend adding 'Visit Curate + Co. ASAP', to your To-Do List next time you visit Kalamazoo. One of the things I like most is that they host a lot of workshops to learn how to create new things or pick up a new hobby! If you can't make it to the store you can always visit their website at www.Curate-Chicago.com

Thank you again to Curate + Co for asking me to be a part of this awesome project!

Have a beautiful day,

Andrea

Everyday Glowing Skin Makeup Tutorial Video

Welcome back to Andrea Fontana Beauty!

I have finally filmed a YouTube video on the glowing skin look I've been wearing nonstop since I got back from my Florida vacation. I love how healthy it makes my skin look, but also how quick it is!

Please be sure to LIKE and SUBSCRIBE to my channel so you can always stay updated!

INSTAGRAM: www.instagram.com/andreafontanabeauty

FACEBOOK: www.facebook.com/andreafontanabeauty

Welcome back to my channel! Today I'm sharing the glowing skin look I've been wearing all the time since my recent vacation. Please be sure to LIKE and SUBSCRIBE to my channel so you can always stay updated!

Here are the products and links I mentioned in order of appearance:
-It Cosmetics CC Cream in Light
-Becca Cosmetics Shimmering Skin Perfecter in Opal
-Urban Decay Naked Concealer in Light Warm
-RCMA Makeup No Color Powder
-Sonia Kashuk Undetectable Creme Bronzer: Video on this--> CLICK HERE
-Benefit Cosmetics Dallas Powder
-Glossier Haloscope in Moonstone
-Glossier Boy Brow in Black
****For 10% off your first Glossier order! CLICK HERE
-Loreal Voluminous Mascara in Carbon Black
-Lash Boost Growth Serum & Post --> CLICK HERE

If you'd like to support Andrea Fontana Beauty in an easy way, click this link before buying what you were already going to buy on Amazon. The price stays the same for you and I get a commission of your purchase! If you choose to use it, thank you always for your support!
***http://amzn.to/2HA8Aj5

Let me know if you have any more makeup look requests! I have really fallen in love with creating these videos so I hope you enjoy them!

Have a beautiful weekend,

Andrea
 

Science of Skincare (S.O.S. #4): Cleaning Up Your Skincare Routine

I'm going to warn you in advance that this post is going to be longer than normal. I am cleaning out my skincare and getting rid of the chemicals. This has been something that I have been thinking about doing for a long time. In the last few months I have been thinking about health, fitness, my diet, and more in a different way and that is what prompted me to think about the products I was using on my skin on a daily basis. I have always considered health to be a vital part of my skincare so I felt like this was a natural progression for me. 

With any big changes like this, you have to start small because it's too expensive to do every product I use right now at once. I didn't want to empty my entire medicine cabinet and skincare shelf into the trash so in this post I am going to share my process with cleaning up my skincare routine and my thoughts behind my decisions. If the thought of this is something you have been toying with, I highly suggest you grab a drink and snack and read this post thoroughly. I personally am starting with skincare because I use it twice a day, every day. Next I will move to hair products, and then my every day makeup routine. I say every day because I am not as concerned about a lipstick I wear once a year. I am the most concerned about the products I am applying to my skin every day so I will be focusing there first! So let's dive right in.

Let me start by giving you a little background on the ingredients that are used in skincare products. If you know me, you know that I am a huge label reader and recommend products based on their ingredients, not their brand names or claims. The reason you see such a large margin between high end and low end products, is because most ingredients can be synthetically made. Some skincare companies pay the money to source ingredients naturally, which you see reflected in the price tag. I feel like there is this misconception that you need chemicals in order to see results with skincare but this is not the case. There are so many naturally occurring acids, enzymes, antioxidants, and more that can be used to create amazing products that will be healthier for you and still give you great results. 

When I decided to embark on this journey I first turned to my favorite app called Think Dirty. You can also visit the EWG's Skin Deep Cosmetic Database here, if you want to do it on your computer. I had had the Think Dirty app on my phone for a long time, but was terrified to see just how bad the products I was using were, so I hadn't done much with it. In a nutshell, the app allows you to search or scan the bar code of almost 1 million different products and they rate them on a scale of 0 to 10; 0-3 being healthy for your skin, 4-7 being moderately bad for your skin, and 8-10 being the worst for you skin. Not only does it rate them, it allows you to look at why they get the rating they do. Each ingredient in the product is also rated so if it has a high rating it will show you the ingredients that are causing it to rate so high. It will then tell you the purpose of the ingredient and if it's linked to being carcinogenic, causing developmental & reproductive toxicity, or causing allergies & immunotoxicities. 

If a product wasn't listed in the app, which seems to be the case for a lot of newer products and brands, I would first submit the product to the app (a feature I love) and then I would hop on my computer and search ingredient by ingredient on the Skin Deep Database I mentioned above. Now I want to list some of the ingredients I am trying to stay away from and how I decide if I'm ok with keeping a moderately bad product in my skincare routine. 

Ingredients to Avoid (All information on ingredients is either from my brain from years of skincare training or the EWG Skin Deep Cosmetic Database):

  • Mineral Oil: MIneral oil is a cheap oil made from petroleum that traps moisture in skin, but doesn't actually hydrate the skin. It simply doesn't do anything for us and can even trap bacteria in the skin and pores. There is belief that it could be a possible human immune system toxicant and since it doesn't actually do anything for the skin and comes from petroleum I say, DO WITHOUT IT!
  • Parabens: If you are familiar with skincare, you probably know that a lot of companies are straying away from the use of parabens as preservatives because of it's possible link to cancer and how it can mimic estrogen in the body. For this reason, it's going on my DIRTY list.
  • Phenoxyethanol: This is an ingredient that I think will be one of the hardest to stay away from, because it seems to be in everything!! haha Again this is a fragrance or preservative ingredient and is restricted in Japan in cosmetics in certain quantities. I've noticed it often in cleaners and toners, but can be in moisturizers as well.
  • Propylene Glycol: This one is a humectant and skin conditioning ingredient that has been associated with skin irritations and dermatitis. After reading about how it is a probably carcinogen, I've decided it's on my DIRTY list. 
  • Synthetic Colors (Yellow 5, Red 40, etc.): In my opinion, there is no reason that a skincare product needs to be colored a certain way. If there is naturally occurring pigment in the ingredients that is fine, but do not add synthetic colors that are made from petroleum just so the mask is orange. To me this is an easy one to get rid of so welcome to the DIRTY list!
  • Benzalkonium Chloride: A surfactant found is many household cleaning supplies, I have no use for it in my cleansers! It has been shown to be a skin, respiratory, and eye irritant. 
  • Triethanolamine: This is a relative of Nitrosamines, which are a very likely carcinogen, which means that it is a very possible health hazard. It is used as a buffering and emulsifying agent and will no longer be irritating my skin.
  • Polysorbate 20/PEG Sorbitan Laurate : These are similar in that they are derivatives of Lauric Acid, and they have an extremely high contamination of Ethylene Oxide and 1,4 Dioxane which are very highly likely to be carcinogens. Lauric Acid is the fatty acid found in coconut oil that is totally fine and healthy for your skin. However, these forms of it, are very much a toxicant and welcomed on the DIRTY list. 

Ok this list could probably go on and on, but I will stop now and encourage to use this website and app to go through your own collection. If I come across more research and more ingredients that I will be omitting for sure, I will made sure to write new posts updating those who want the info! For now I will be for sure eliminating those above.

Now let me describe some of my decisions regarding ingredients and how I read labels. First off, it's important for you to know that the order that ingredients are listed shows which are in higher quantities. The first listed ingredient makes up the most of that product, the second being the second most, and so on until the last ingredient has the least concentration within. This is important to note because it can help you decide if that product is good for you or not. My biggest concern is usually the first half of the ingredients. I do not want a single chemical in those. Ideally, there wouldn't be a chemical in the whole label, but if I have a product that I love and works well for my skin and the second to last ingredient is a chemical, I might consider using it occasionally because I know the concentration is lower. 

Next, I look for the purpose of the ingredient. Sometimes products will be rated higher because they contain an ingredient like Glycolic Acid which exfoliates the skin. That glycolic acid could be listed as a potential skin irritant for this, which is fine with me because that's the reason I'm using it. I want it to break down the skin and exfoliate the dead cells off. As long as that Glycolic Acid is coming from a more natural source like maybe sugar cane, I am fine with it and don't consider that product to be a hazard. 

Now if you are thinking about making this transition with me into cleaning up your skincare, your next question is probably about how to make that transition. My recommendation is to do it slowly and phase out products as you use them up and purchase only healthy alternatives. If you have brand new bottles or back ups on hand, try returning them or giving them away to friends that don't necessarily care about the chemicals in their skincare (to each their own!).

So what does this mean for Andrea Fontana Beauty? I am a firm believer in putting your money into the health of you skin first so from here on out, I will not be recommending skin care products that are not clean for your skin. I will include you on this journey and plan on doing a follow up post asap, as to what products I've had to get rid of and what I've replaced them with. When I move on to hair care and every day makeup products I will do the same. For makeup however, I will continue to recommend, try and use all brands of products because I do not use the same things every day and still need high performance products for wedding day and special event makeup. For me this isn't an all or nothing process. As long as I'm converting 75% of what is going on my face and body every day, I will consider that a win. 

Again, I'm not encouraging you to throw out everything you own, but rather look where you can make some healthier changes in your every day routines. As always send all questions my way and let me know how you feel about this topic in a comment below!

Have a beautiful week,

Andrea